Uploading a Custom Ableton Template
Use your own Ableton Live set as a band's export template: Collect All and Save, upload it under Settings → Template → Custom, confirm track roles, map stem groups to returns, and every export comes out in your template.
A custom template is your own Ableton Live set, used as the shape of every export for a band: your tracks, your returns, your routing. Upload it once and every song and set export comes out in it. Your songs don't change; only the template they're poured into.
Watch the lesson: this article goes with Use your own Ableton template, part of the Using Pliris to Program, Practice, and Perform course.
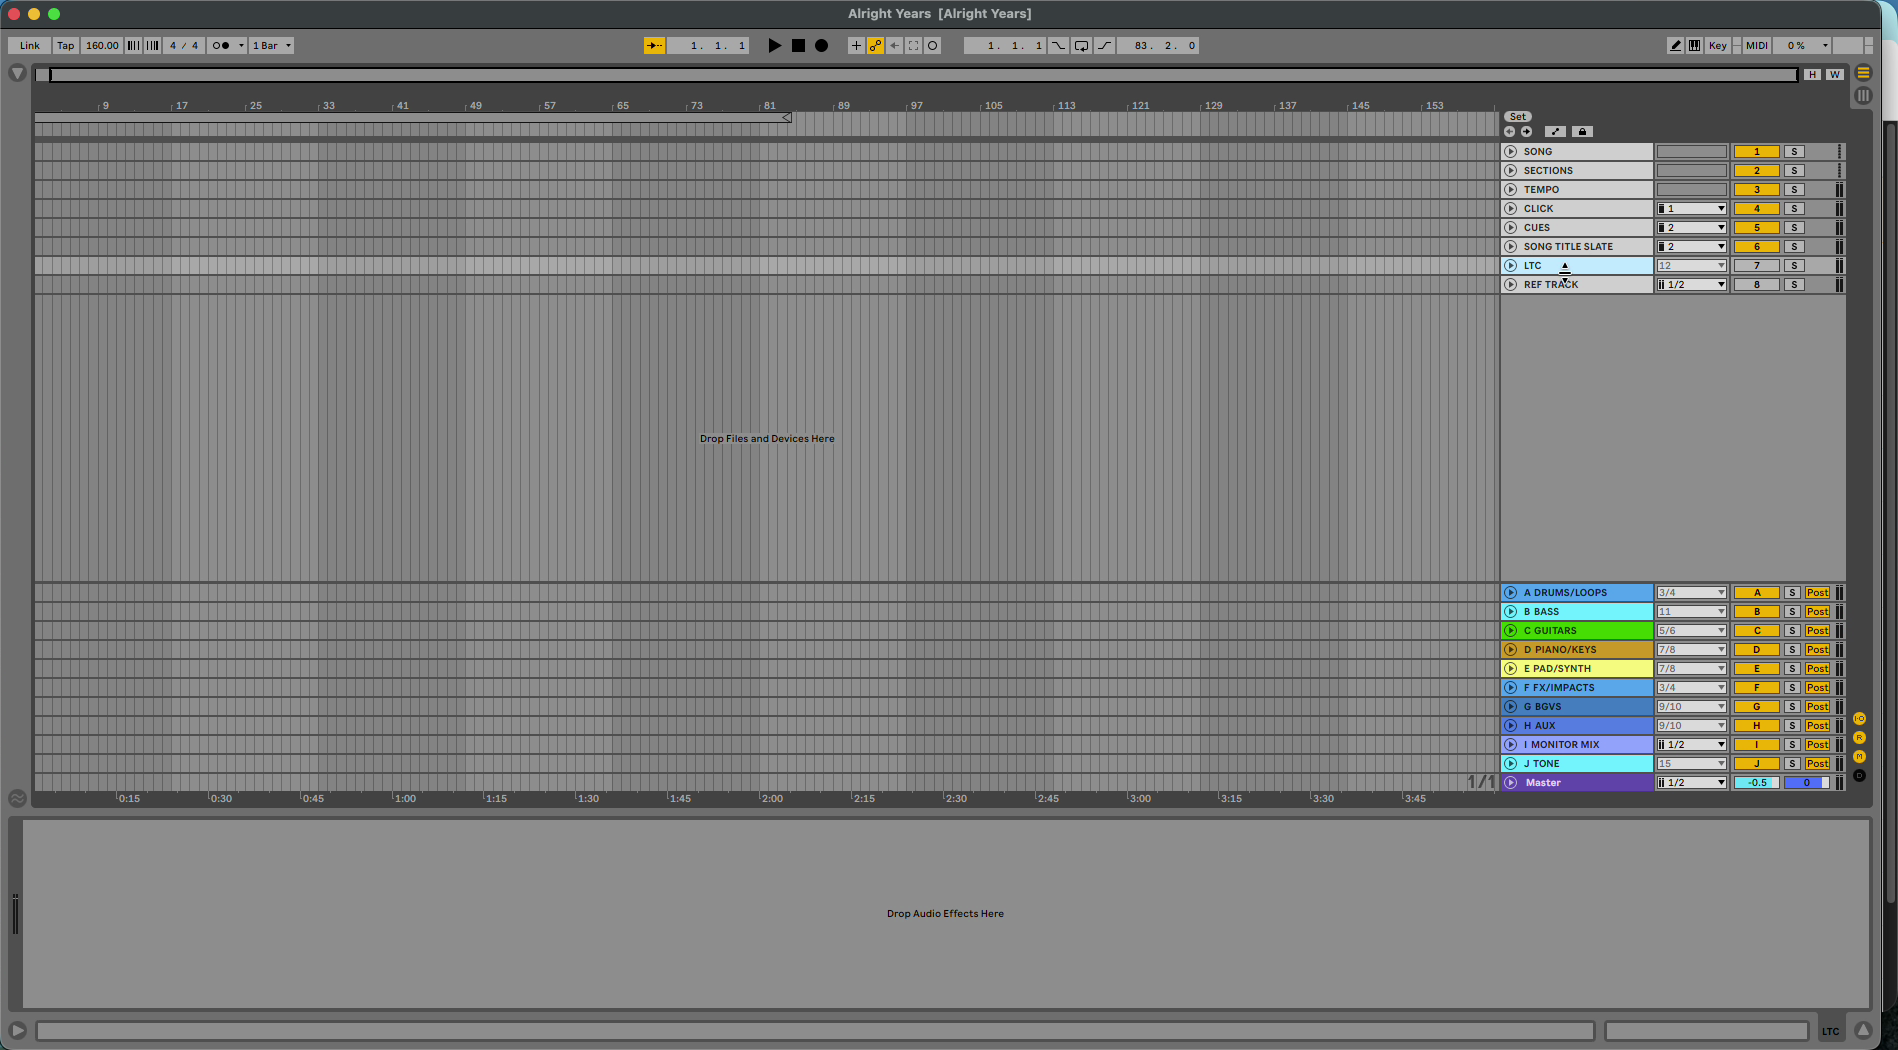
Before you start
- In Ableton, run File → Collect All and Save, including files from elsewhere and other projects, so the template's samples are inside the project folder.
- Custom templates are per band.
Upload the template
Click your profile icon, then Band settings, then Template.
Choose Custom. Under Add your Ableton template, choose:
- Upload a compressed template: a .zip of the project folder, or
- Choose a plain Ableton project: the project folder on your computer, no zip.
You can also drop a .zip or a project folder onto the page.
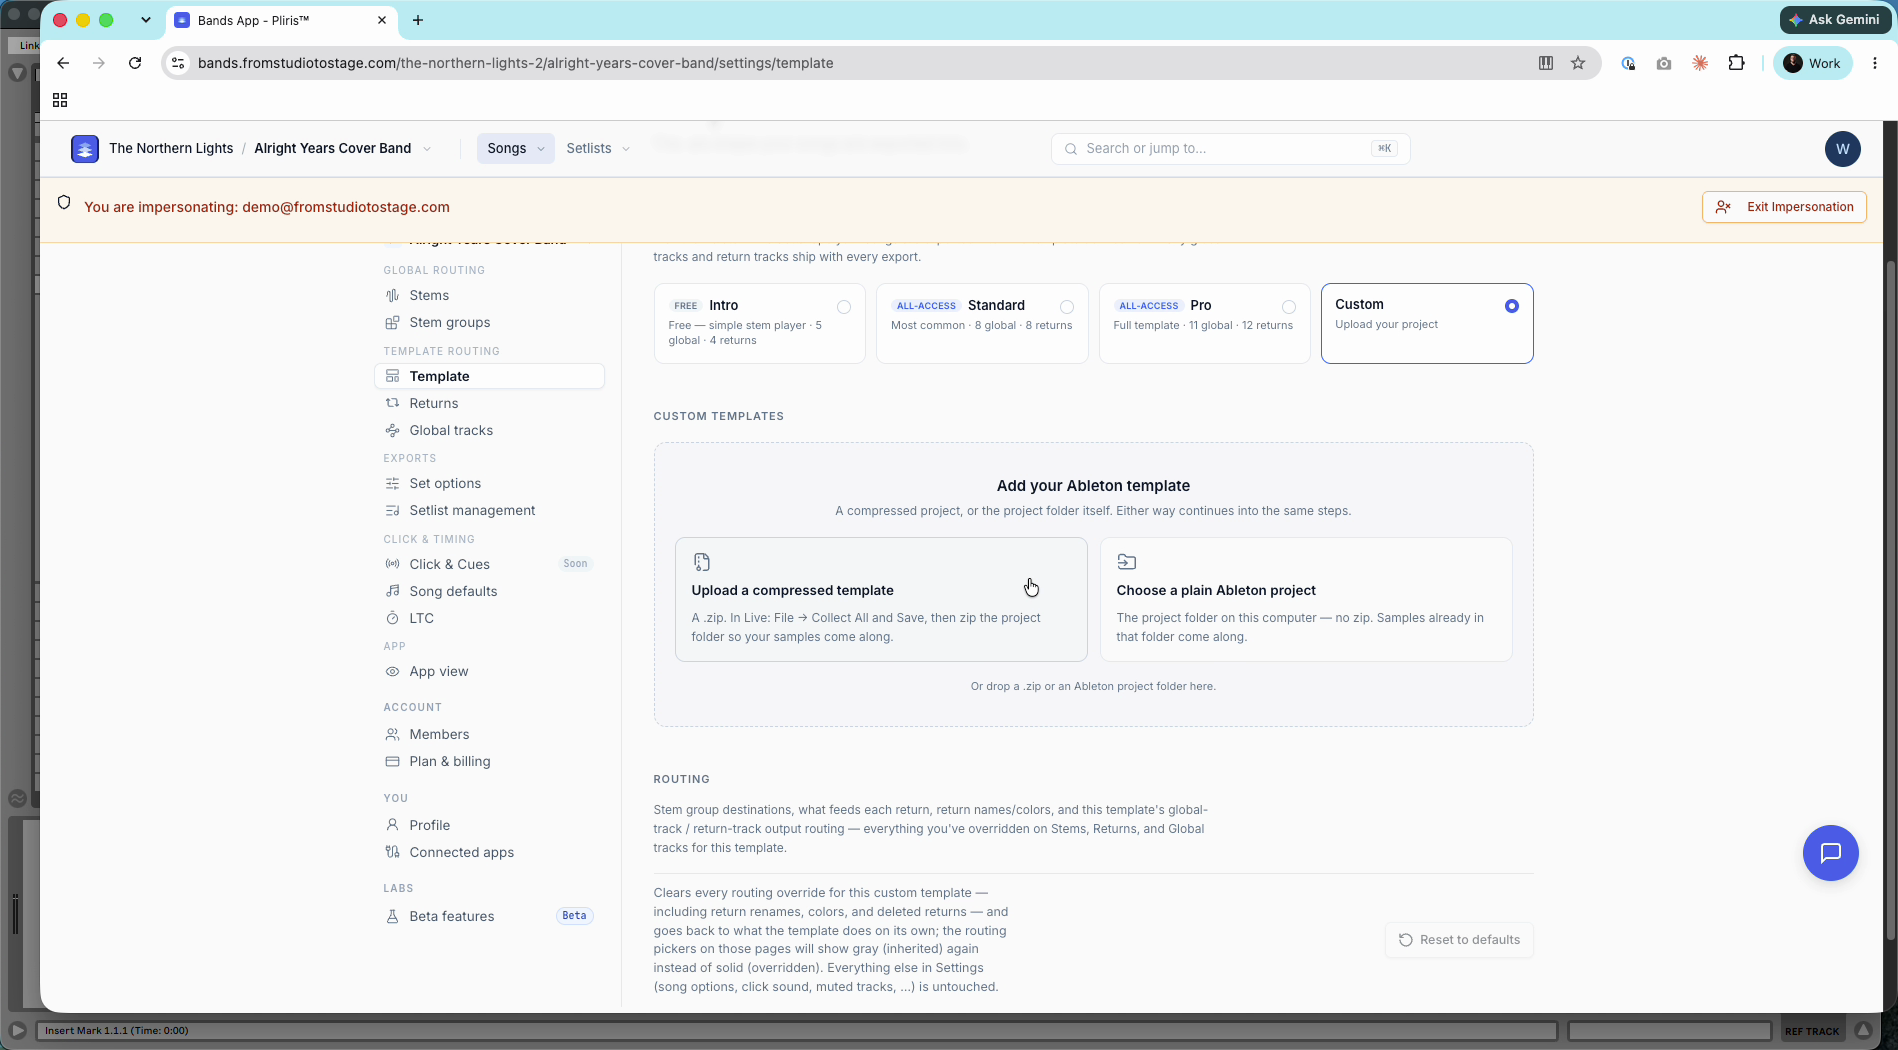
- Pliris reads the project. If samples are missing, it asks you to point it at a folder before uploading.
Set it up
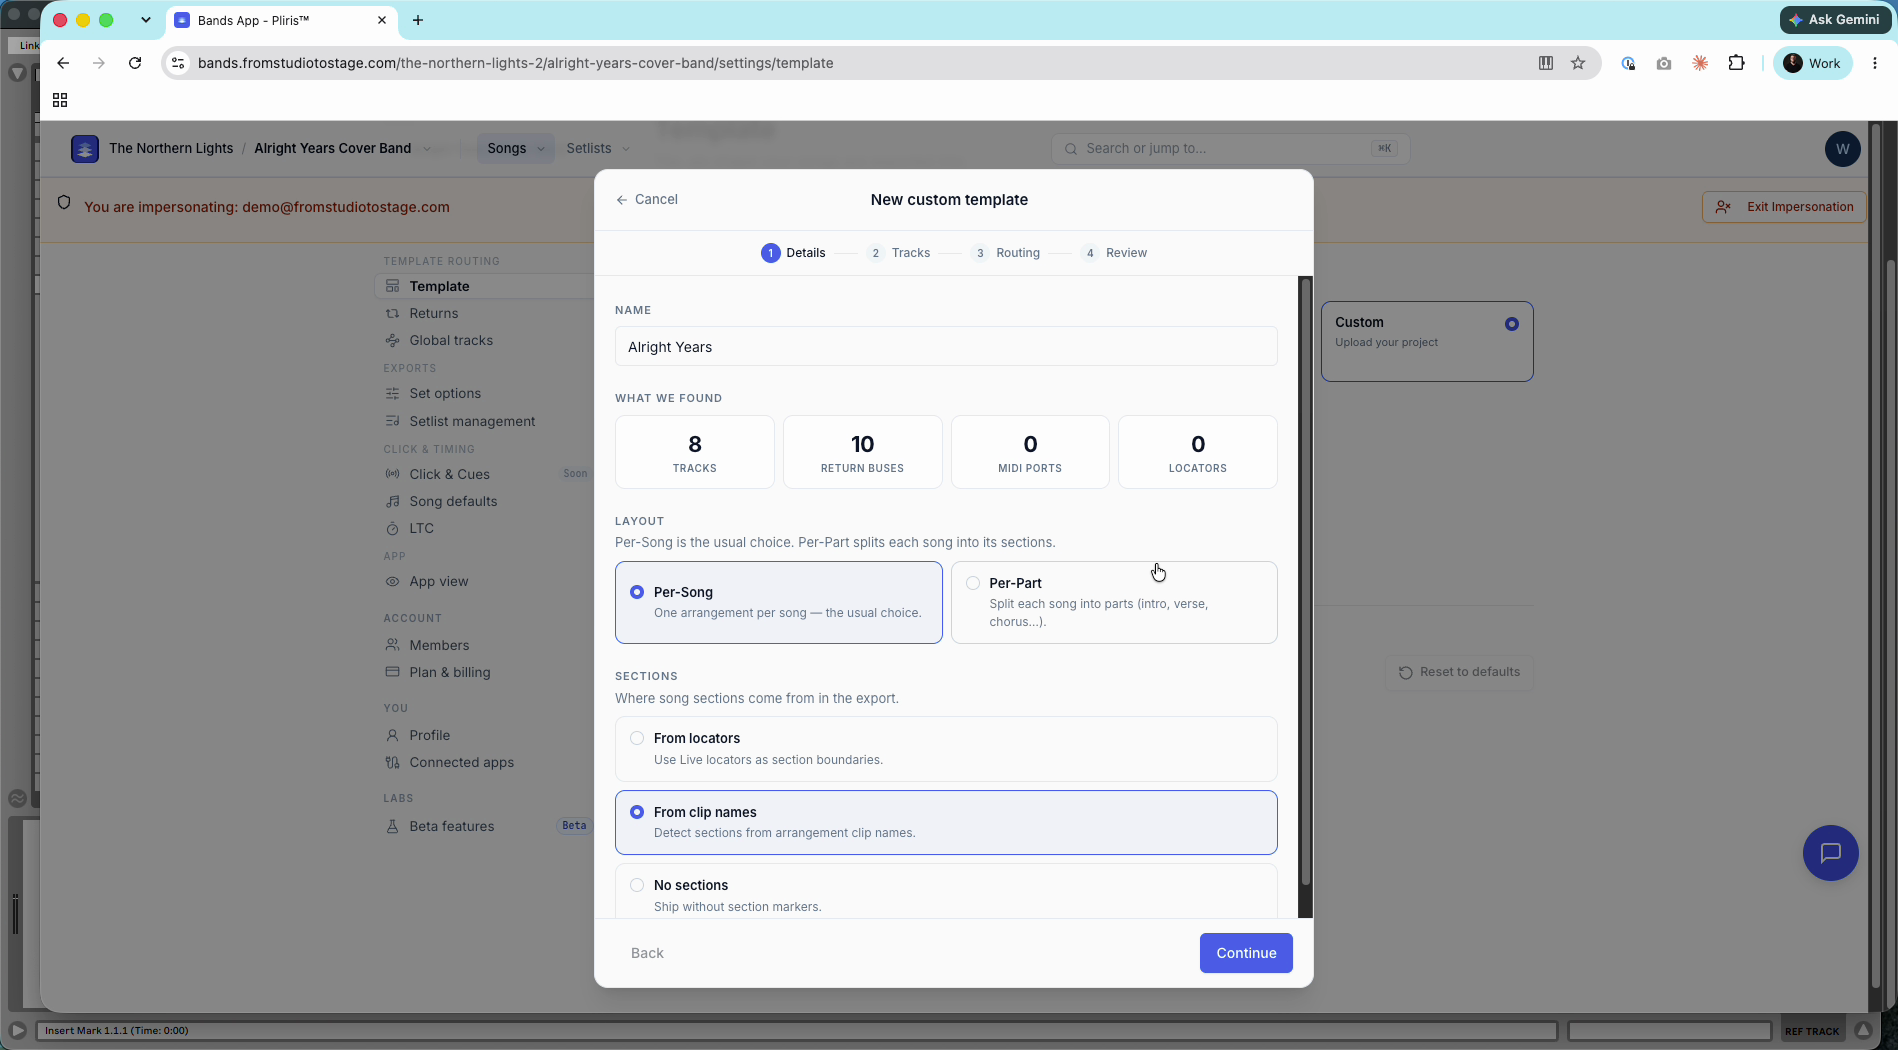
Basics
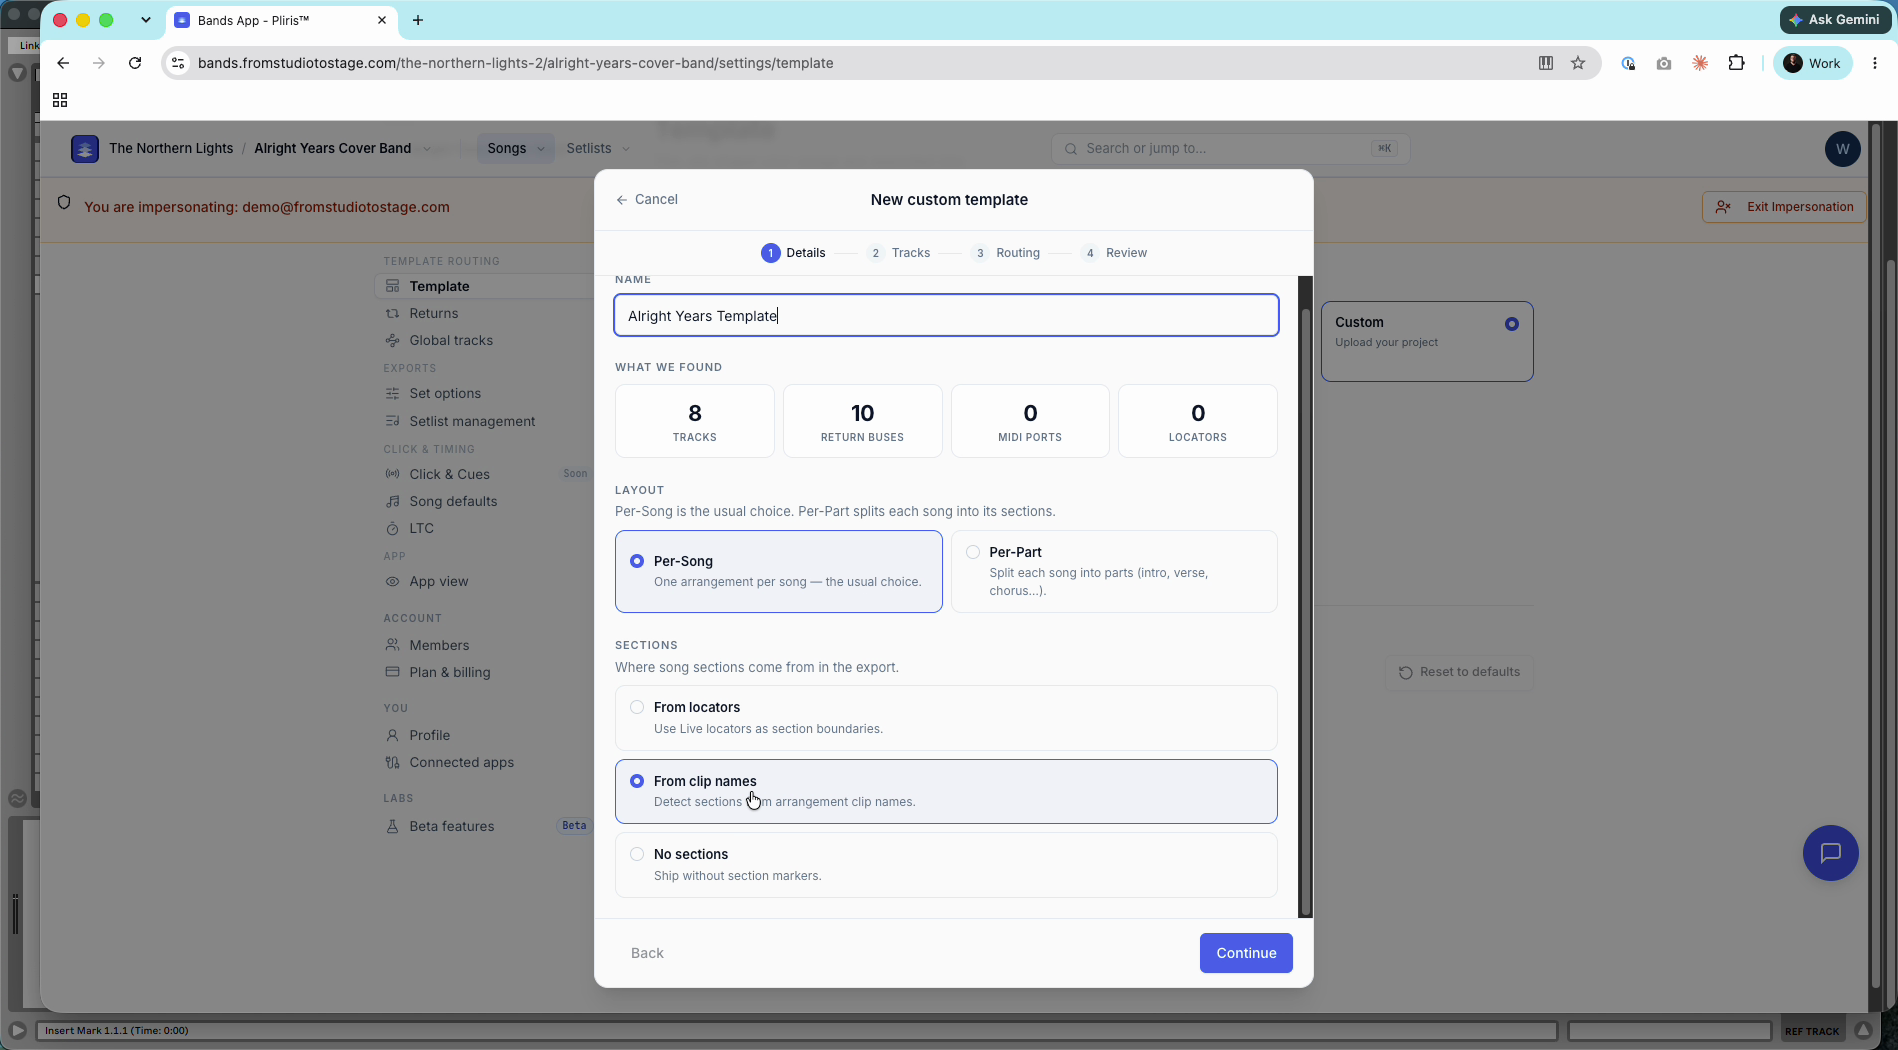
Name the template and check What we found (tracks, return buses, MIDI ports and locators). Then choose:
- Layout: Per-Song (one arrangement per song, the usual choice) or Per-Part (each song split into its sections).
- Sections: From locators (Live locators mark the sections), From clip names (sections come from arrangement clip names) or No sections.
Tracks
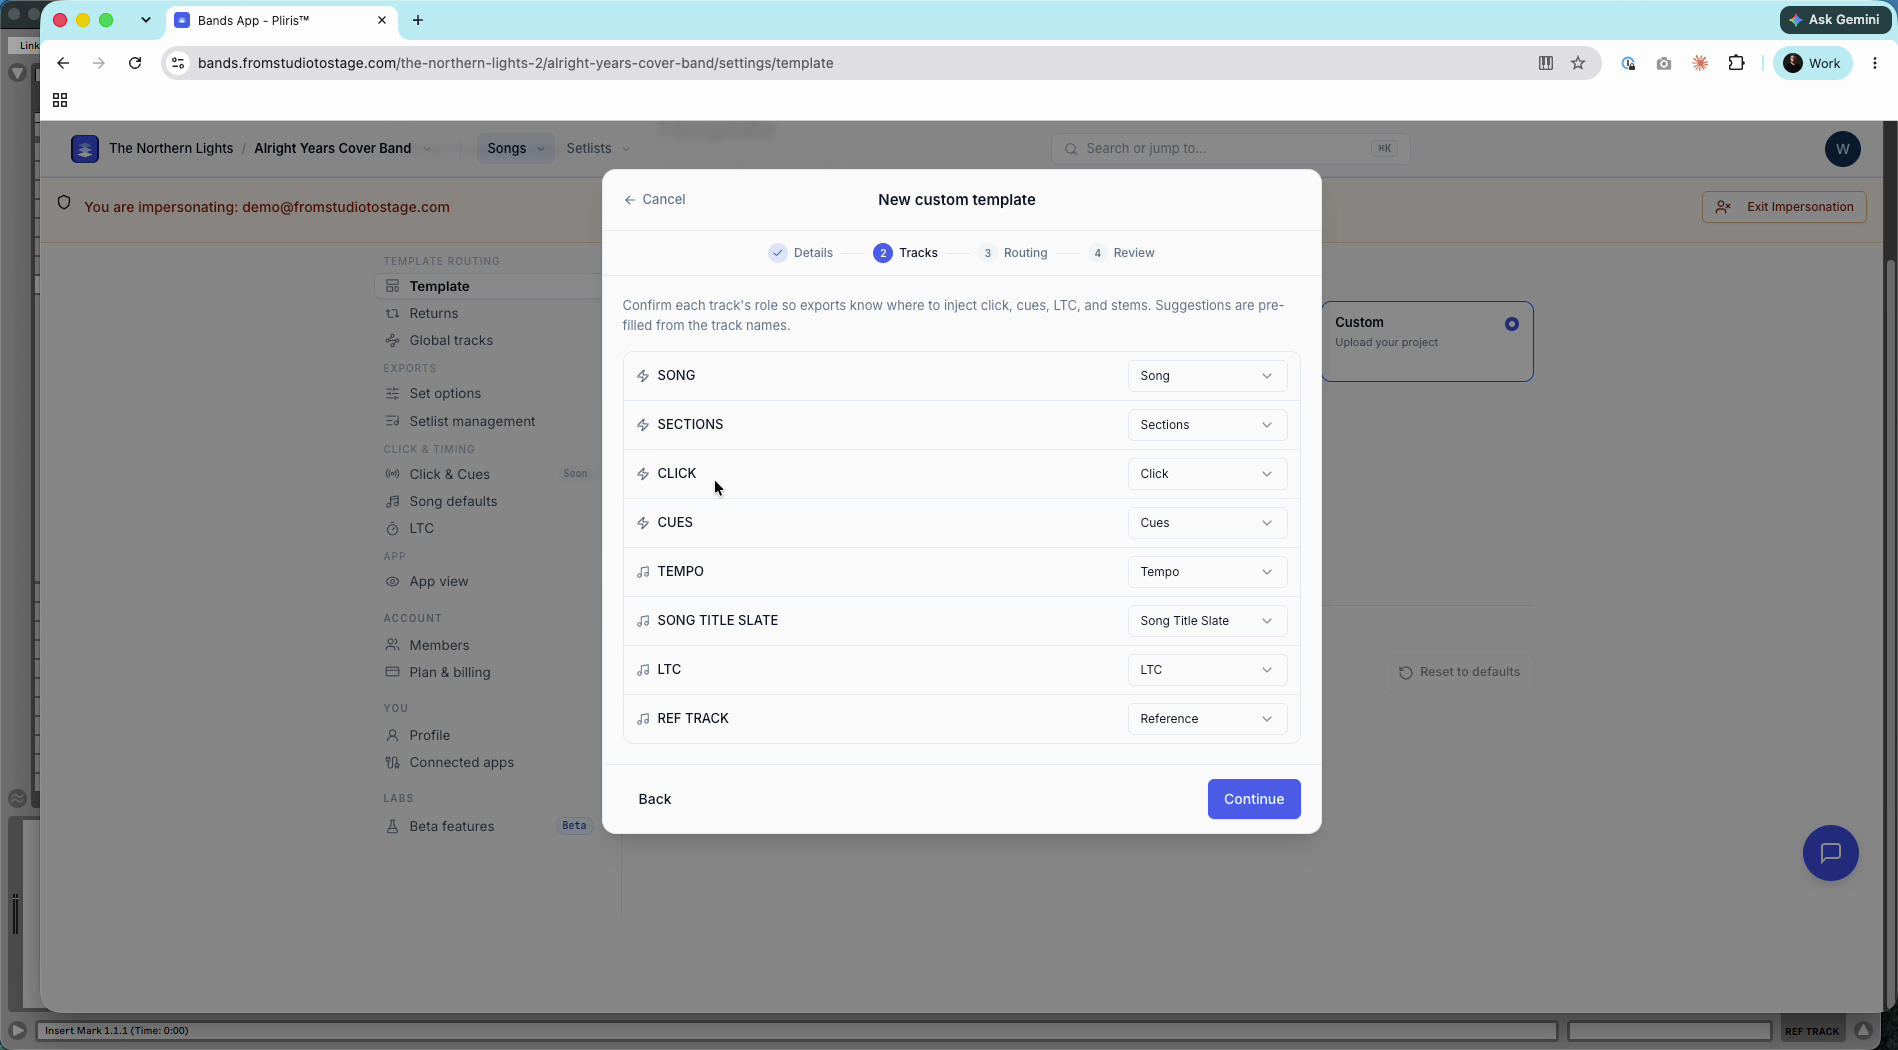
Confirm each track's role so exports know where to put the click, cues, LTC and so on. Roles are filled in from track names. If your click track has another name, choose Click from the dropdown.
Routing
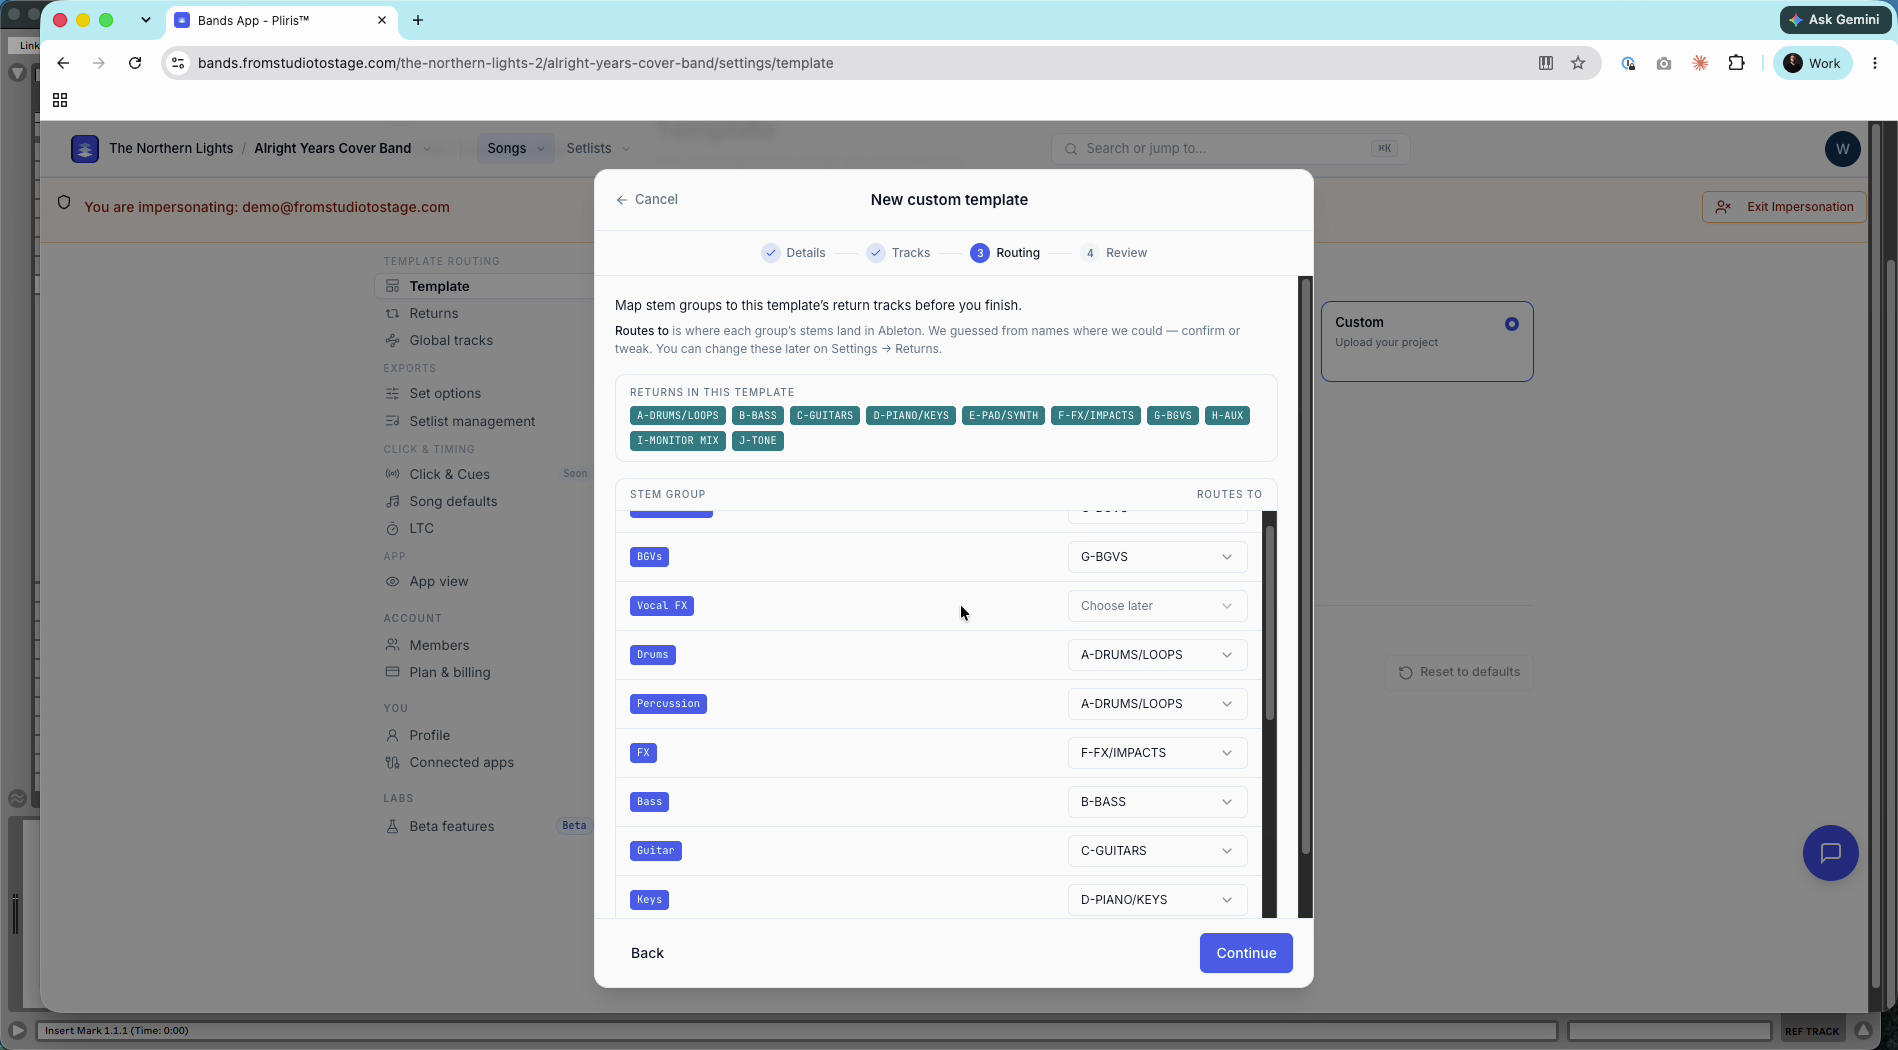
Map each of the band's stem groups to one of the template's return tracks. Pliris guesses from names; anything it can't match shows Choose later. You can change these later on Settings → Returns.
Save
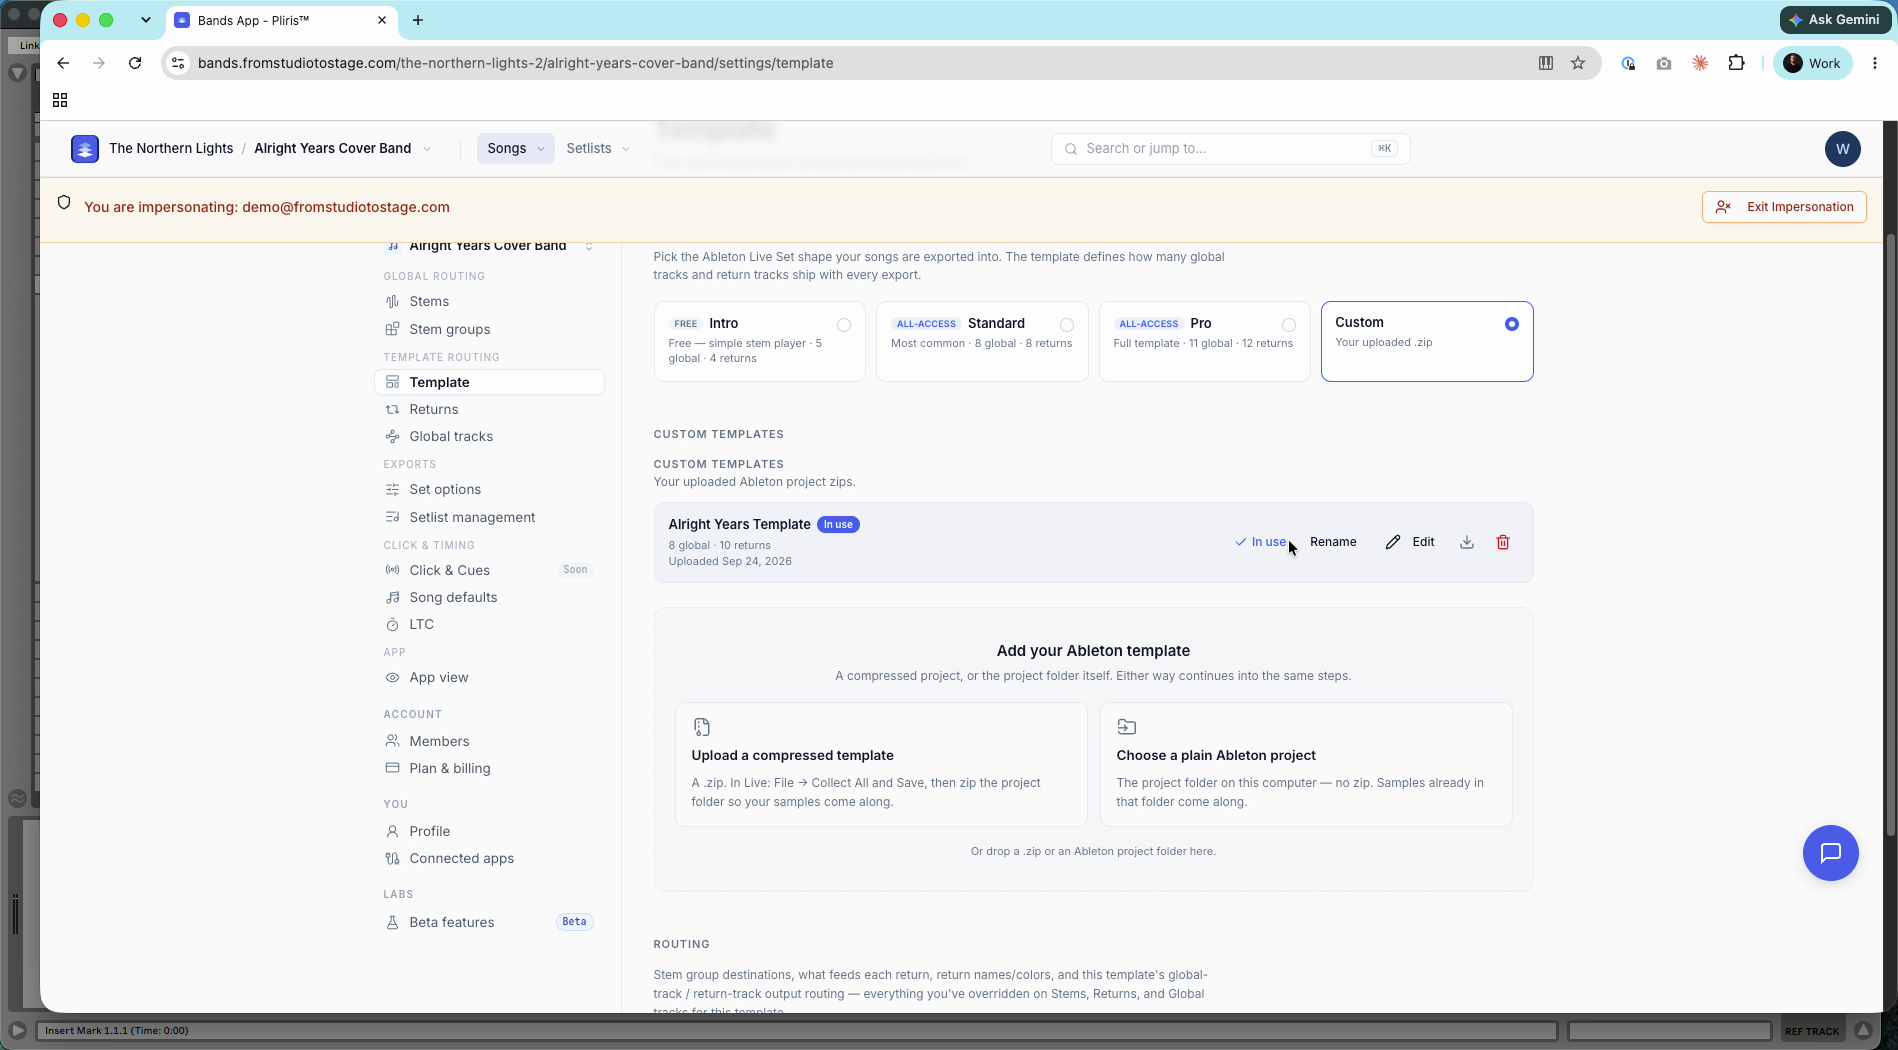
Click Save template. Pliris uploads the template's samples to your account. When it's finished, the template shows as In use. If you have more than one, choose between them on the same page.
Export in your template
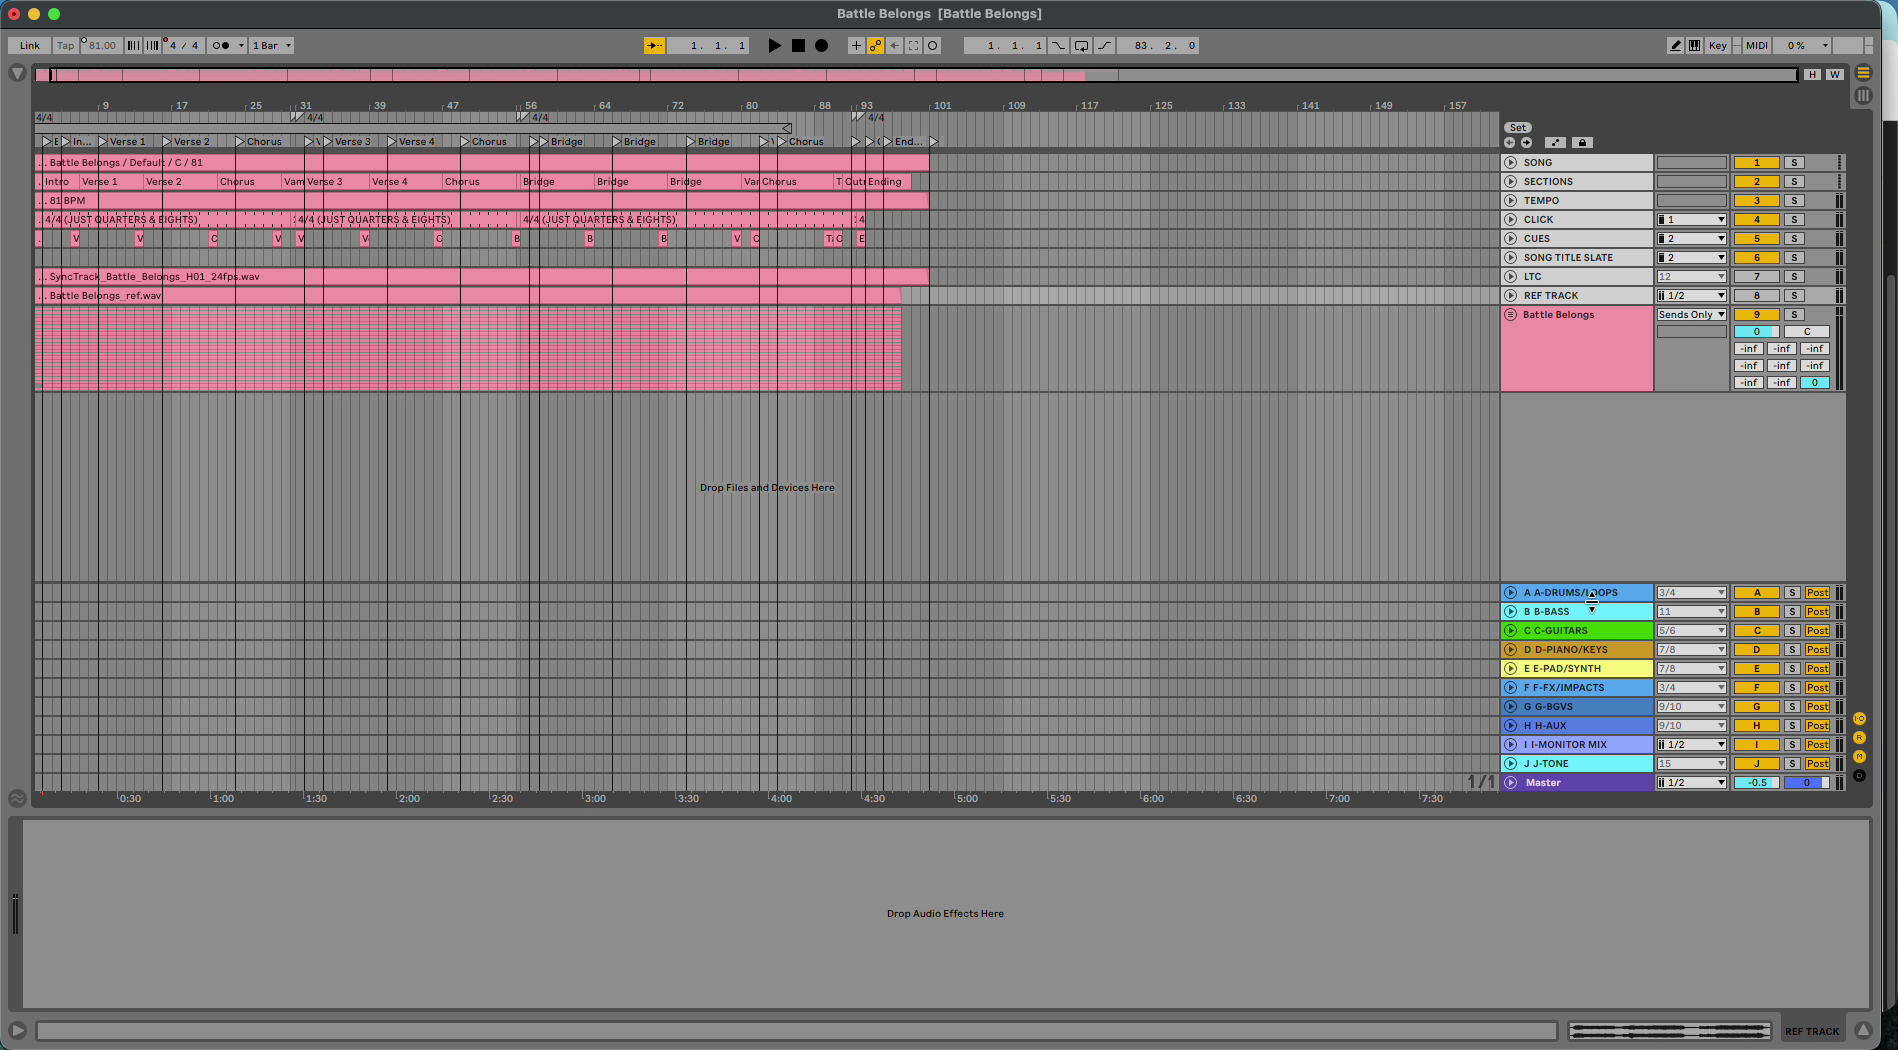
Download any song as an Ableton project. The song's sections, locators, stems and routing come out in your template.
Related: Settings → Template, Switching Your Ableton Export Template, How to Route Return Tracks, Cloud Builds, Custom Templates & Analysis via the API.
Frequently asked questions
Can I use my own Ableton template with Pliris?
Yes. Upload it under Settings → Template → Custom, confirm the track roles and return routing, and save. Every export for that band uses it.
Why does Pliris say samples are missing from my template?
The project references samples outside its folder. Point Pliris at the folder, or run Collect All and Save in Ableton and upload again.
Can each band have a different template?
Yes. Custom templates are per band.
What's the difference between Per-Song and Per-Part?
Per-Song gives one arrangement per song. Per-Part splits each song into its sections.
Can I change the return routing after uploading?
Yes. Change it on Settings → Returns.