The Maestro Desktop App
Run your show in Ableton Live from a Pliris setlist: sign in, load tonight's set, jump between songs and sections, loop and fade, and drive it all from a MIDI controller or your phone, while Lyrics, Video and Charts follow along.
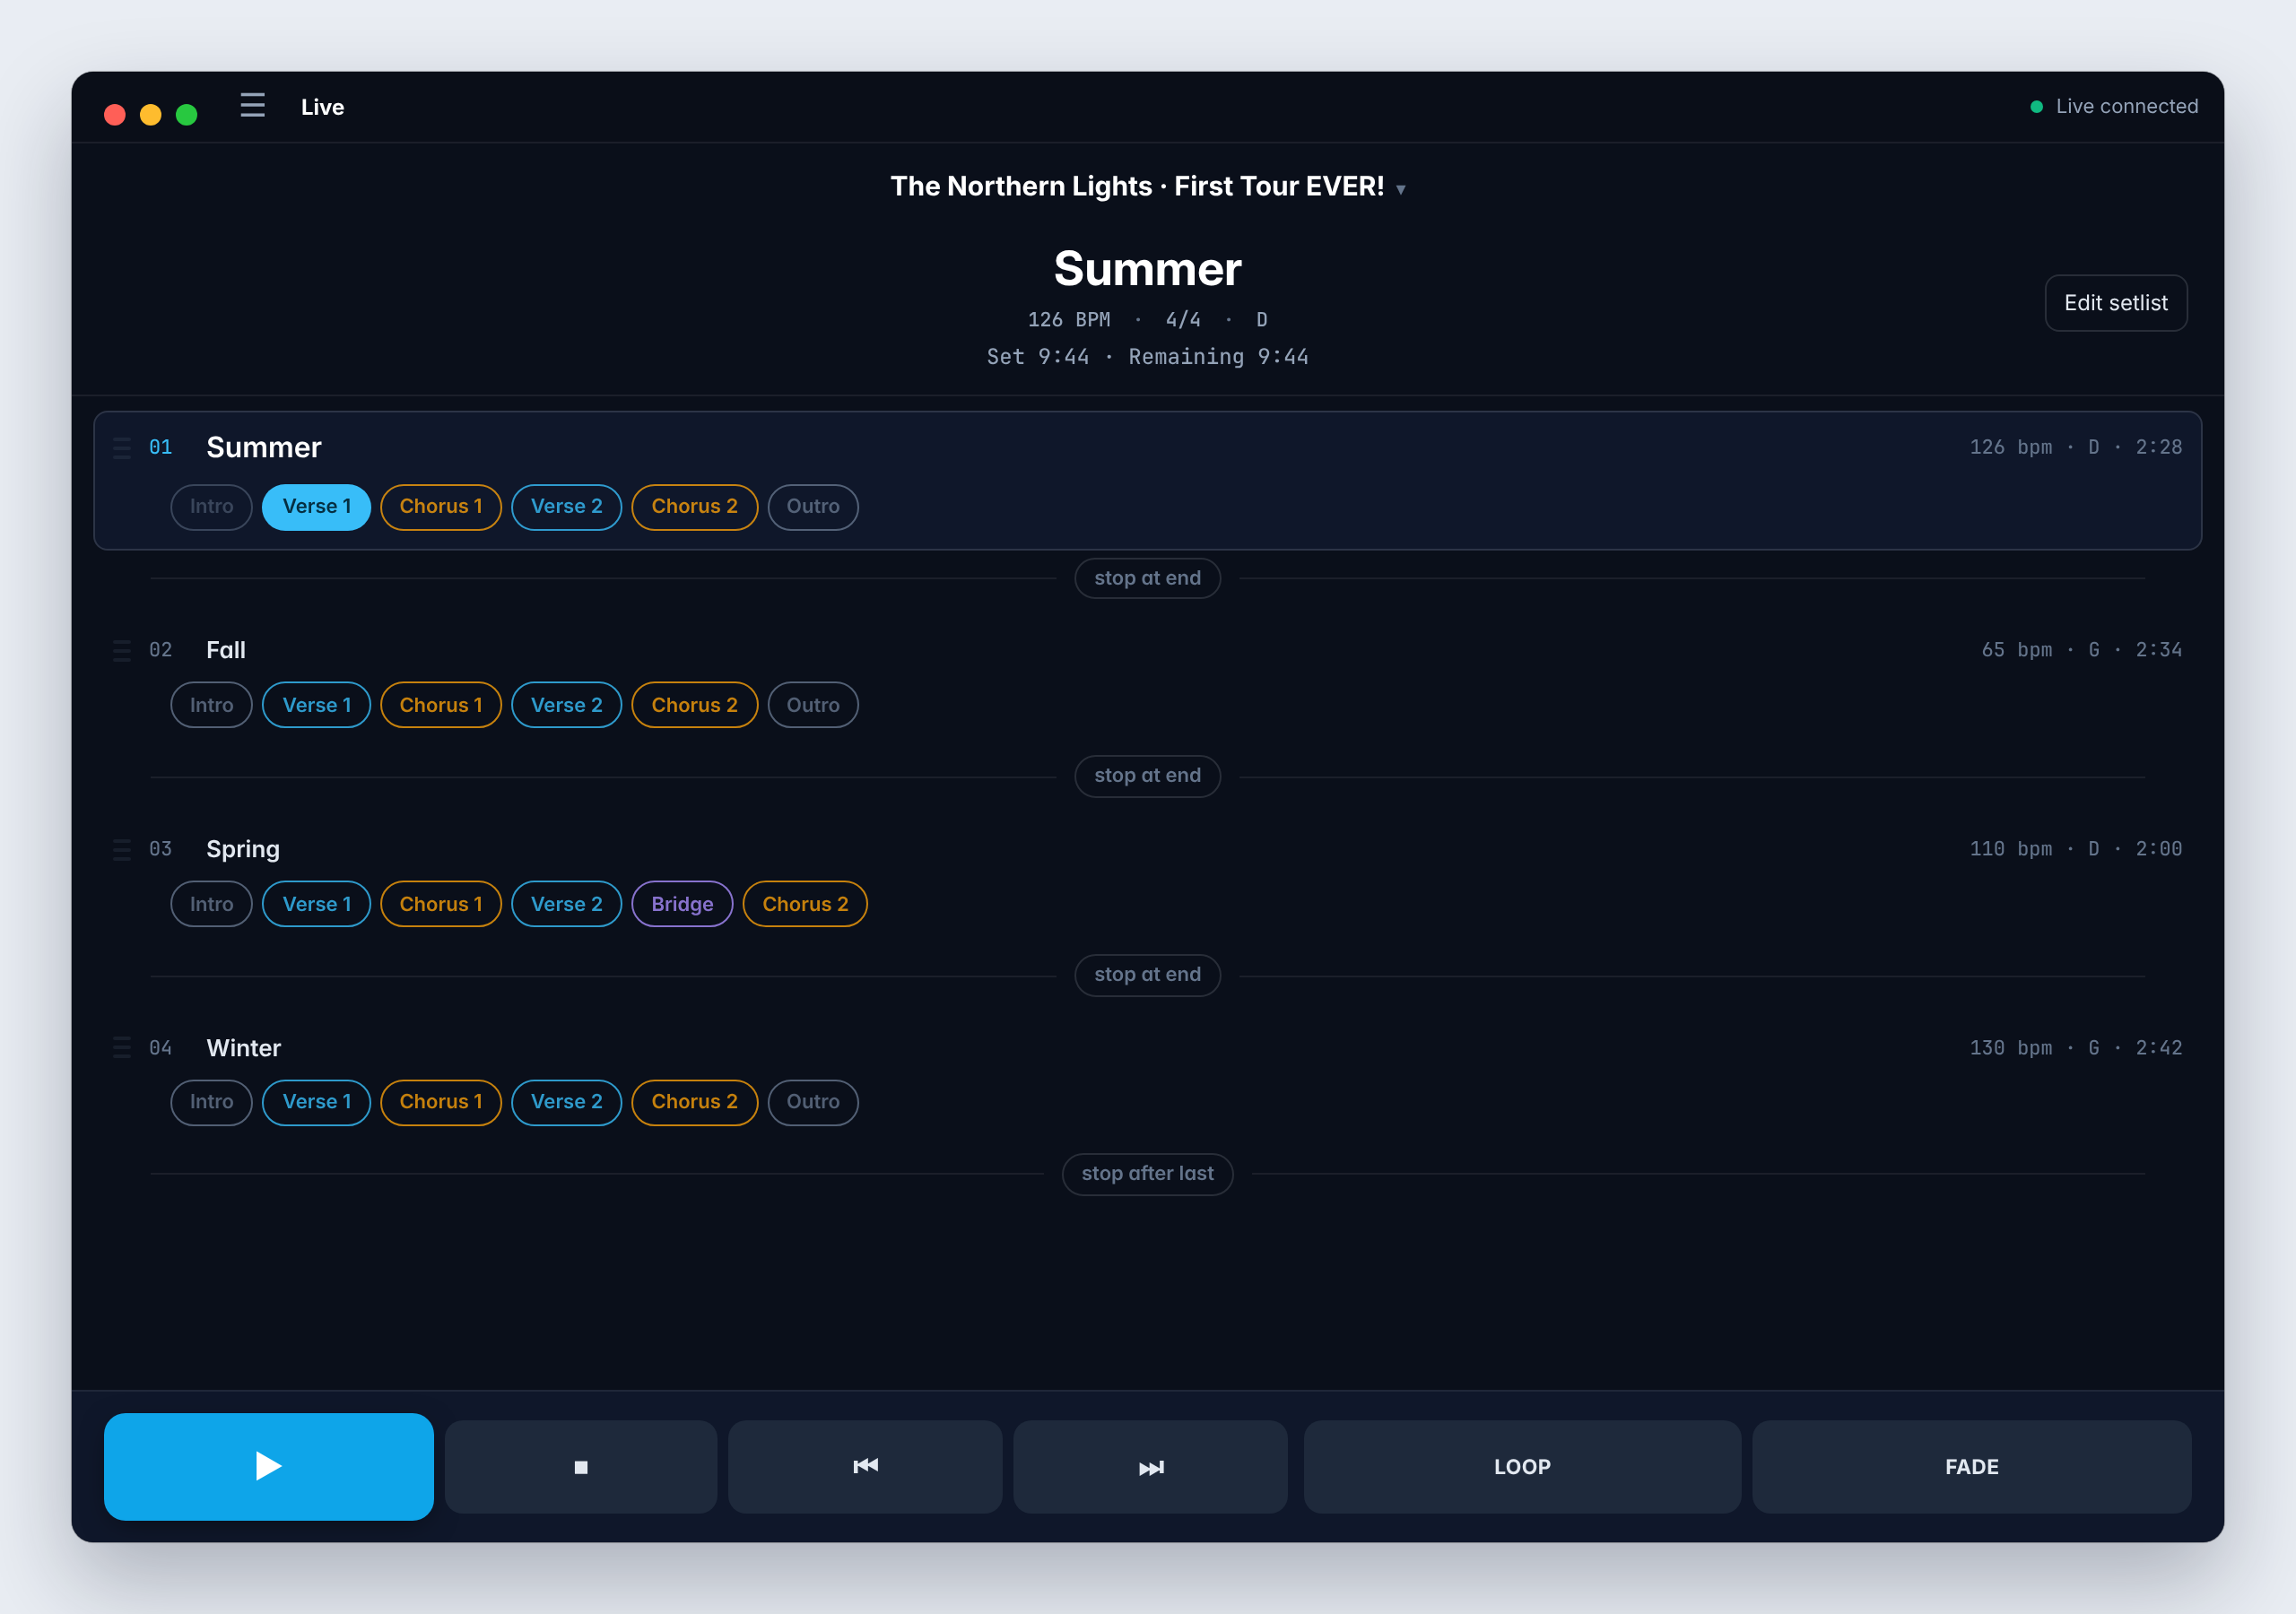
Maestro runs your show in Ableton Live. Load tonight's setlist from Pliris and every song and section is one click away: play, stop, jump to the chorus, loop the vamp until the solo is over, fade out cleanly. Map it to a MIDI controller or run it from your phone, and Lyrics, Video and Charts follow every move over Pliris Network.
What you need
- A Mac with Ableton Live.
- Maestro, from the beta apps page.
- The Files desktop app, if you want Maestro to open your Pliris sets in Live. Files builds the Live set; Maestro runs it.
- Your Pliris account. Maestro uses the same account as the website.
Set up Maestro with Ableton Live
Maestro controls Live through a small control script, the same way a hardware controller does. Maestro installs the script for you every time it opens, so you set it up in Live once.
- Open Maestro. It installs the Pliris Maestro script into Live's User Library.
- Open (or restart) Ableton Live, so Live loads the newly installed script.
- In Live, open Settings → Link, Tempo & MIDI (on Live 11, Preferences → Link/Tempo/MIDI).
- In an empty Control Surface slot, choose Pliris Maestro. Leave its Input and Output set to None.
In the top-right corner of Maestro, Waiting for Live changes to Live connected. You're set.
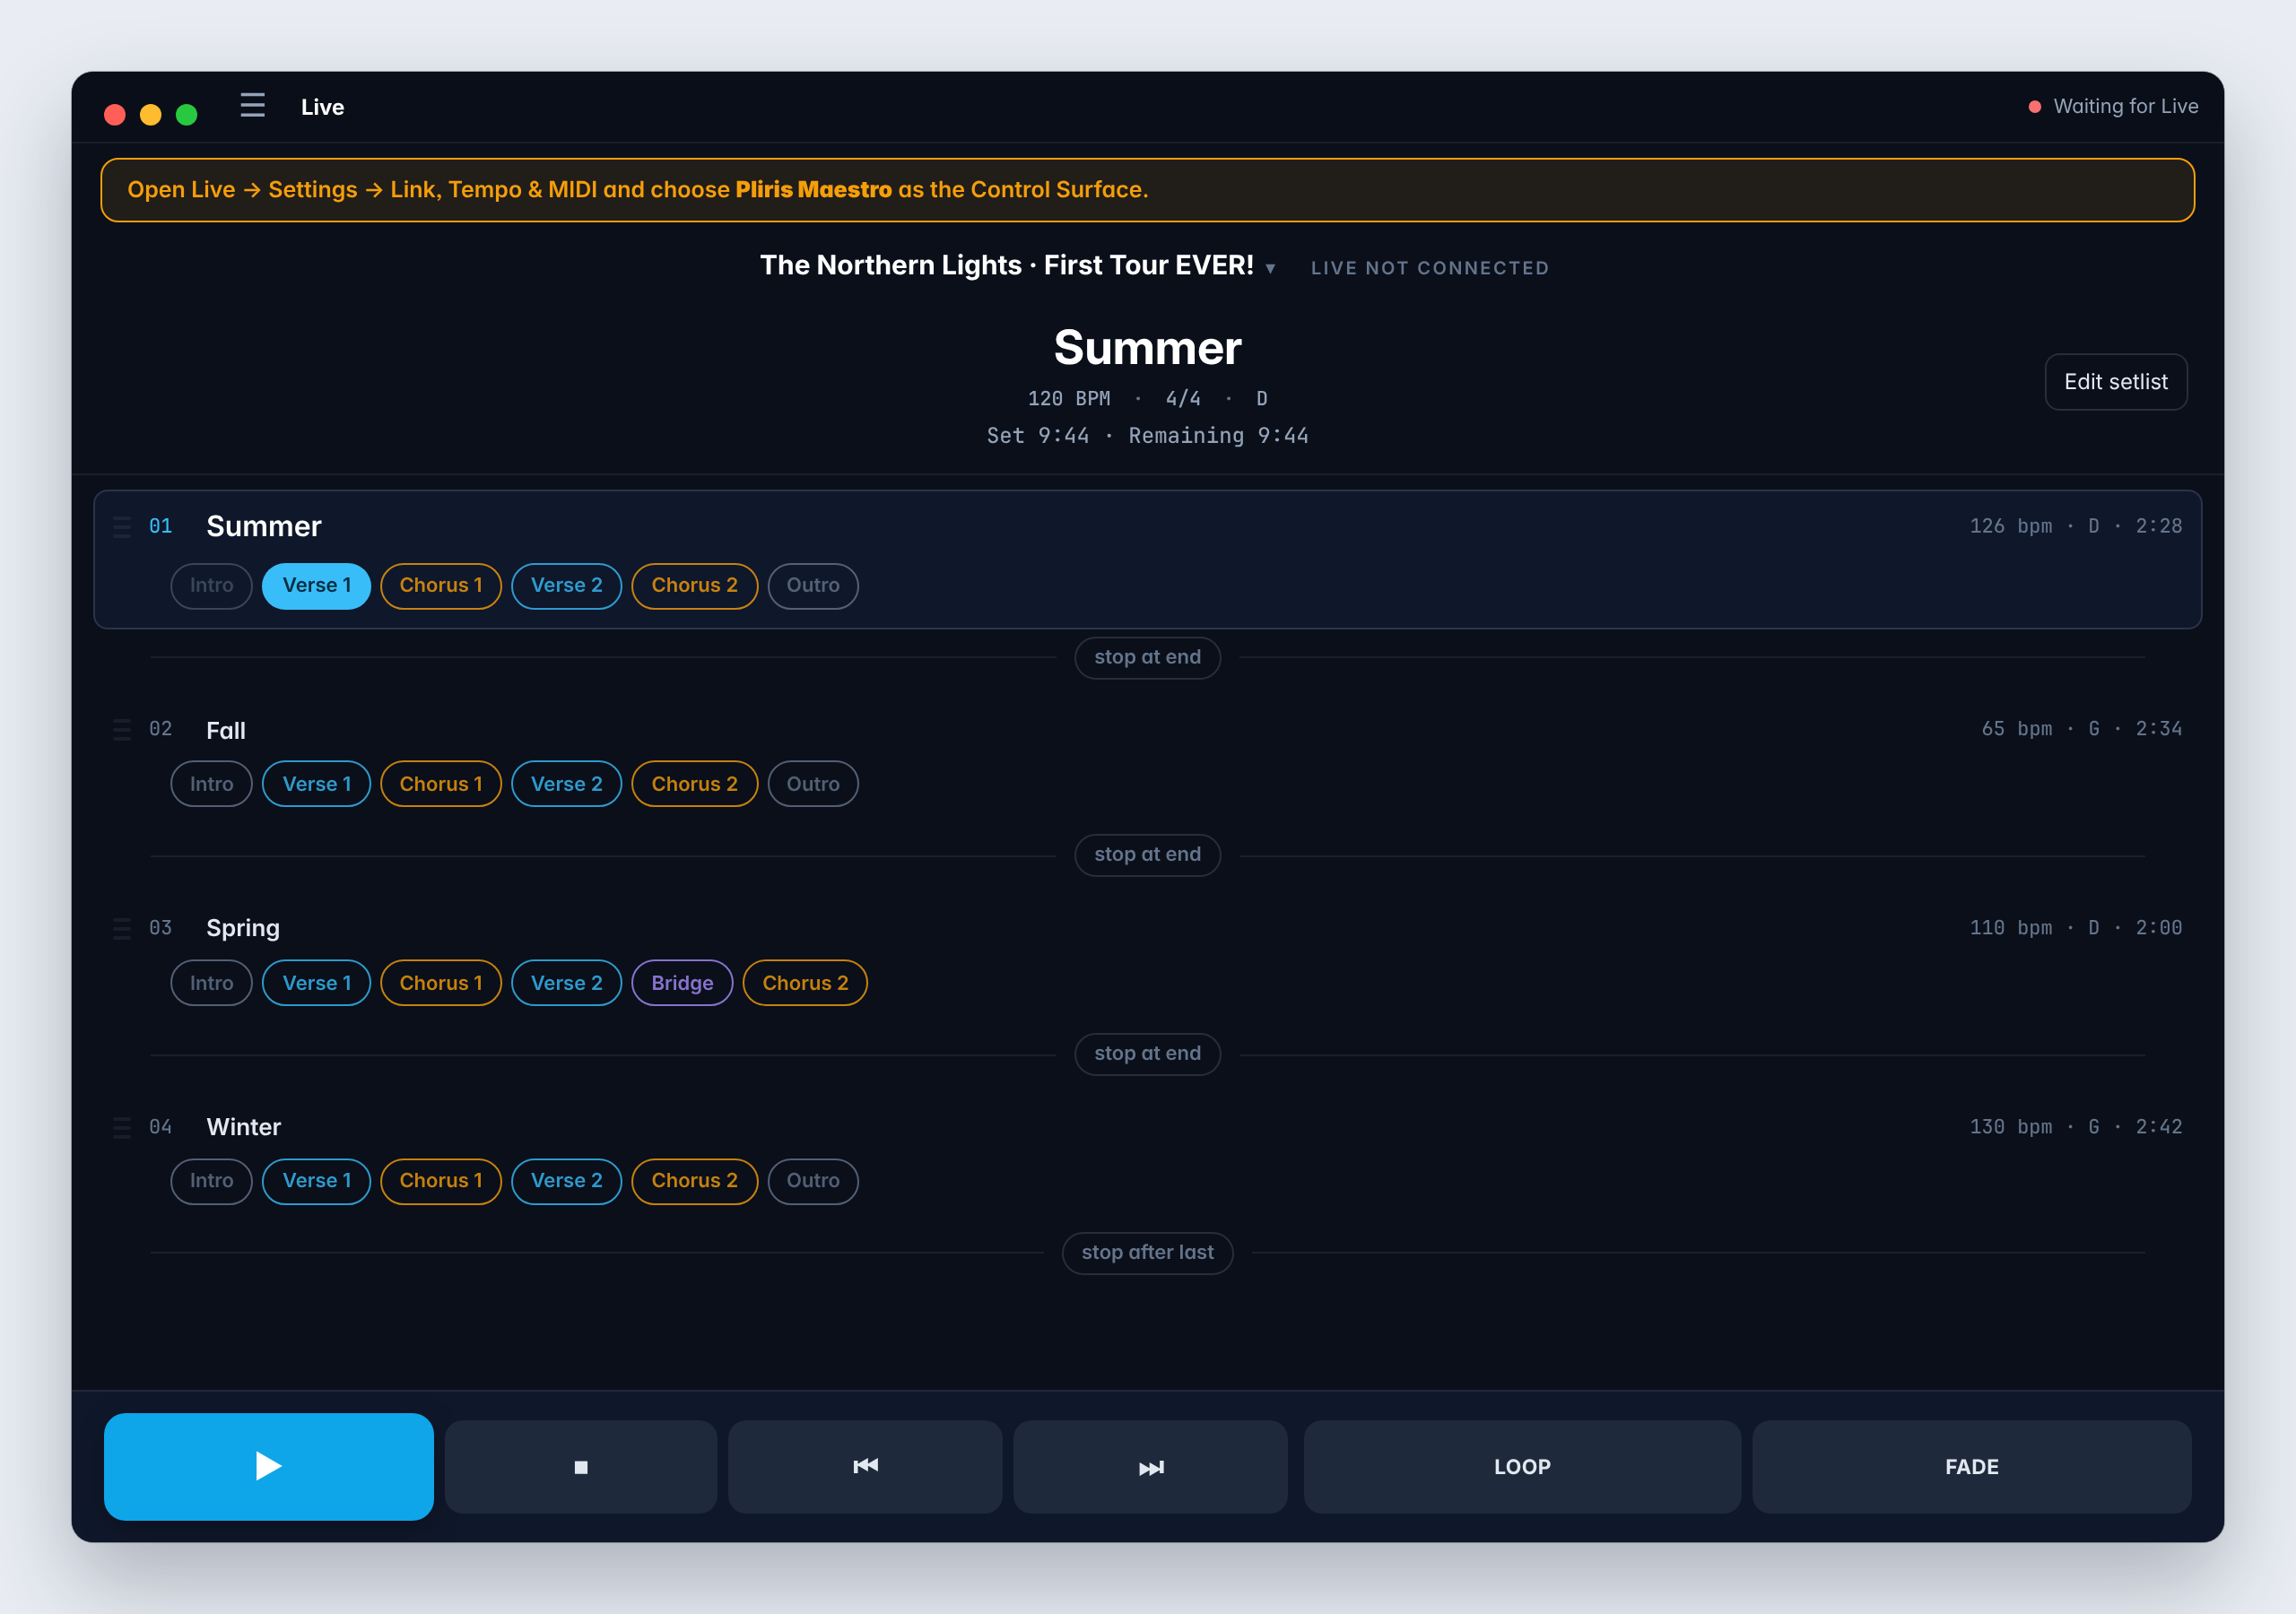
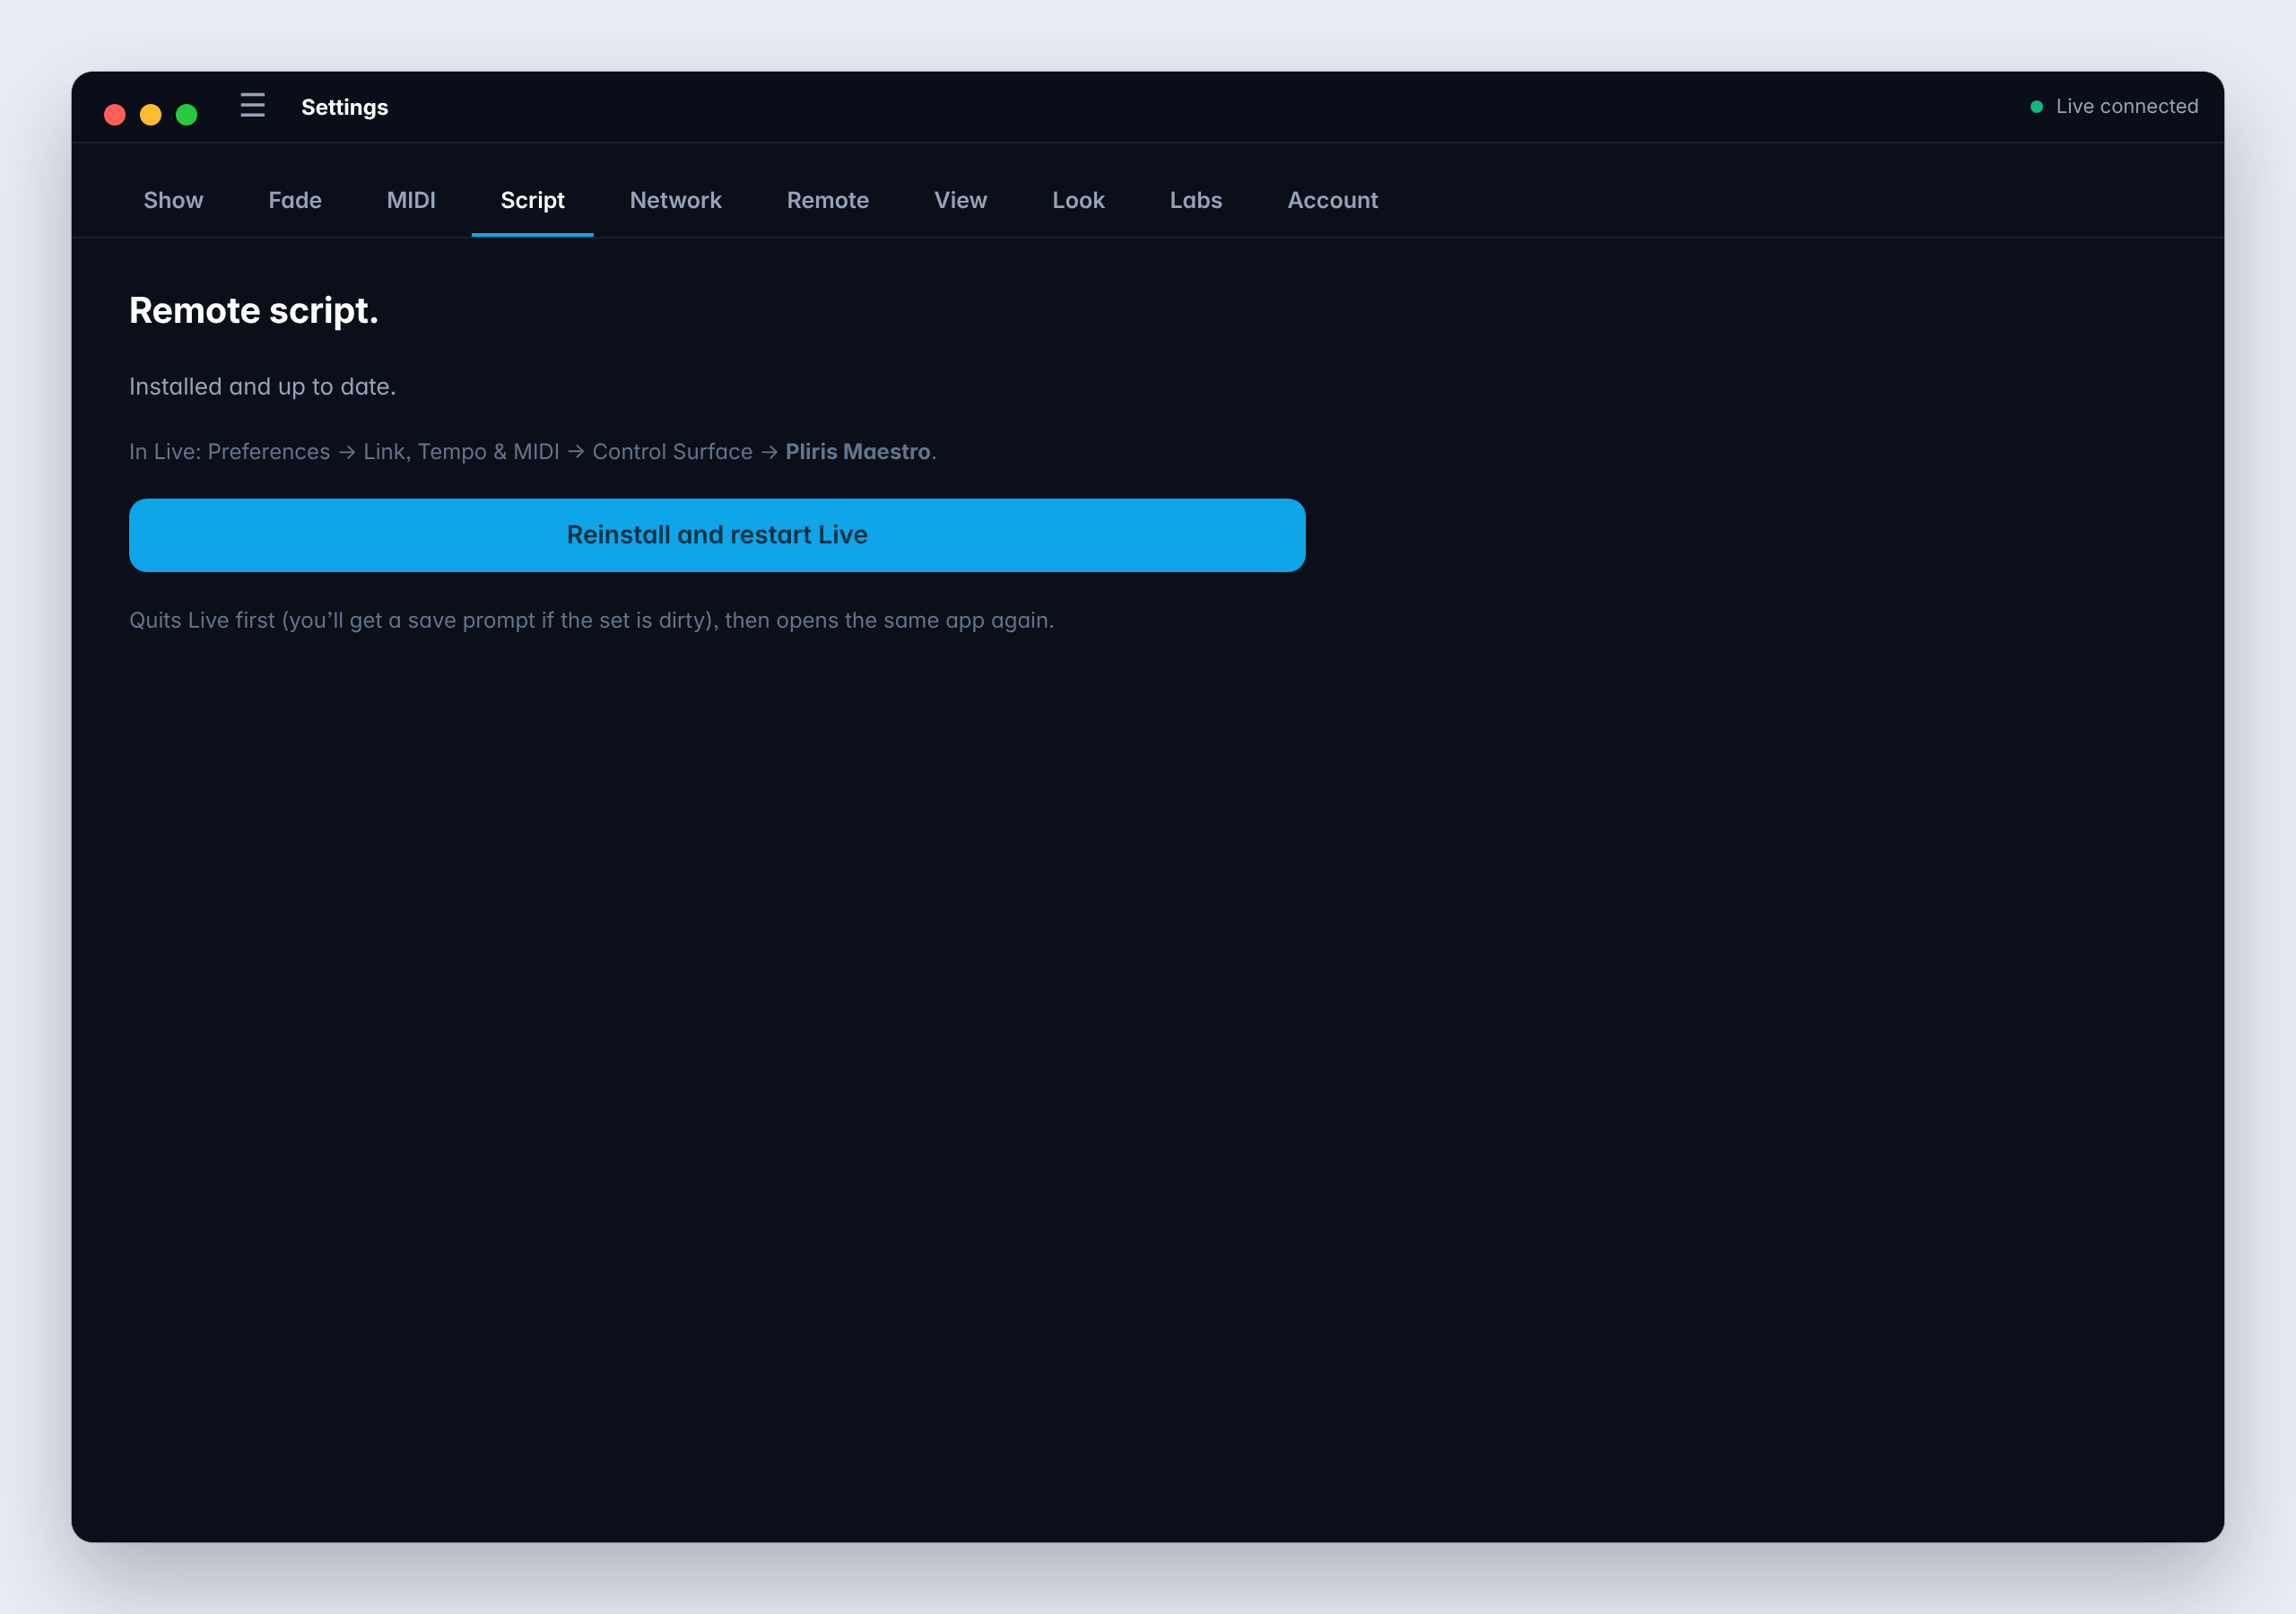
If Maestro still says Waiting for Live, press ⌘3 in Maestro to open Settings and choose Script. It shows whether the script is installed and up to date, and Reinstall and restart Live puts it back and restarts Live for you. Save your set first: Live asks before it quits if you have unsaved changes.
Allow Accessibility when macOS asks. Maestro asks the first time you open it. Playing your set doesn't need it, but cutting, pasting, duplicating or deleting song sections, Save in Live, and telling which set you opened yourself in Live all do. If you missed the prompt, open System Settings → Privacy & Security → Accessibility and turn on Maestro.
Sign in
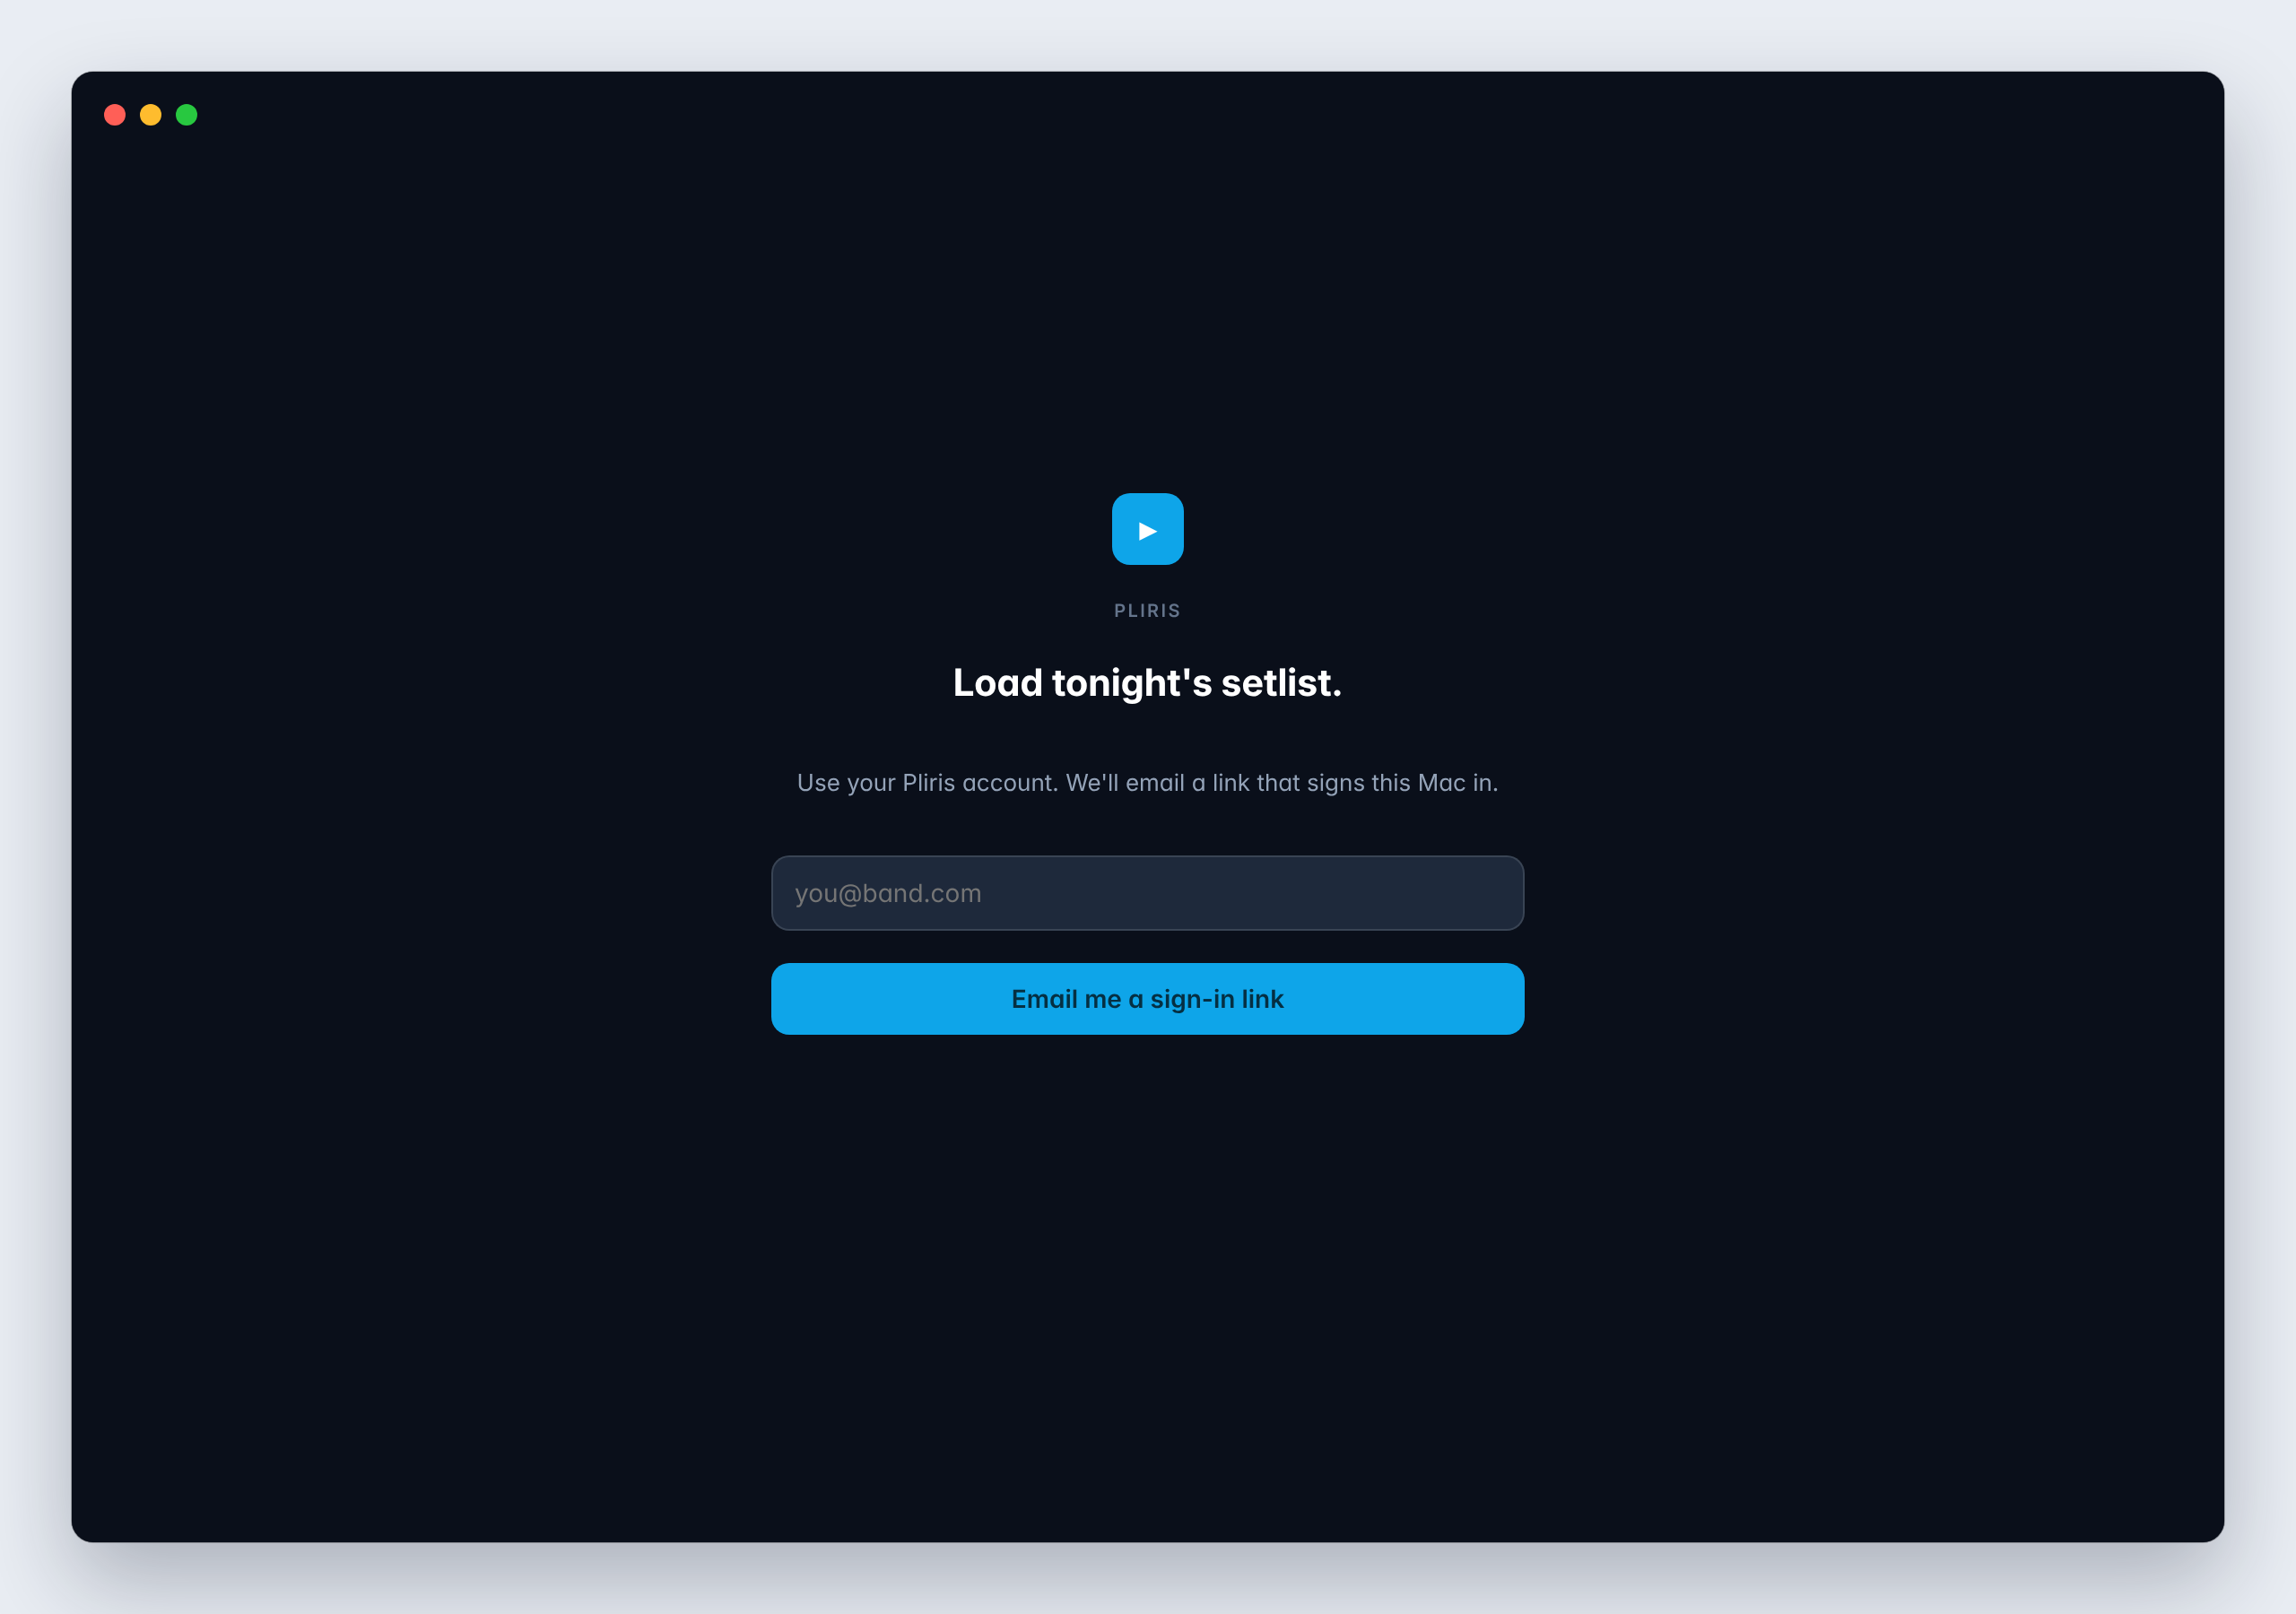
- On the sign-in screen, type the email address you use for Pliris and click Email me a sign-in link.
- Open the email on this Mac and click the link. The Maestro window signs itself in.
If another Pliris app on this Mac is already signed in, Maestro offers Continue as with that email instead.
Load tonight's setlist
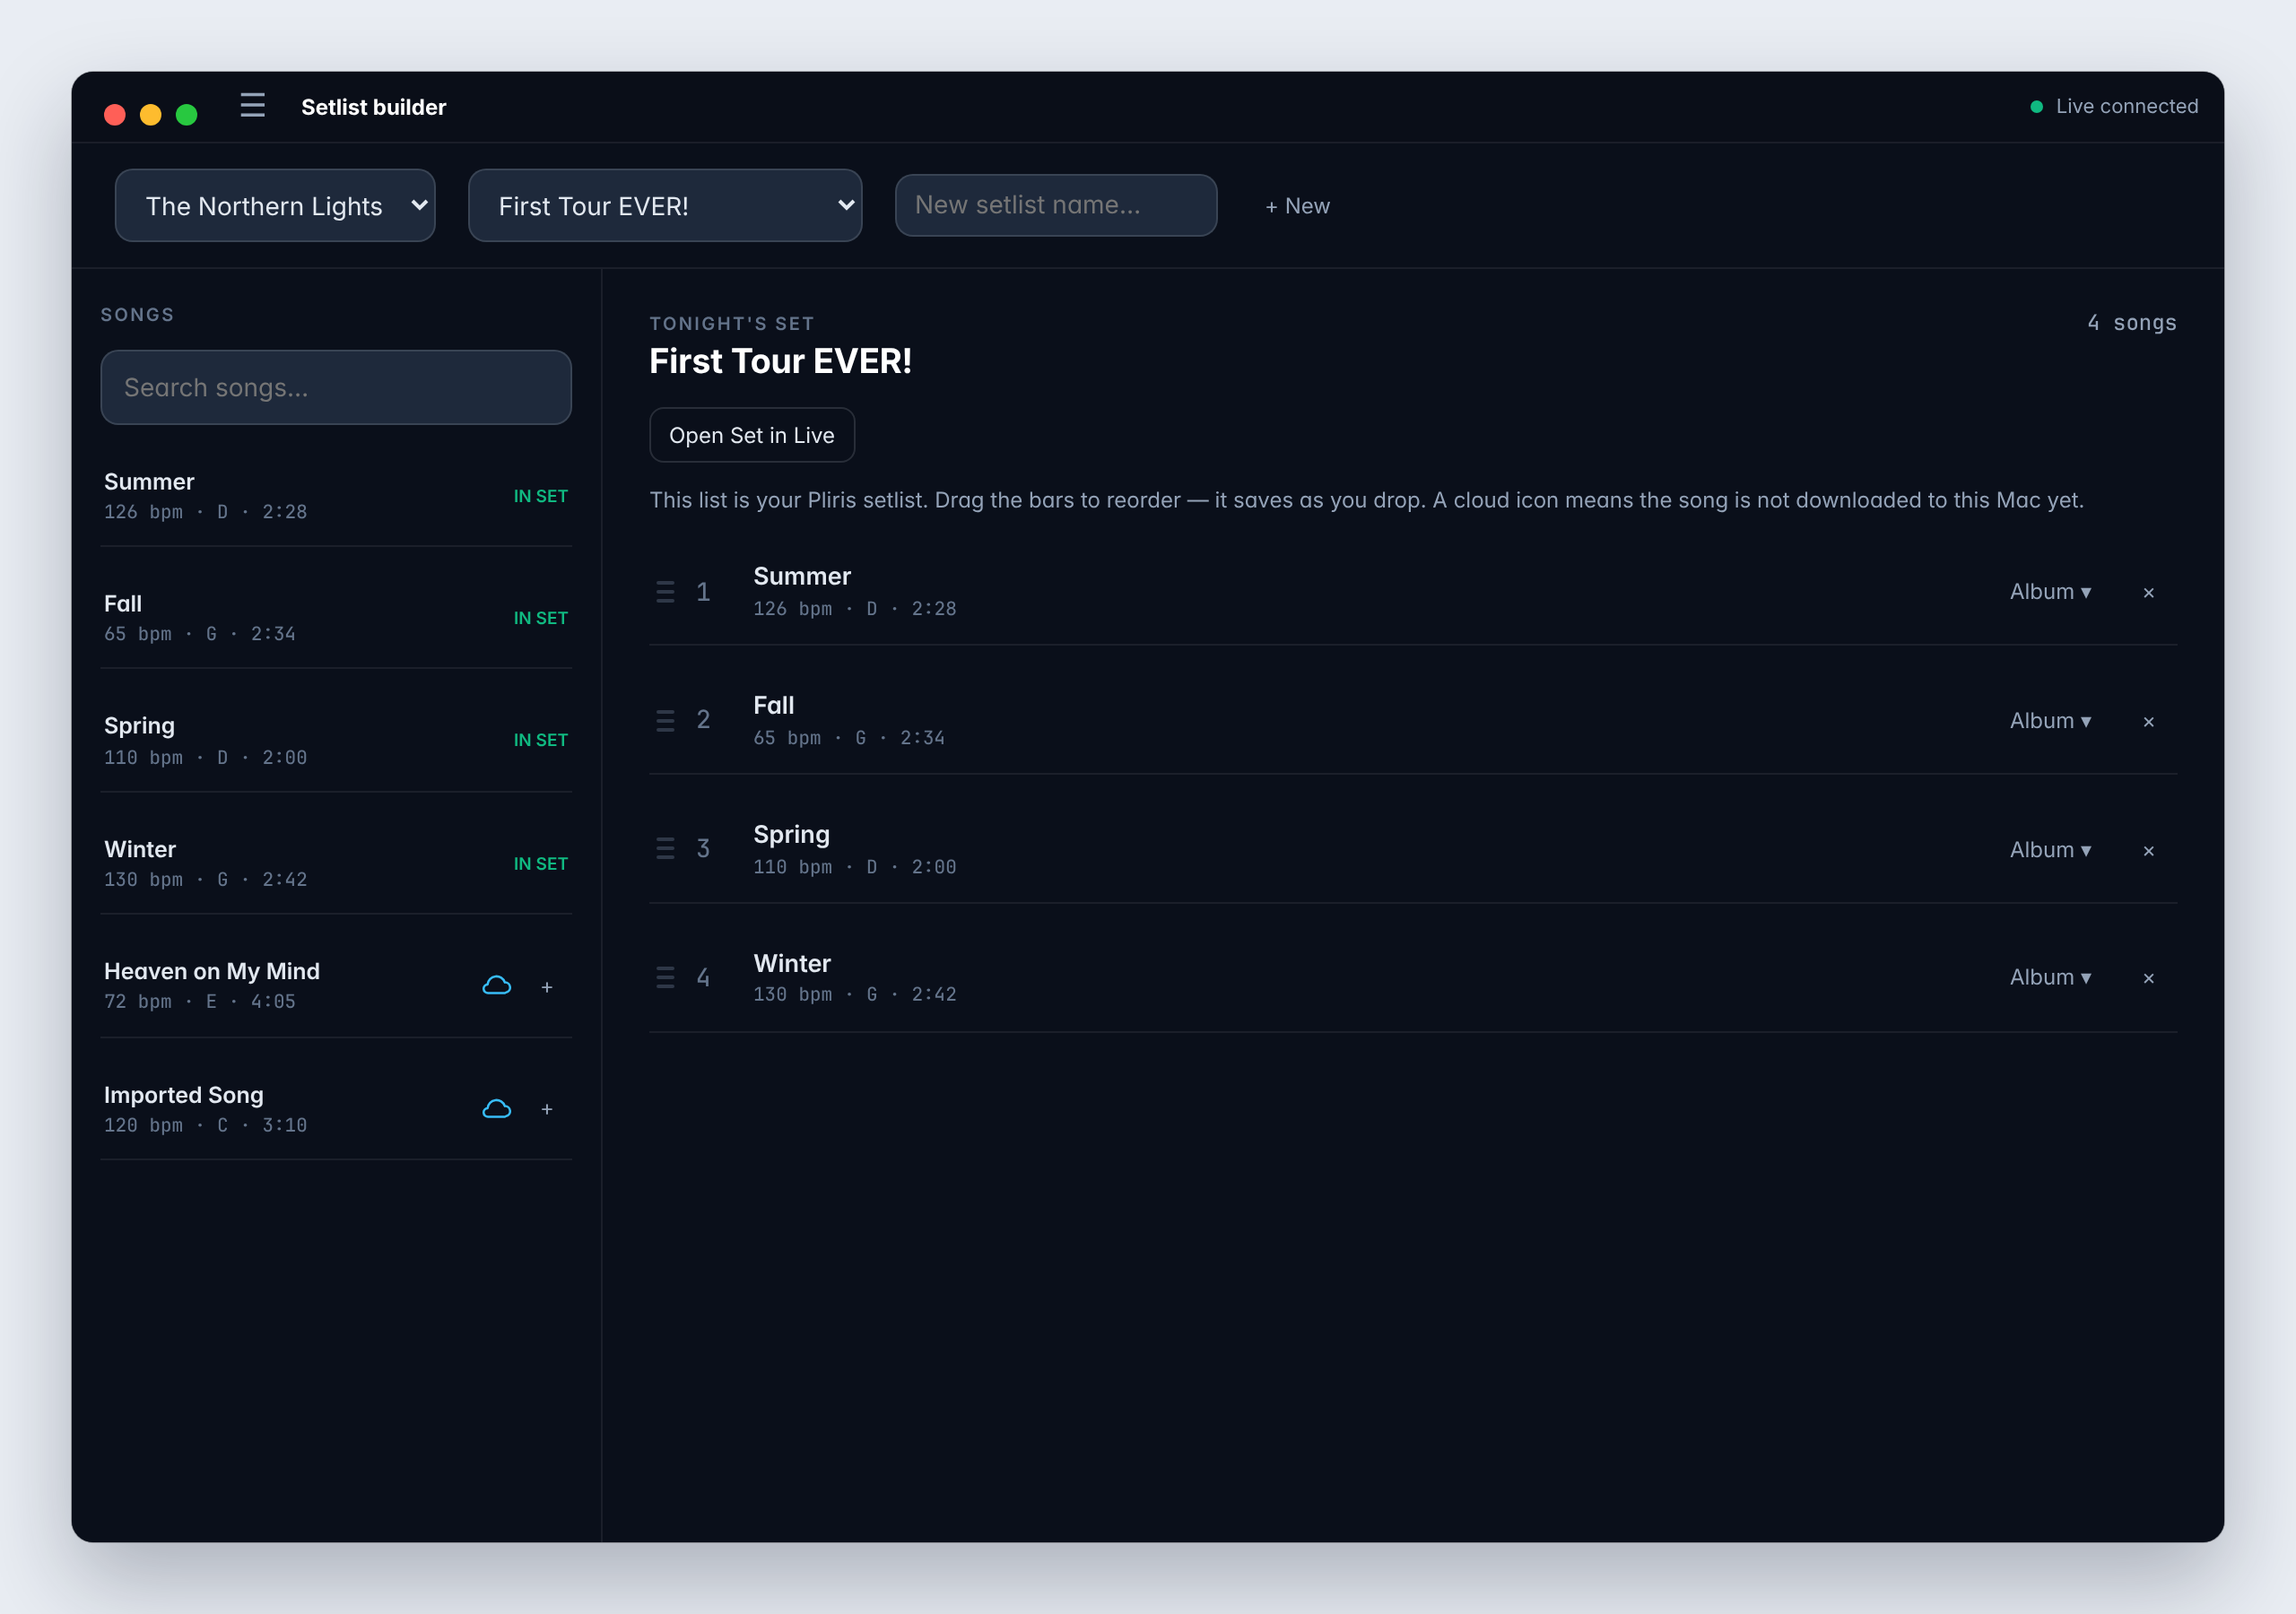
Setlists come from Pliris. Build them on the website or in Maestro's setlist builder.
- Open the ☰ menu and choose Setlist builder (⌘2).
- Pick your band and the setlist at the top. To start a new one, type a name in New setlist name… and click + New.
- Add songs from the Songs list on the left with +. Drag songs on the right to reorder them; changes save as you drop them. To use a different version of a song, click its arrangement name and choose another.
- Click Open Set in Live.
Files builds the whole set as one Live set and Maestro opens it in Live. If Live asks whether to save the set it already has open, choose Don't Save unless you need those changes.
A cloud icon next to a song means it isn't downloaded to this Mac yet. Tick it in the Files app first.
Switch to another setlist
Setlists change only in the setlist builder. Open it from the ☰ menu (⌘2), or click the setlist name at the top of the Live screen. Pick the other setlist and click Open Set in Live.
Run the show
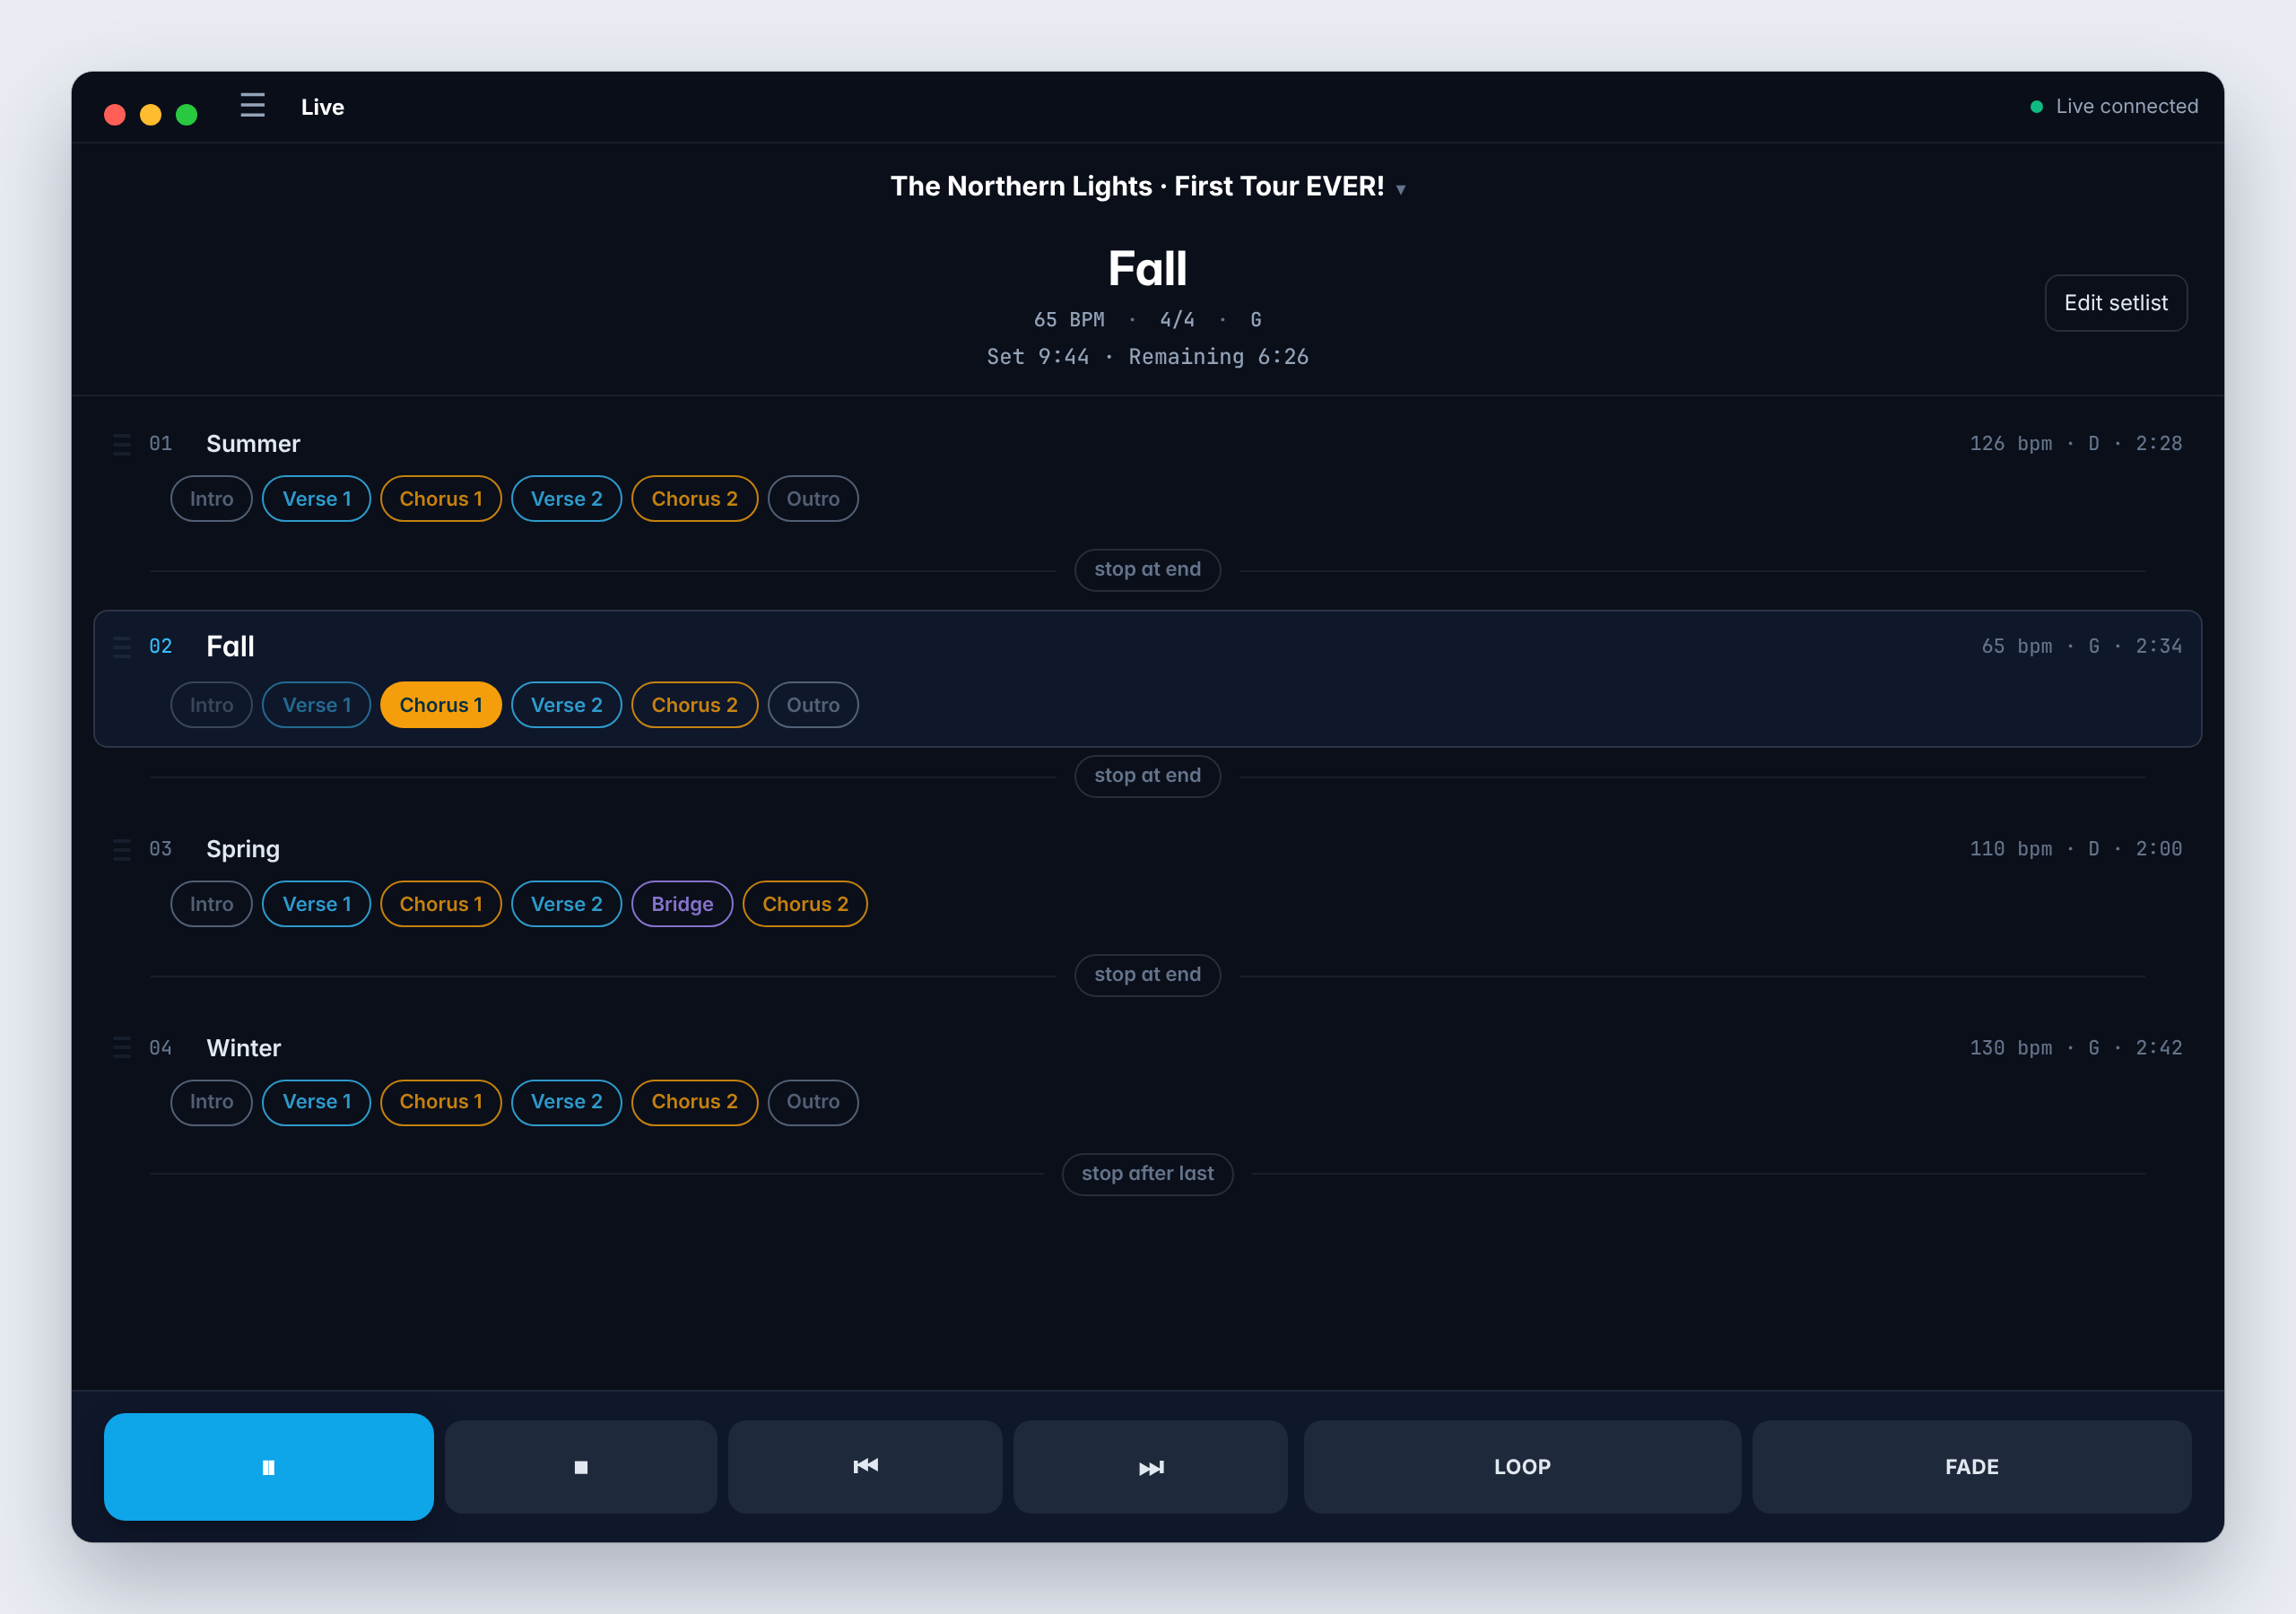
The Live screen is where you spend the show. The current song is at the top with its tempo, time signature and key, plus how long the set runs and how much is left.
- Click a song to cue it.
- Click a section (Intro, Verse 1, Chorus) to jump there.
- Between songs, choose whether the show stops at end or continues into next.
- Use the transport along the bottom: Play/Pause, Stop, Previous song, Next song, Loop and Fade.
Change tonight's order on the fly
Click Edit setlist on the Live screen to drag songs into a new order, or set some aside in the parking lot for later. Click Done to play the new order tonight, or Save to Pliris… to update the setlist or save the new order as a new setlist.
Keyboard shortcuts
| Key | What it does |
|---|---|
| Space | Play / pause |
| ↑ / ↓ | Cue the previous / next song |
| ← / → | Jump to the previous / next section |
| L | Loop the current section, or release the loop |
| ⌘1 | Live screen |
| ⌘2 | Setlist builder |
| ⌘3 (or ⌘,) | Settings |
Loop a section
Click Loop, or press L, and the current section repeats until you let it go. A LOOPING banner shows which section is looping. Click Release (or press L again) and the song carries on.
Fade out
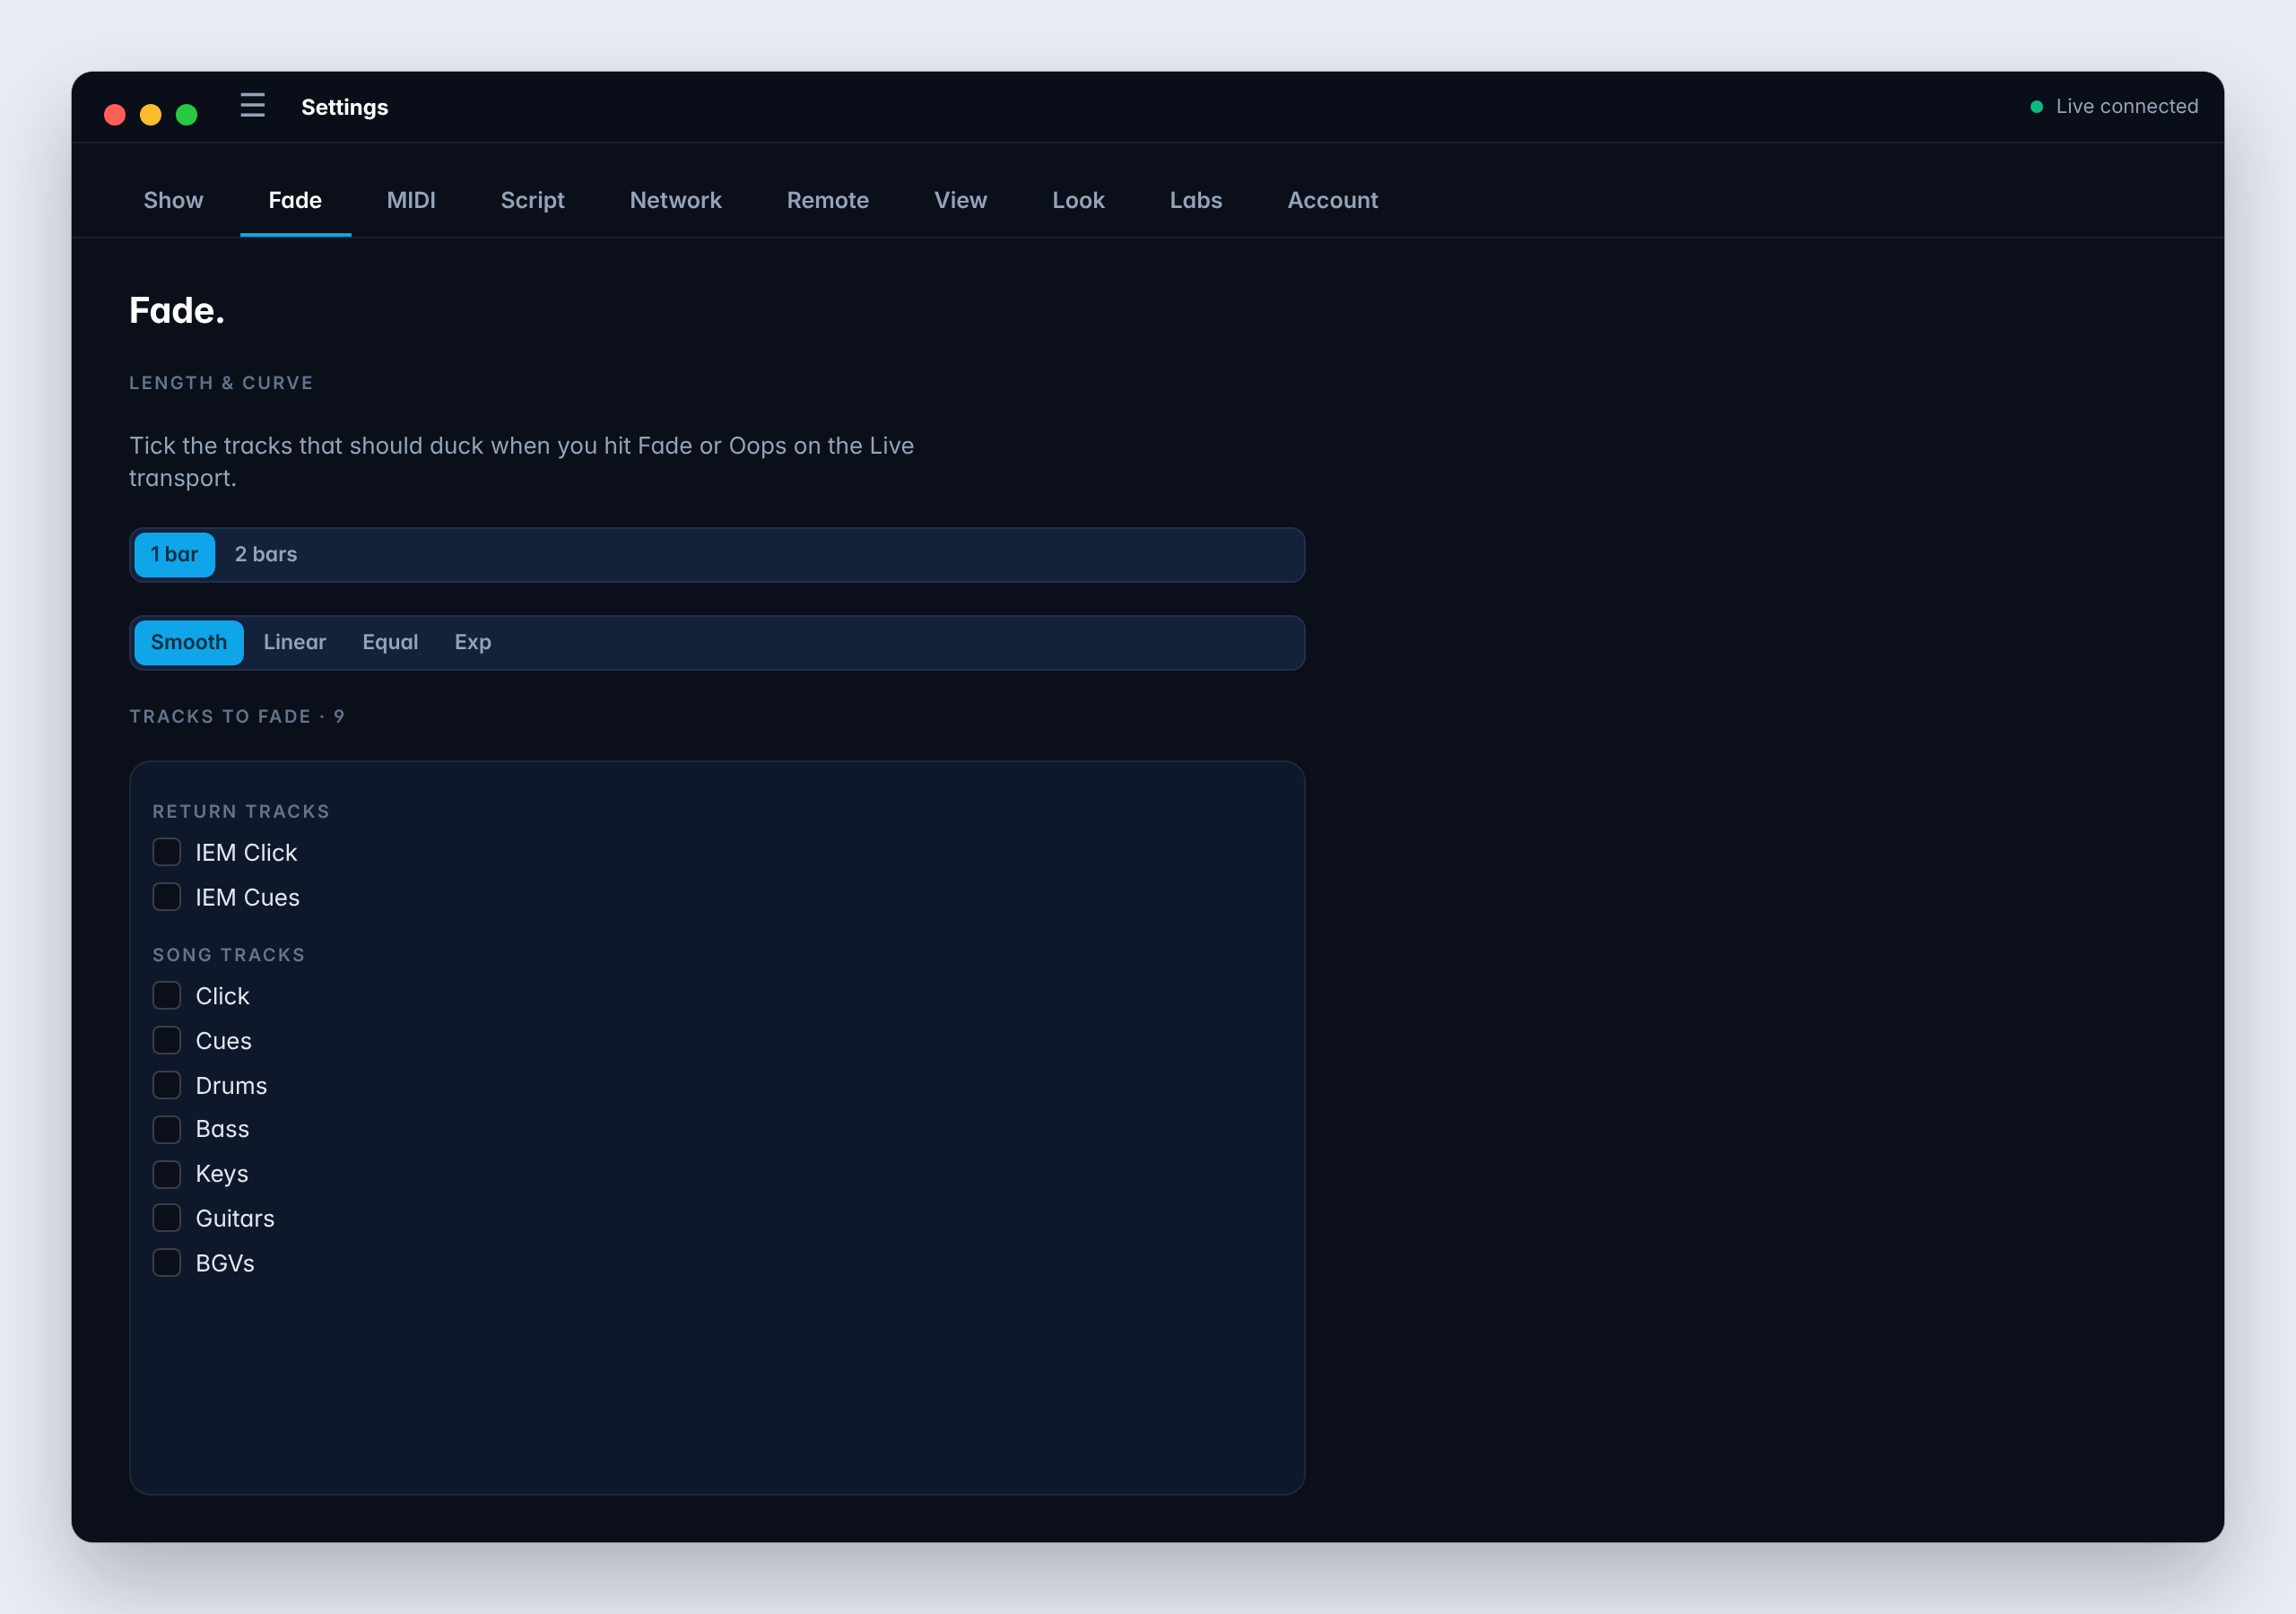
Fade brings the song down over one or two bars. Choose how long it takes, the fade's curve, and which tracks and returns it fades, under Settings → Fade (press ⌘3 to open Settings).
Jump between sections
Every song's sections show as buttons under its name: Intro, Verse 1, Chorus 1 and so on. Click one to jump there, in this song or any other. Press ← or → to go to the previous or next section.
Your Live set doesn't need locators for this. Maestro knows where every section starts, and the music keeps playing through the jump.
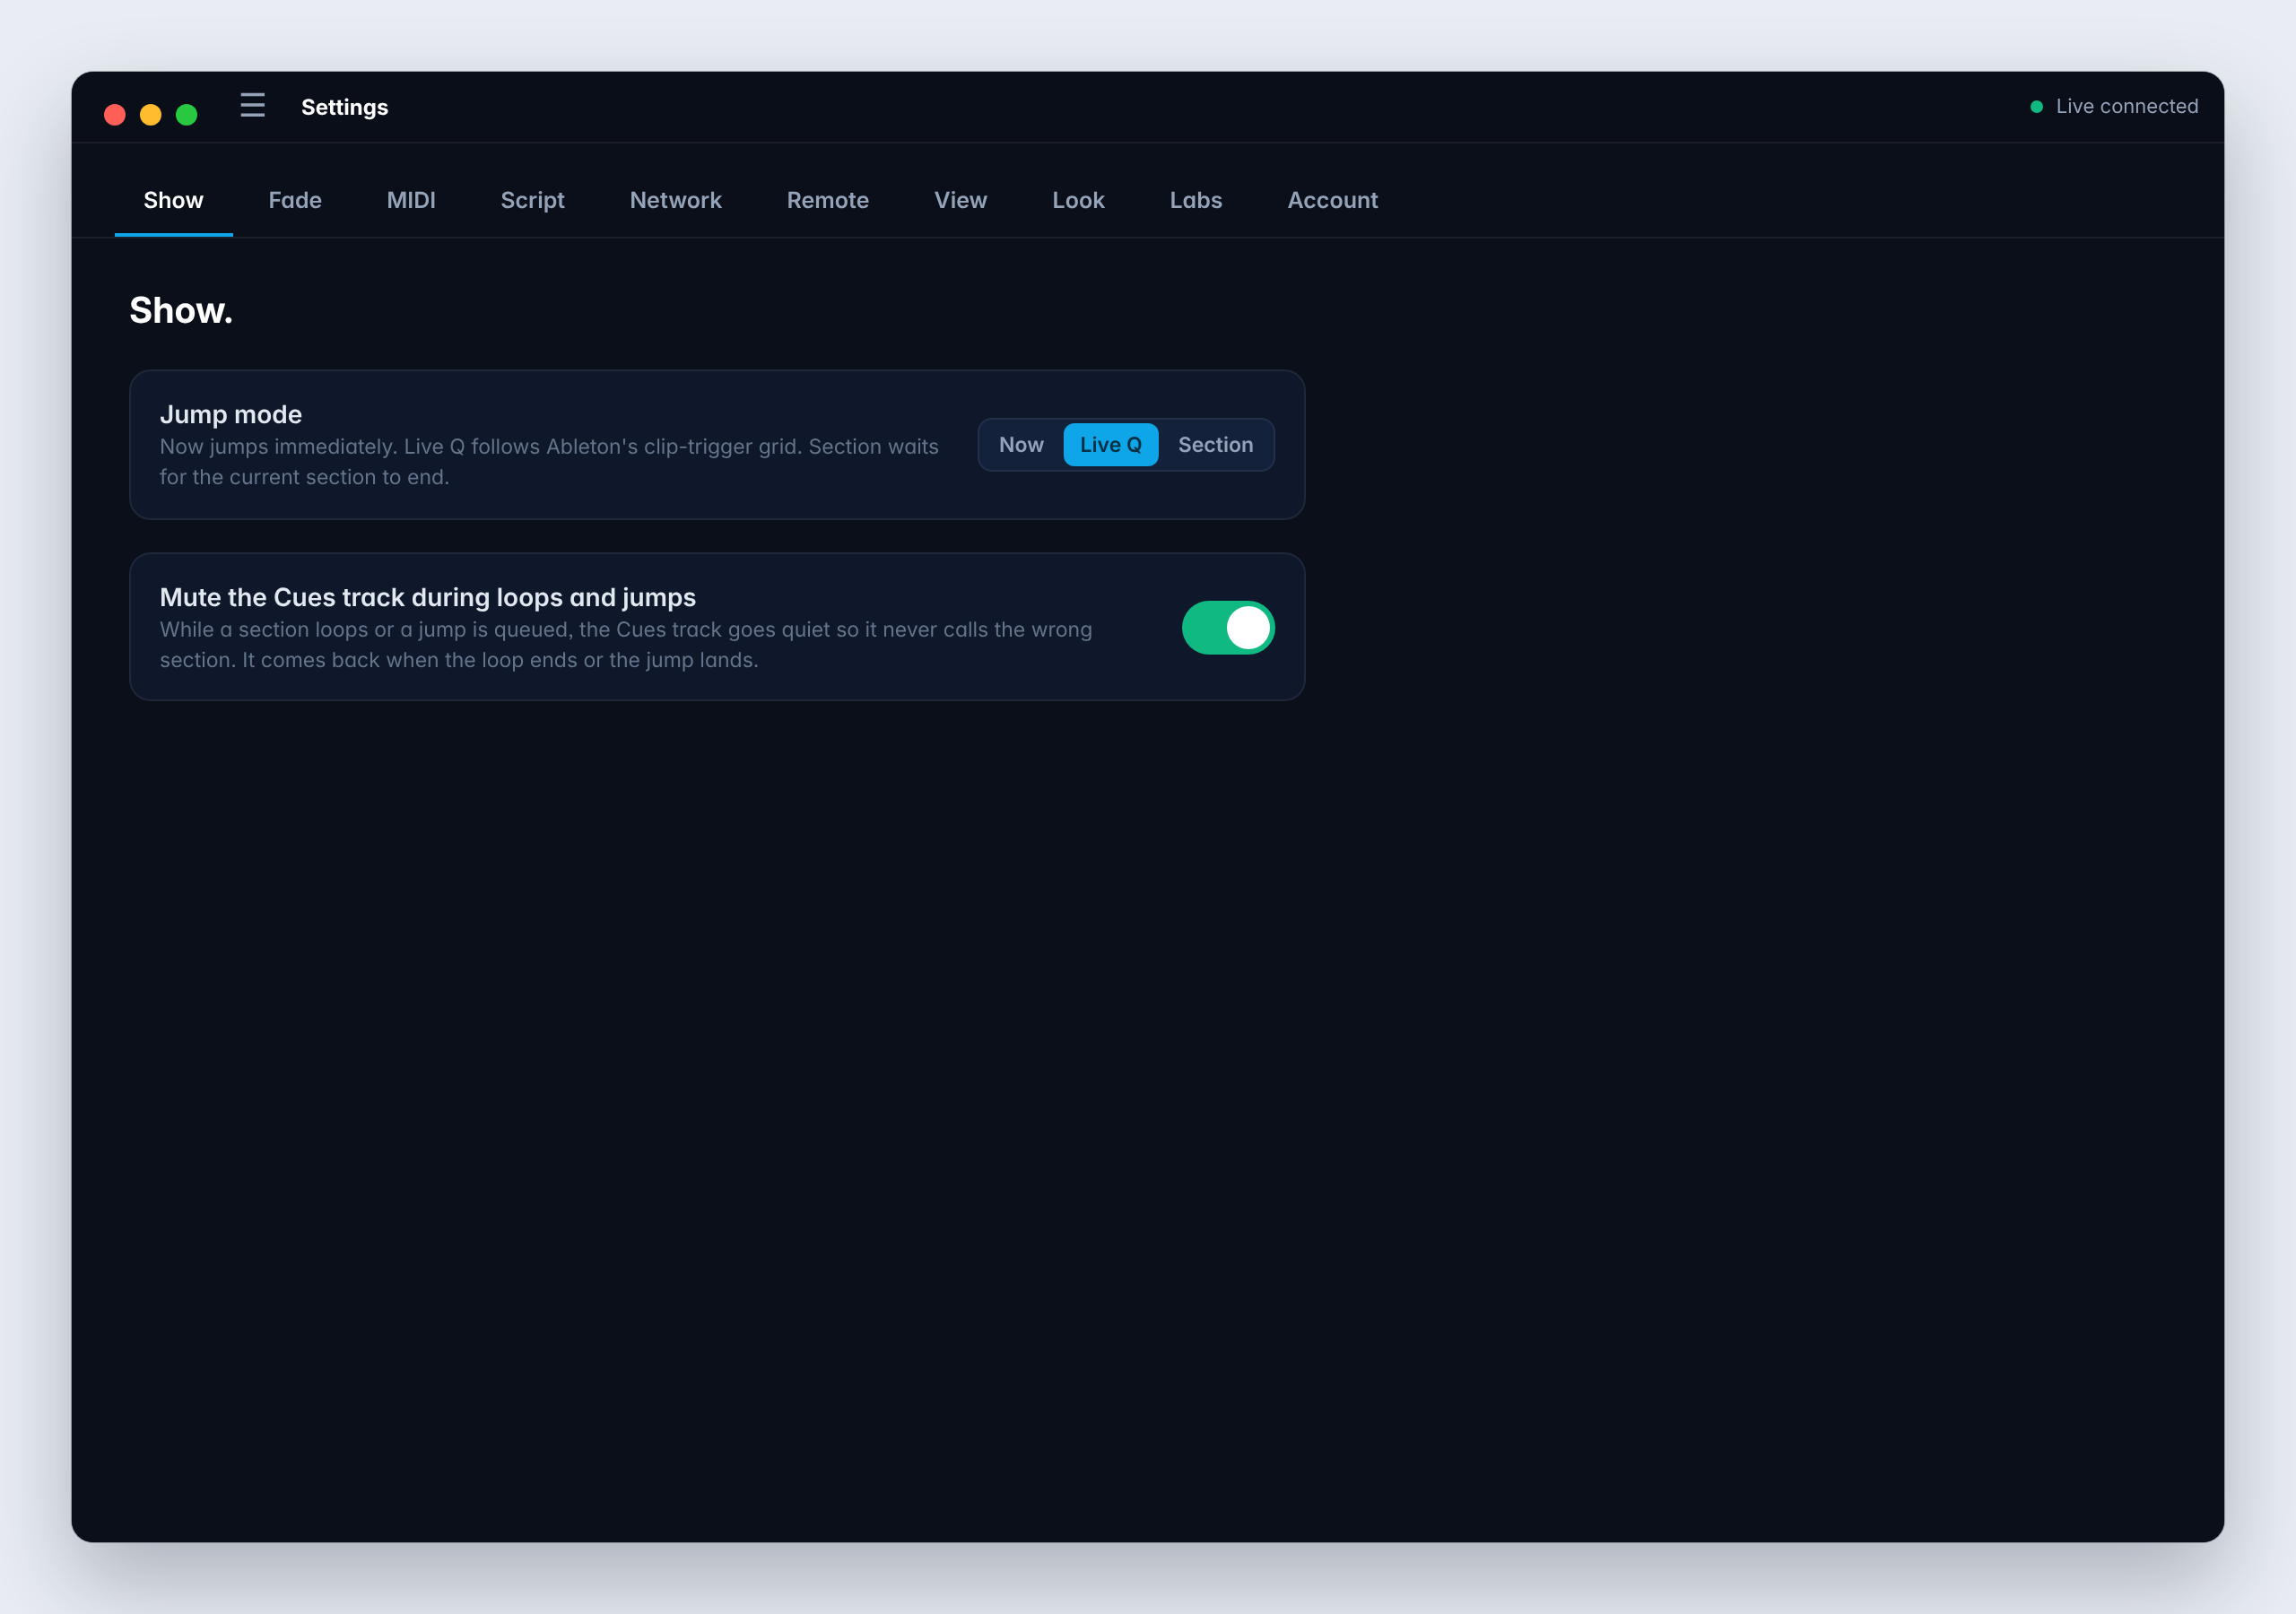
A jump doesn't cut the band off mid-beat. The section you clicked pulses in time with the music until the jump happens, then lights up. Settings → Show → Jump mode decides when that is:
- Live Q (the default) waits for Ableton's own launch quantization, usually the next bar, so the jump lands on the beat.
- Section lets the current section finish, then jumps. Use it when you'd rather the band finish the phrase.
- Now jumps straight away.
Lock song navigation while audio is playing stops anyone from switching songs by accident while a song plays, from the app, Remote or a MIDI controller. Section jumps still work. Mute the Cues track during loops and jumps keeps a spoken cue from talking over a loop or landing mid-jump.
Cues that follow the show
A Pliris set has a Cues track that speaks each section as it comes ("Verse", "Chorus"). That works until you change the plan: loop the vamp, or jump back to the chorus, and the spoken cue no longer matches where the band is going.
Turn on Live cues under Settings → Show (⌘3) and Maestro speaks the cue for where the show is really headed: the next section, each pass of a loop, or wherever a jump you just queued will land. It uses the cue library already on your set's Cues track, so there's nothing extra to program.
- Live cues work on sets built from Pliris's built-in templates.
- Open a Pliris setlist first. The setting is saved with that setlist.
- If Maestro asks you to, reinstall the Live script and restart Live: Settings → Script → Reinstall and restart Live.
- When Live cues stop for any reason, Maestro puts the Cues track back to normal, so your cues are never left silent.
Edit song sections in Live
You can fix a song's sections right from Maestro, without hunting for locators in Live. Right-click a section button:
- Rename… changes the section's name. This works even while the song plays.
- Copy or Cut… takes the section. Then right-click another section and choose Paste “Chorus 1” before or after (the menu names the section you took).
- Duplicate puts a copy of the section straight after it. It's the quickest way to add another chorus.
- Delete section… takes the section's time out of the song. Maestro shows how long it is (for example 8 bars (0:18)) and asks before it deletes.
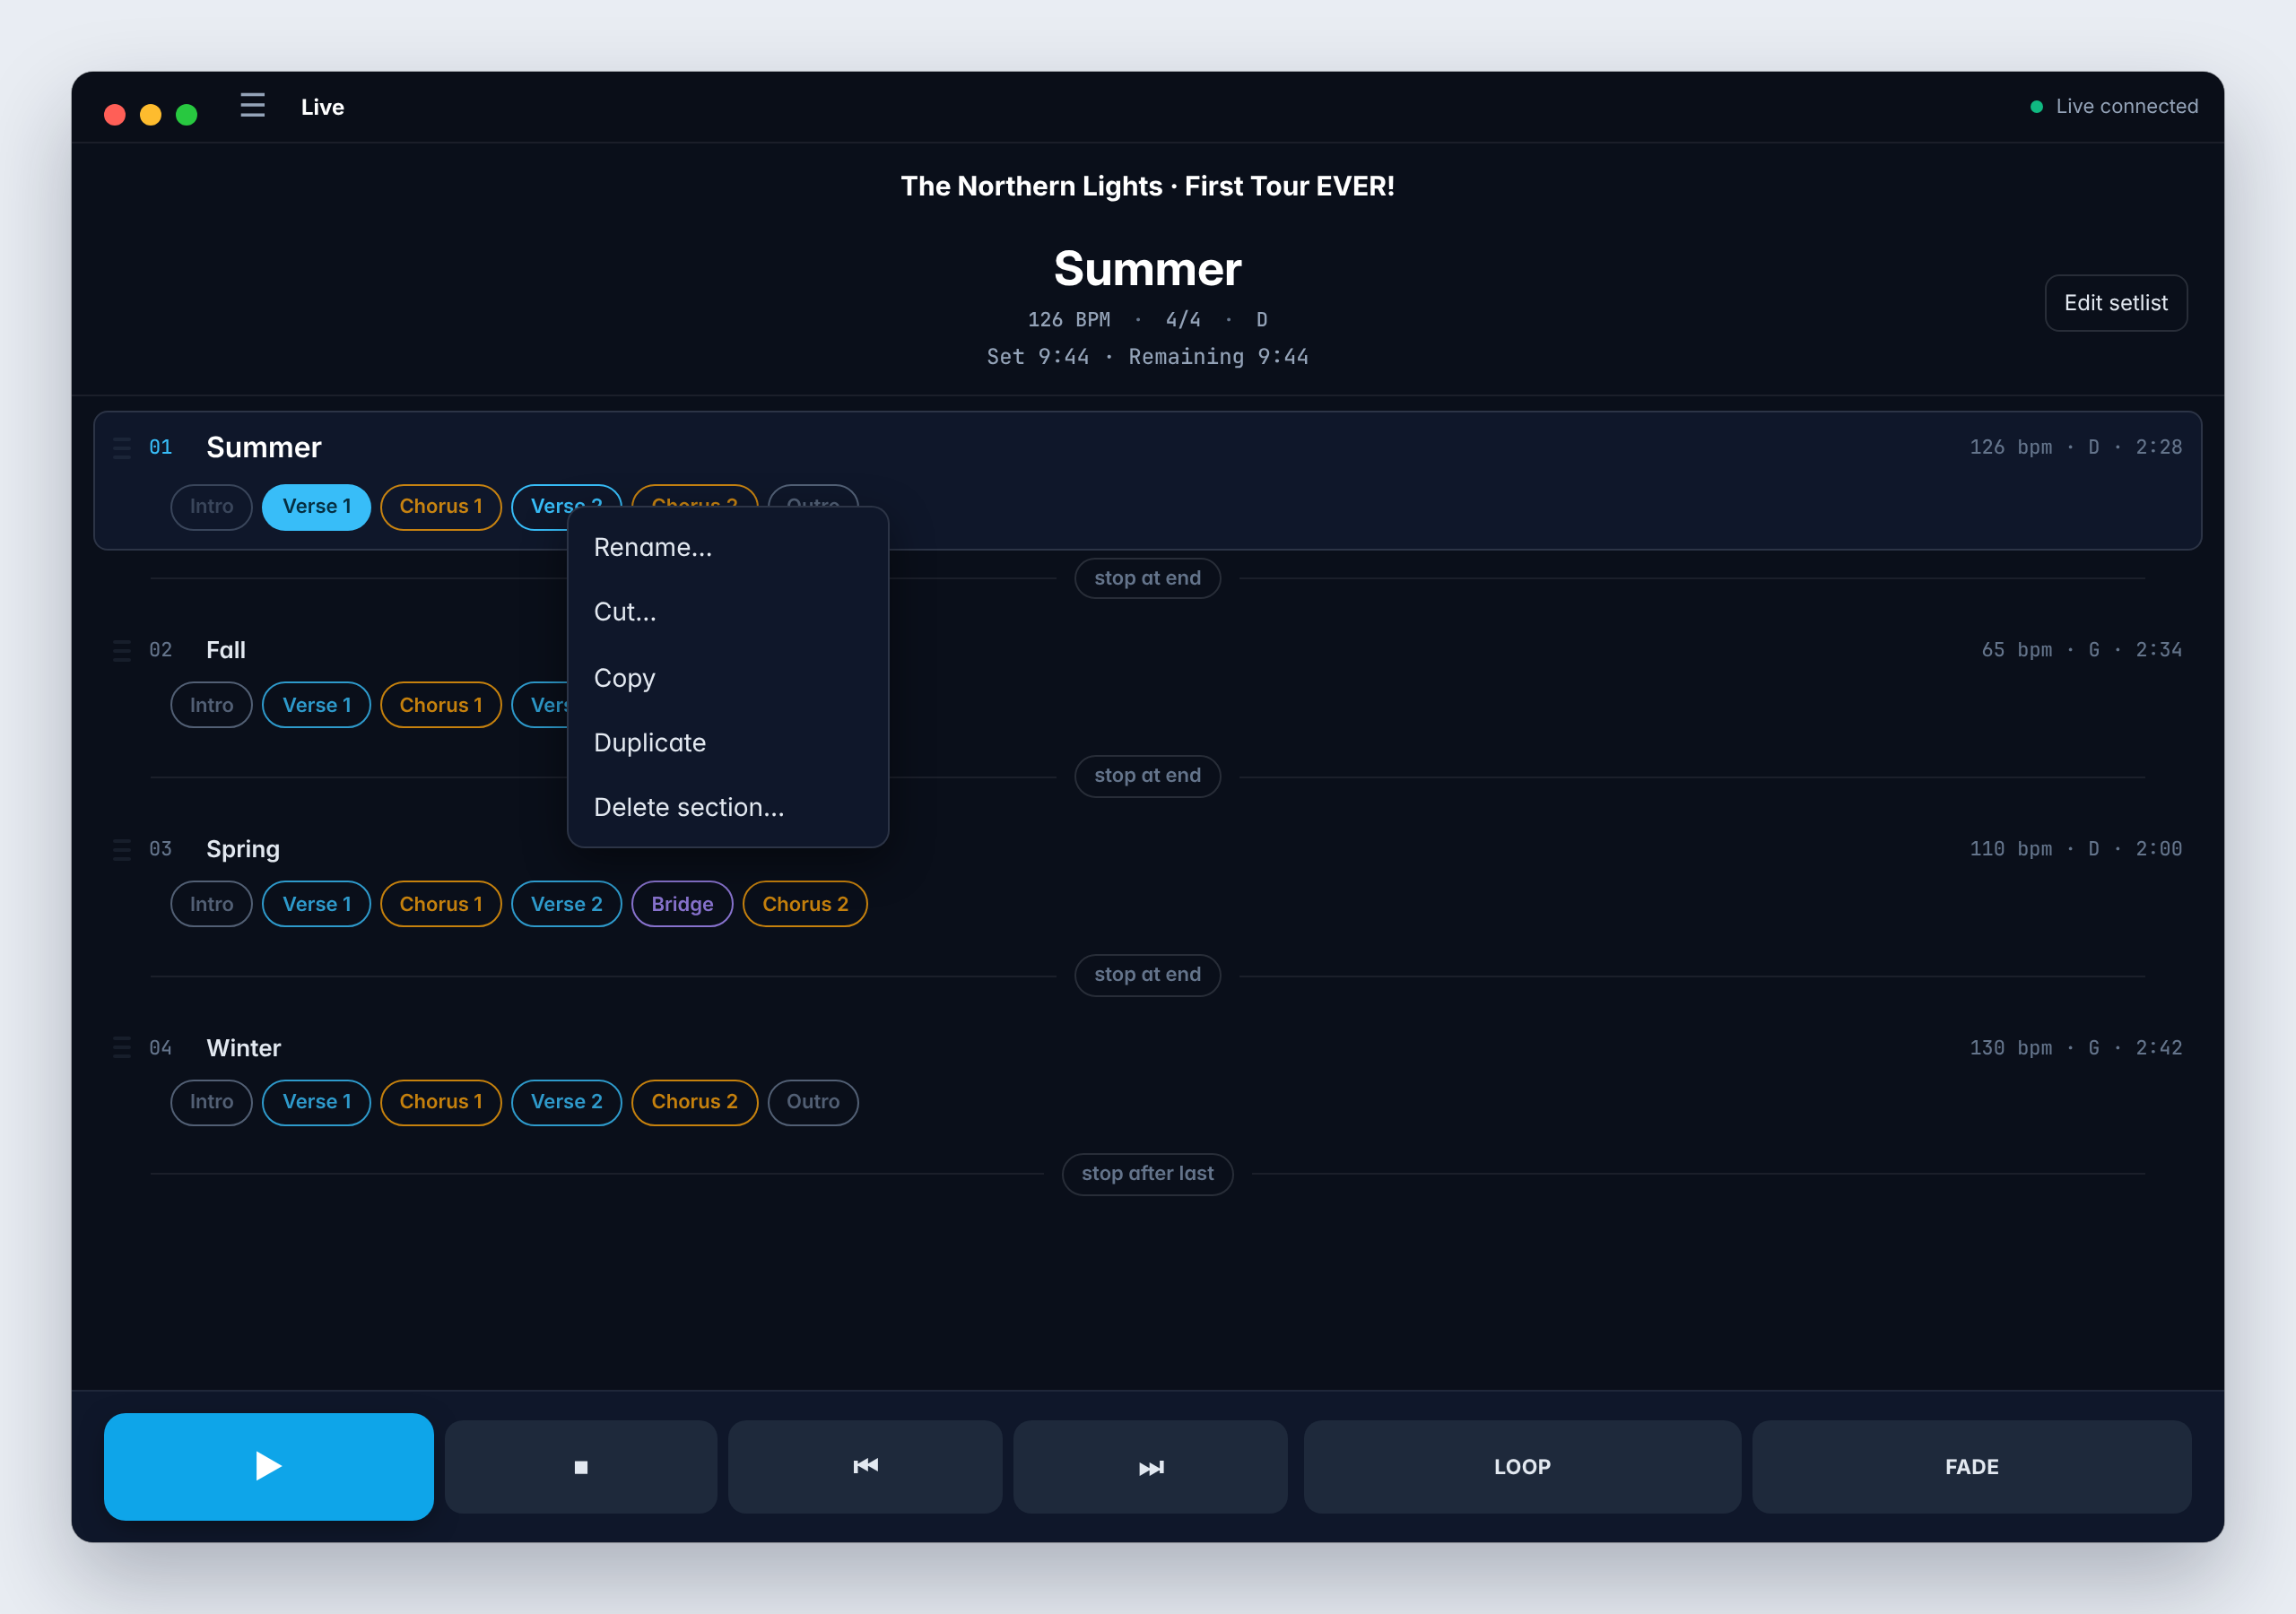
The change happens in Live straight away, and an Unsaved edits in Live banner lists what you've changed. To keep the changes, save the set in Live (⌘S in Live, or Save in Live from Pliris Remote's menu). To undo them, stop playback and click Revert to saved, which reopens the last saved set. Every unsaved change in Live is lost, not only these edits, so when Live asks to save, choose No. When you save, the Files app asks whether to update the song on Pliris, so your band gets the new arrangement too.
A few things to know:
- Stop playback first for anything that moves time (cut, paste, duplicate, delete). Renaming works any time.
- Allow Accessibility. Maestro uses Live's own Edit menu to move time, which needs Accessibility permission (see Set up Maestro with Ableton Live).
- It works on sets Pliris built. Open the set from Maestro or Files so the changes can come back to Pliris.
You can do the same from your phone: press and hold a section in Pliris Remote.
Control Maestro with a MIDI controller
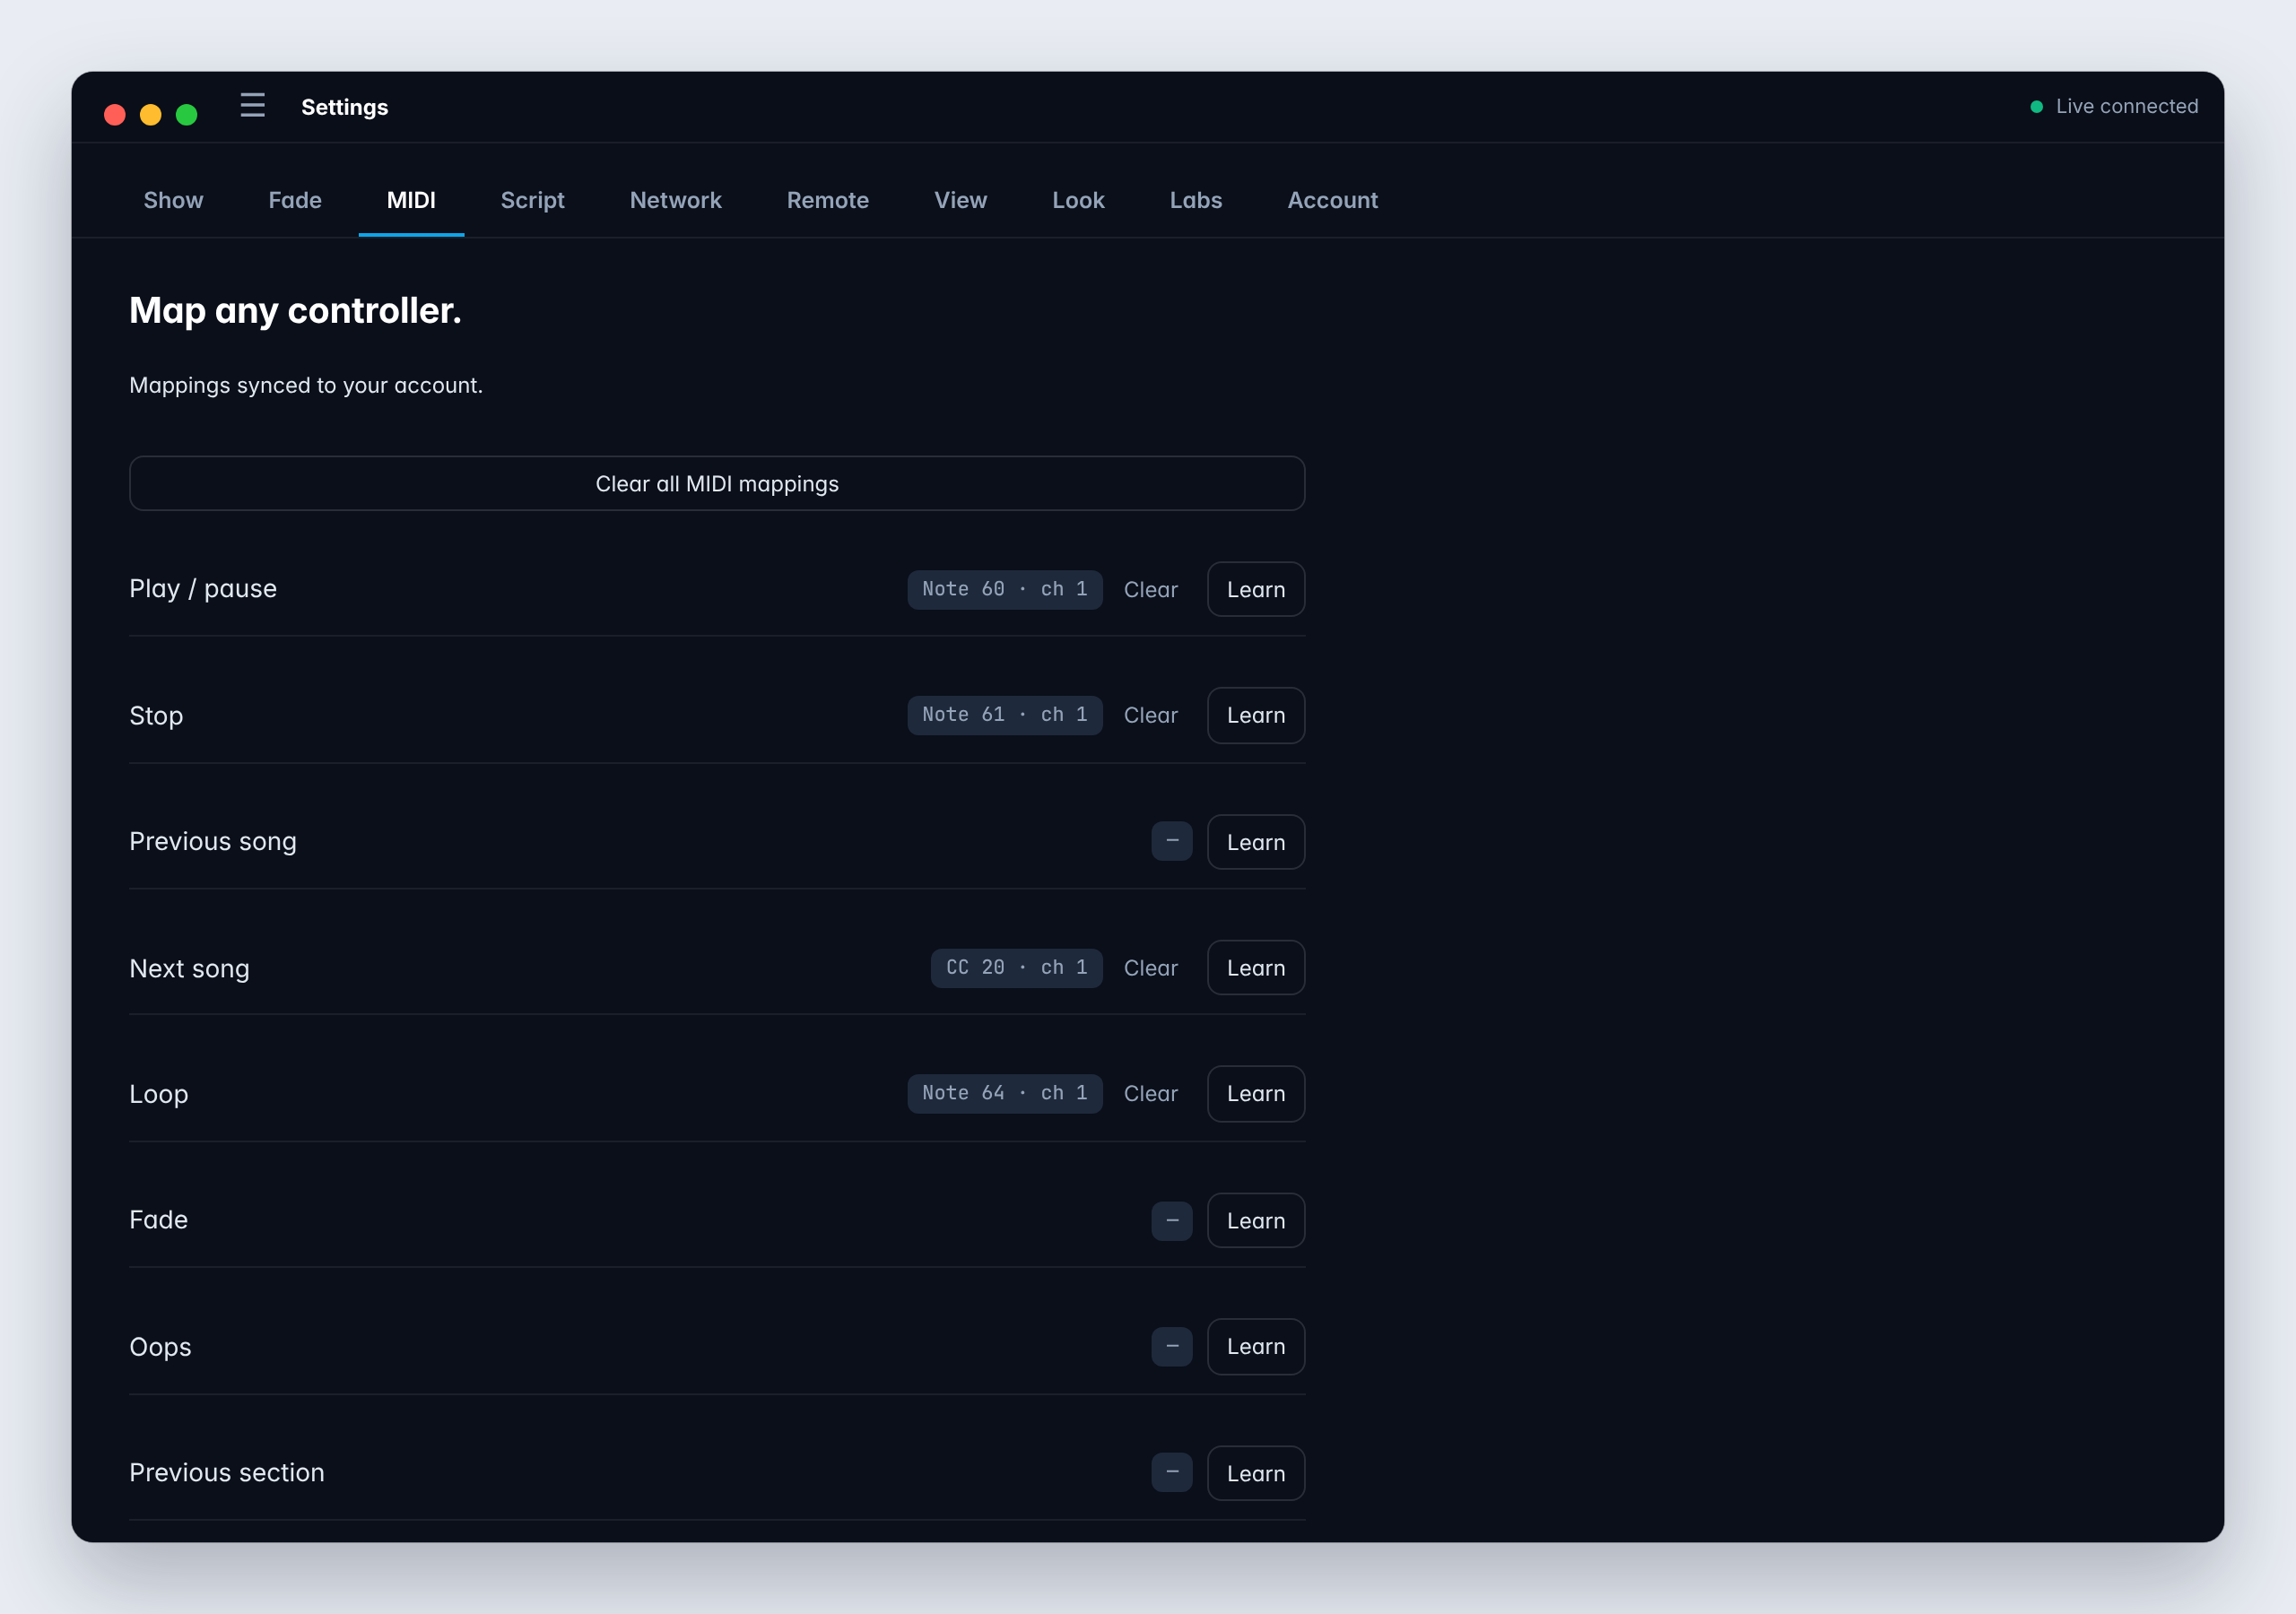
- Open Settings → MIDI.
- Click Learn next to an action, such as Play / pause or Next song.
- Press the pad, key or button on your controller. Maestro shows what it heard, for example Note 60 · ch 1.
Repeat for each action. Clear removes one mapping, and Clear all MIDI mappings starts over. Mappings are saved to your Pliris account, so they follow you to another Mac.
Control Maestro from your phone
Run the show from the stage with Pliris Remote on your iPhone or iPad. For everything Remote can do, see Pliris Remote.
- Put the phone on the same network as the playback computer. It can be wired or Wi-Fi (the playback computer can be plugged into your show router while the phone joins its Wi-Fi), and it doesn't need the internet. Remote talks to Maestro over your local network only.
- Open Pliris Remote. Maestro shows up in its list on its own, with no address to type. Tap it.
- If you set a remote password, enter it.
Manage phones under Settings → Remote. The password is optional: leave it empty and phones join with one tap; set one and they have to enter it. Devices shows how many phones are connected, and Disconnect all signs them all out.
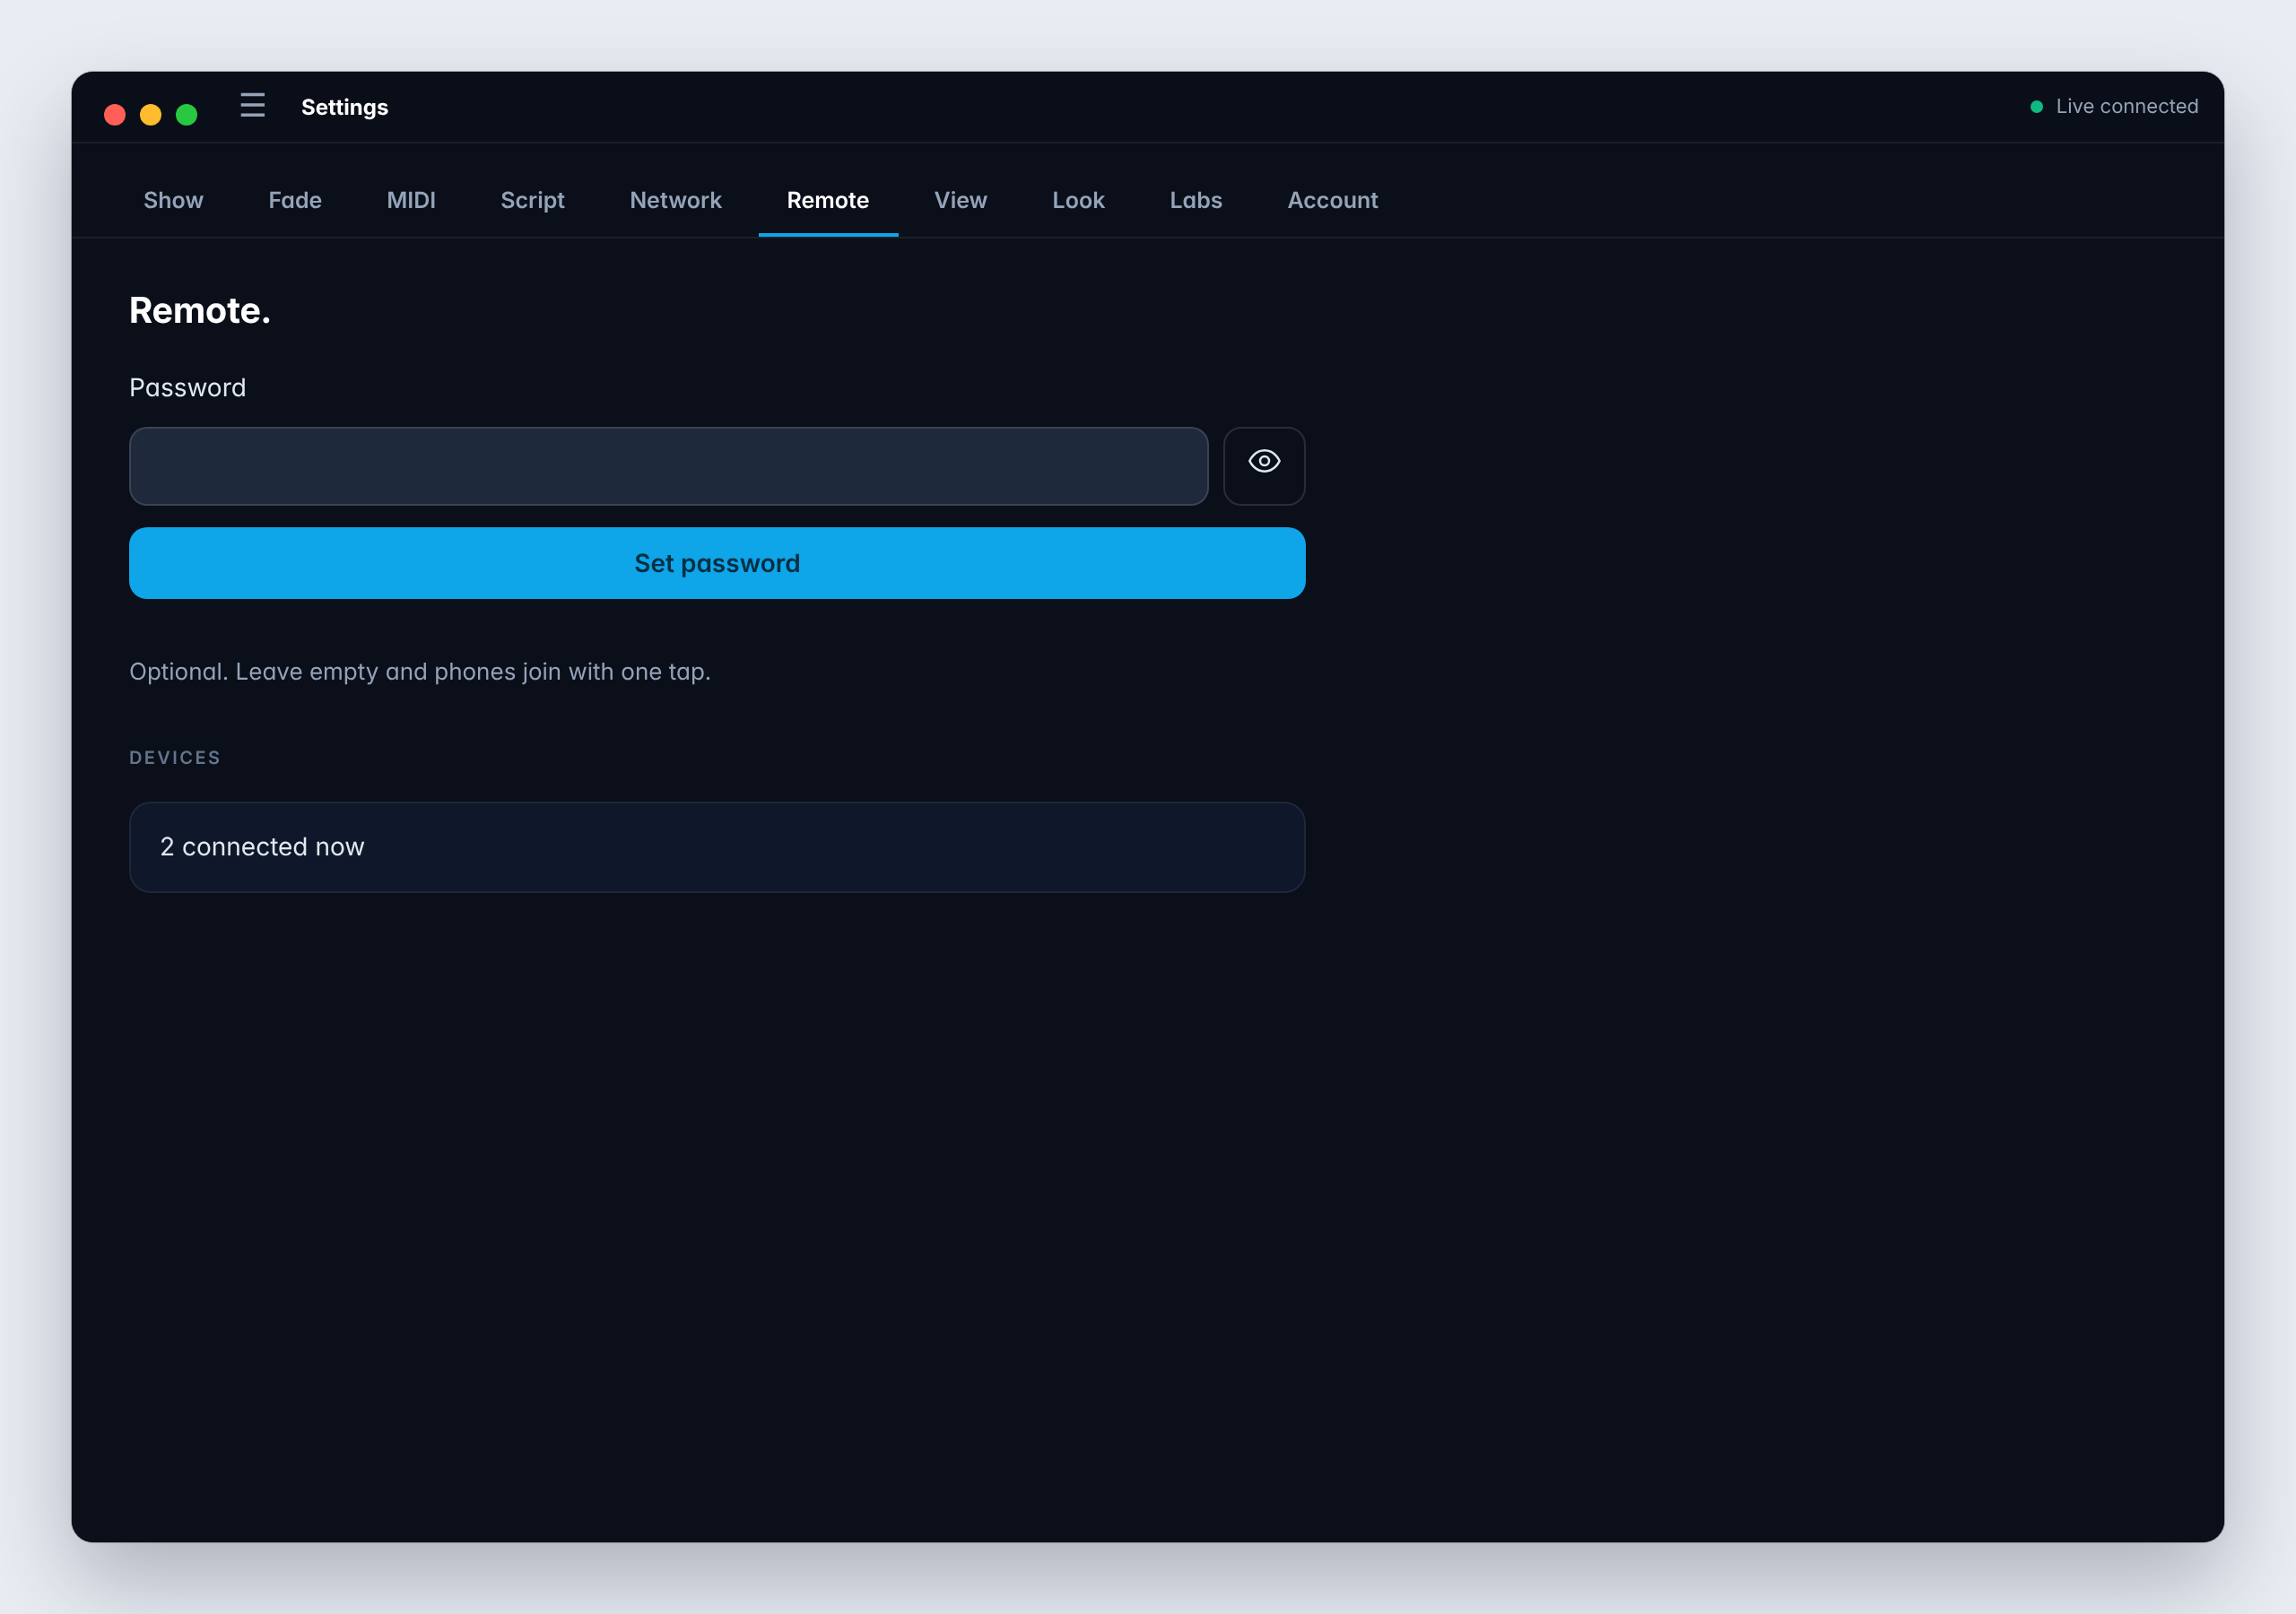
Pro tip: Set a remote password whenever you share the network with people outside your team, such as on venue Wi-Fi.
Pliris Network: Lyrics, Video and Charts follow along
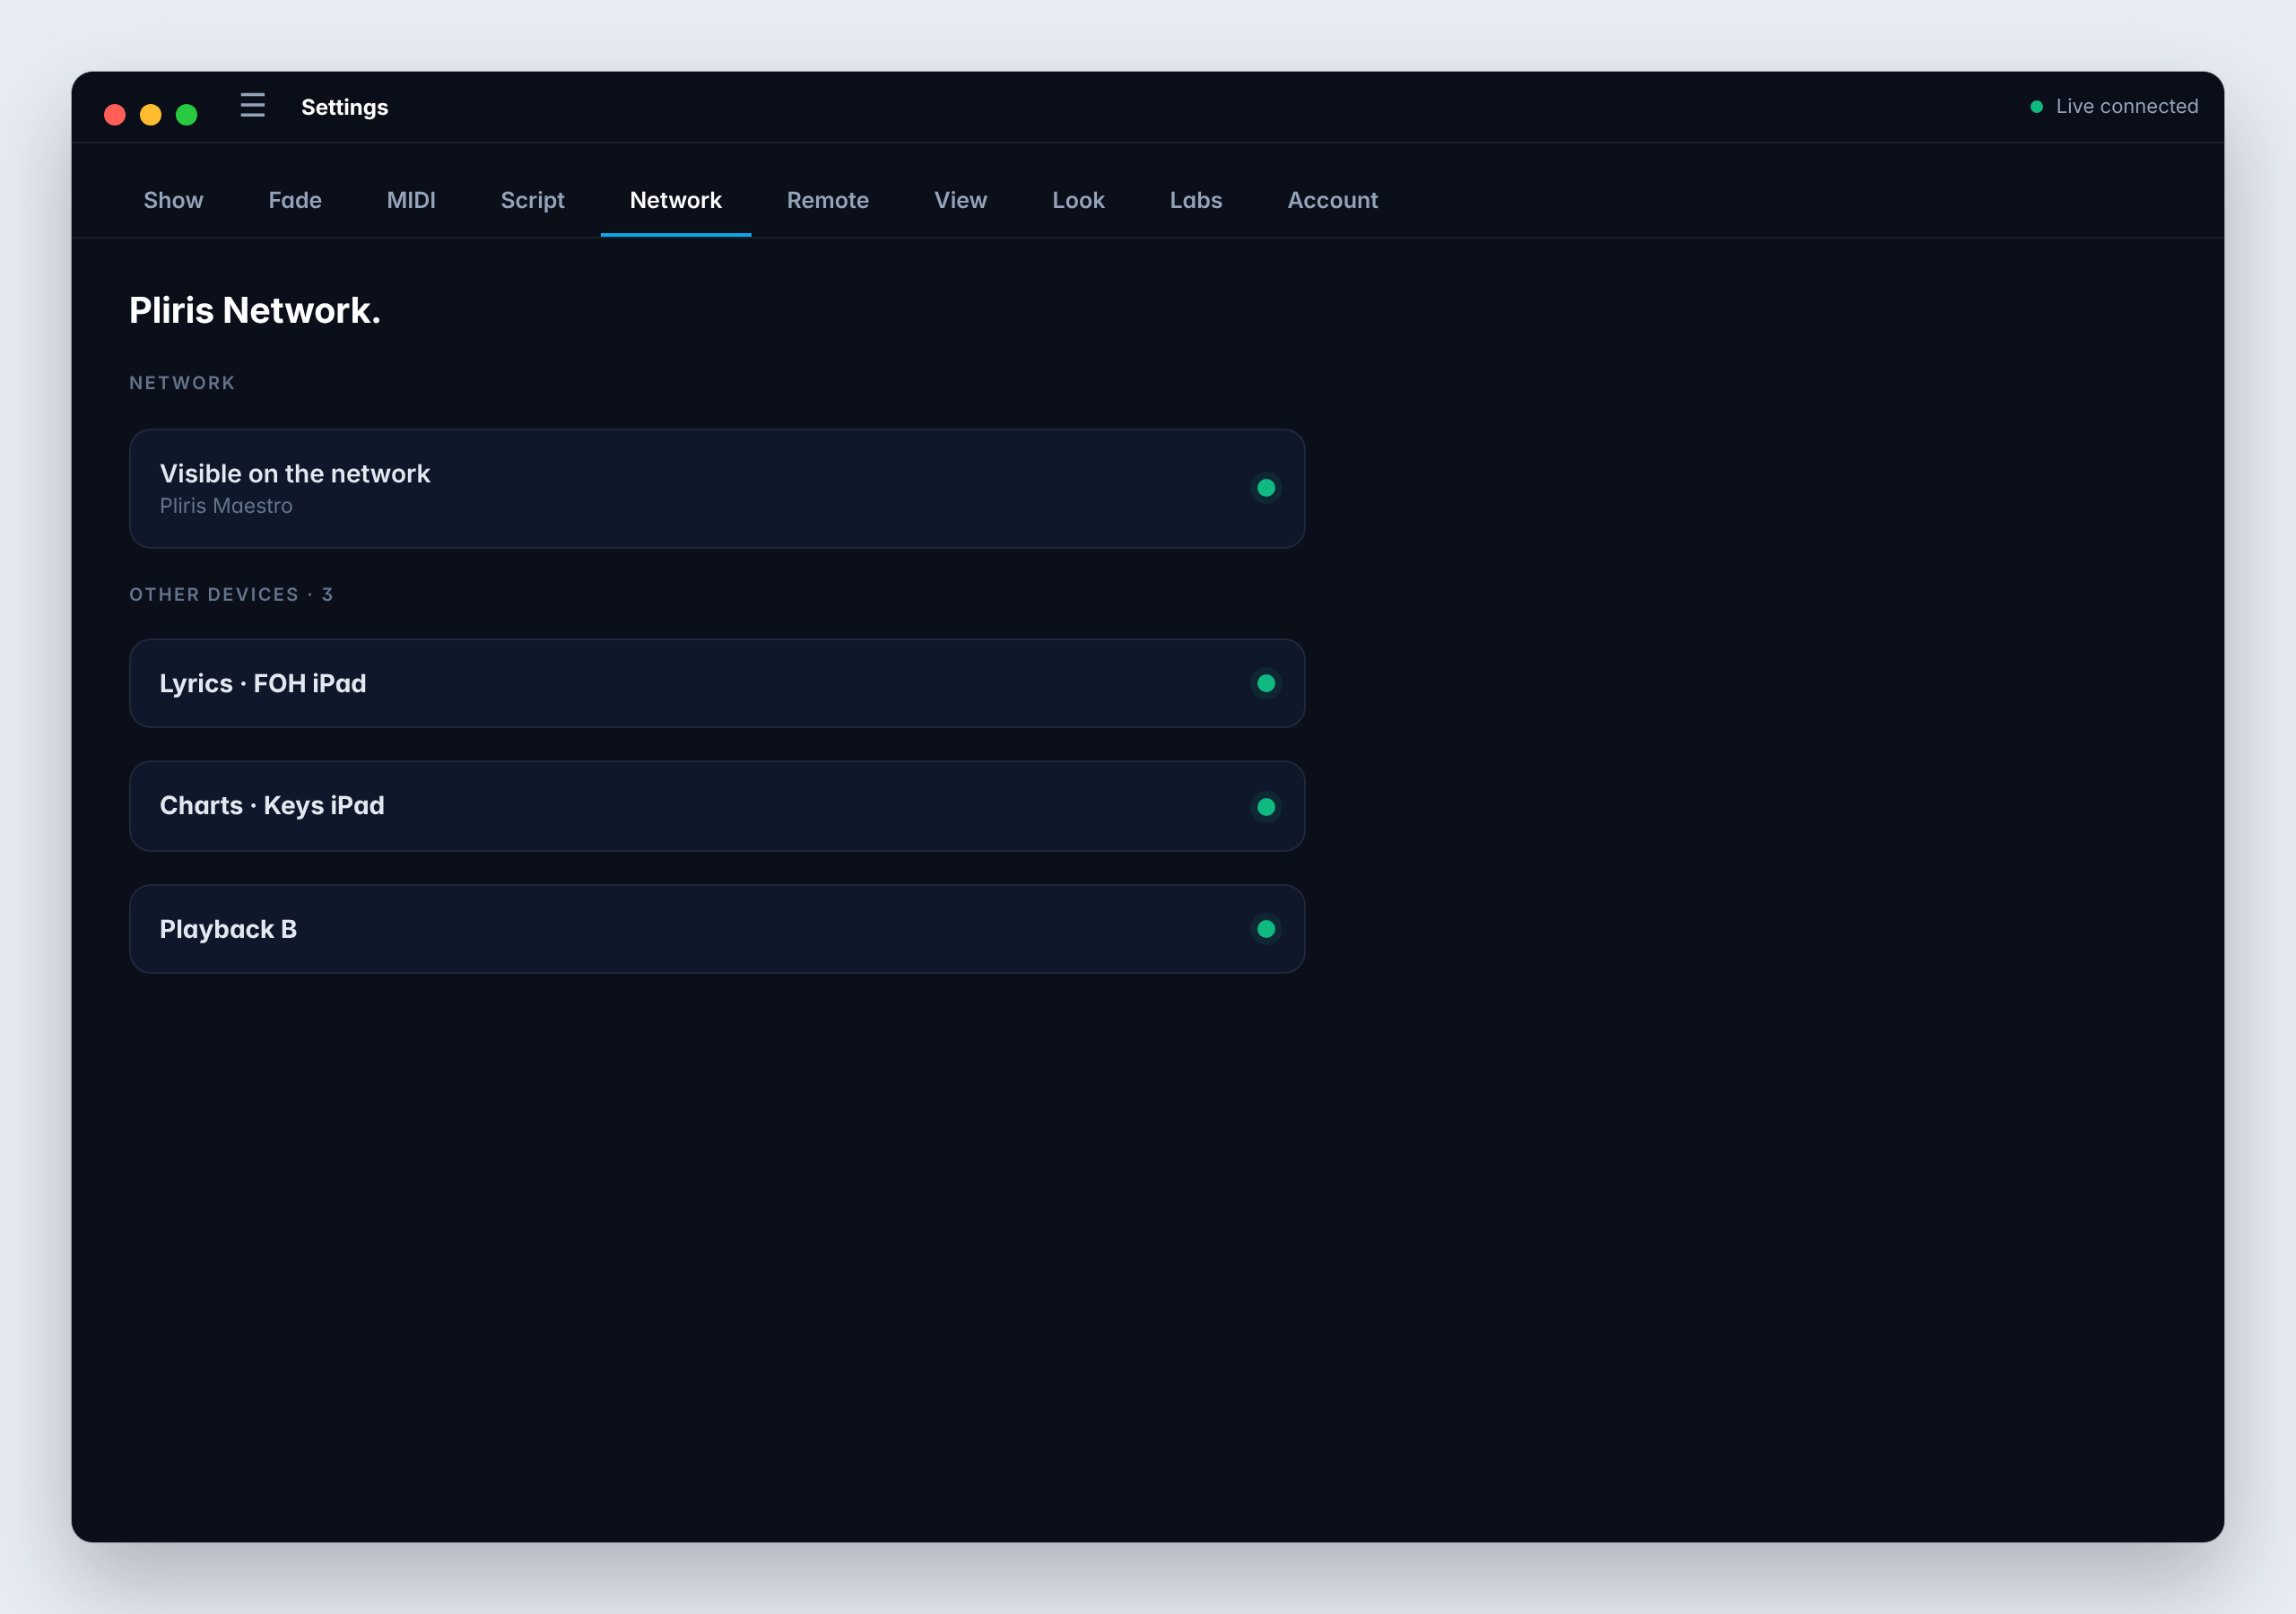
Maestro is the source of the show on Pliris Network. As Live plays, it shares tonight's setlist and the song and section that are playing, and the other Pliris apps on the network follow: Lyrics scrolls, Video plays in time, and Charts highlights the current section on every iPad. When you load a setlist, they offer to open it too.
Pliris Network is always on in Maestro. Open Settings → Network to check it: Visible on the network means this Mac is on it, and Other devices lists every app that's listening.
Choose a view
Maestro fits around Ableton the way you work. Open Settings → View (⌘3) and pick a layout. Switch on Always on top to keep Maestro in front of Live in any of them, and turn off Show song sections if you only want song names.
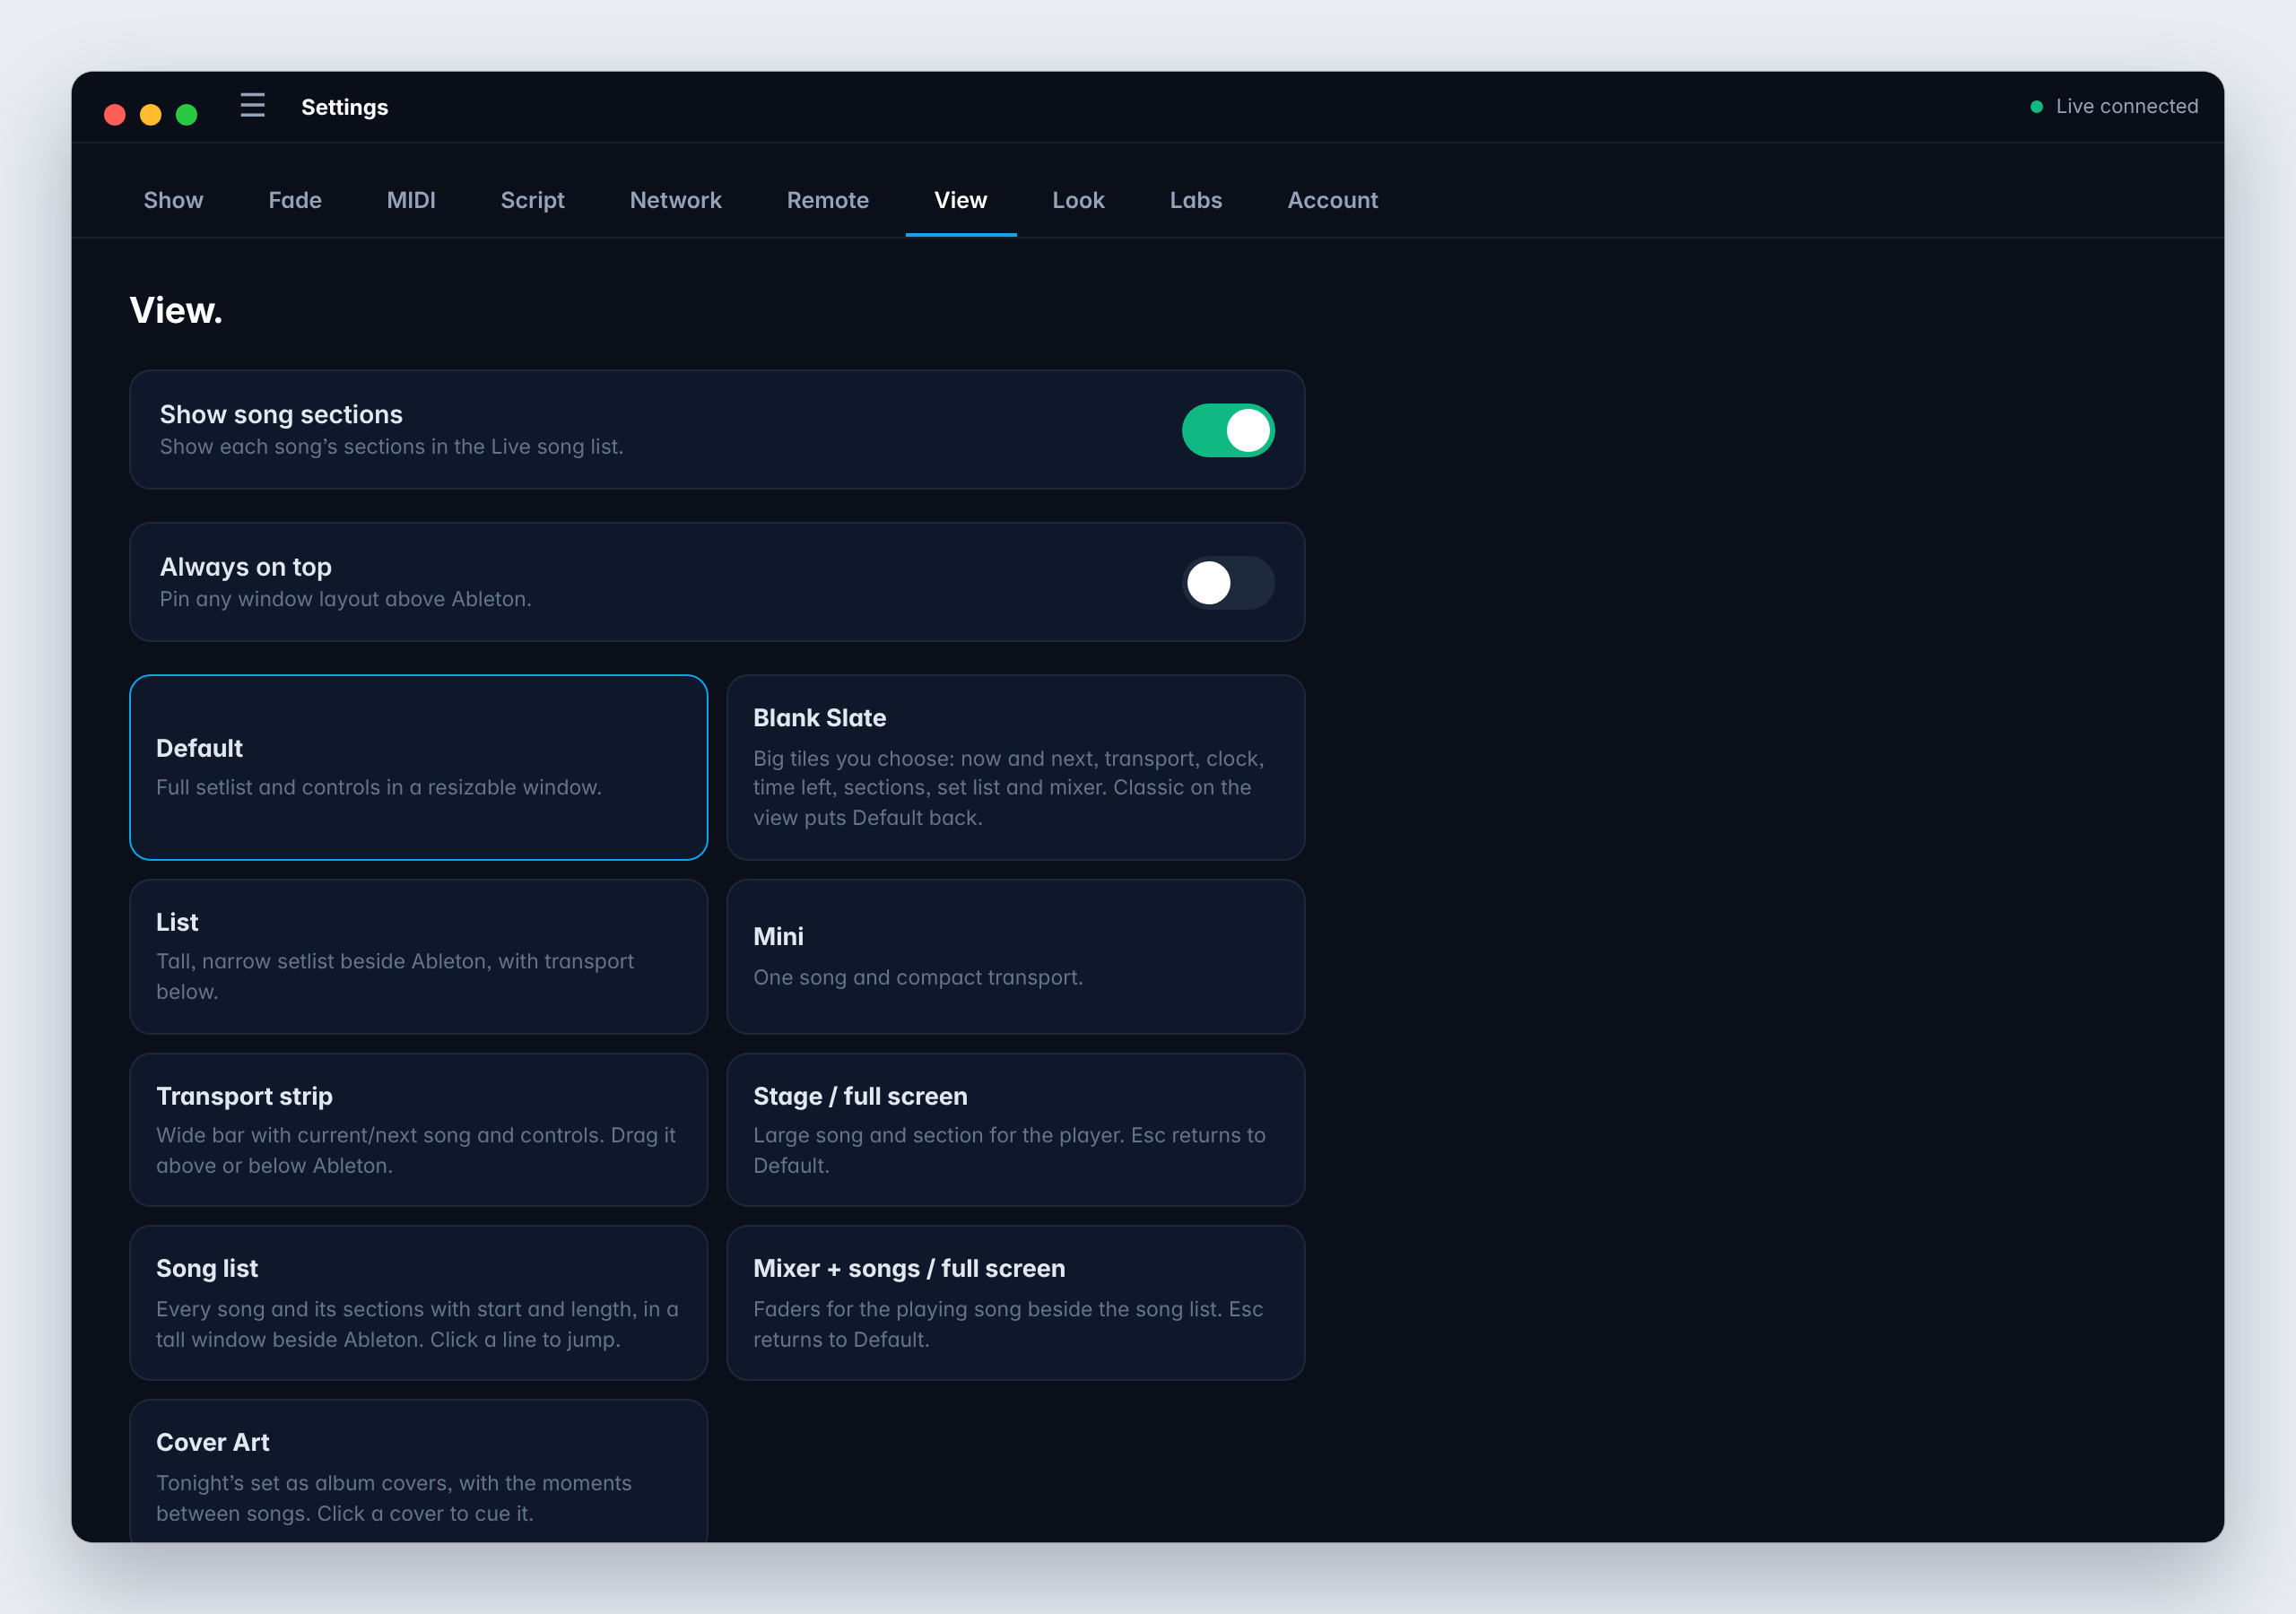
Default. The full setlist with every section and the transport, in a window you can resize. It's the view used throughout this article.
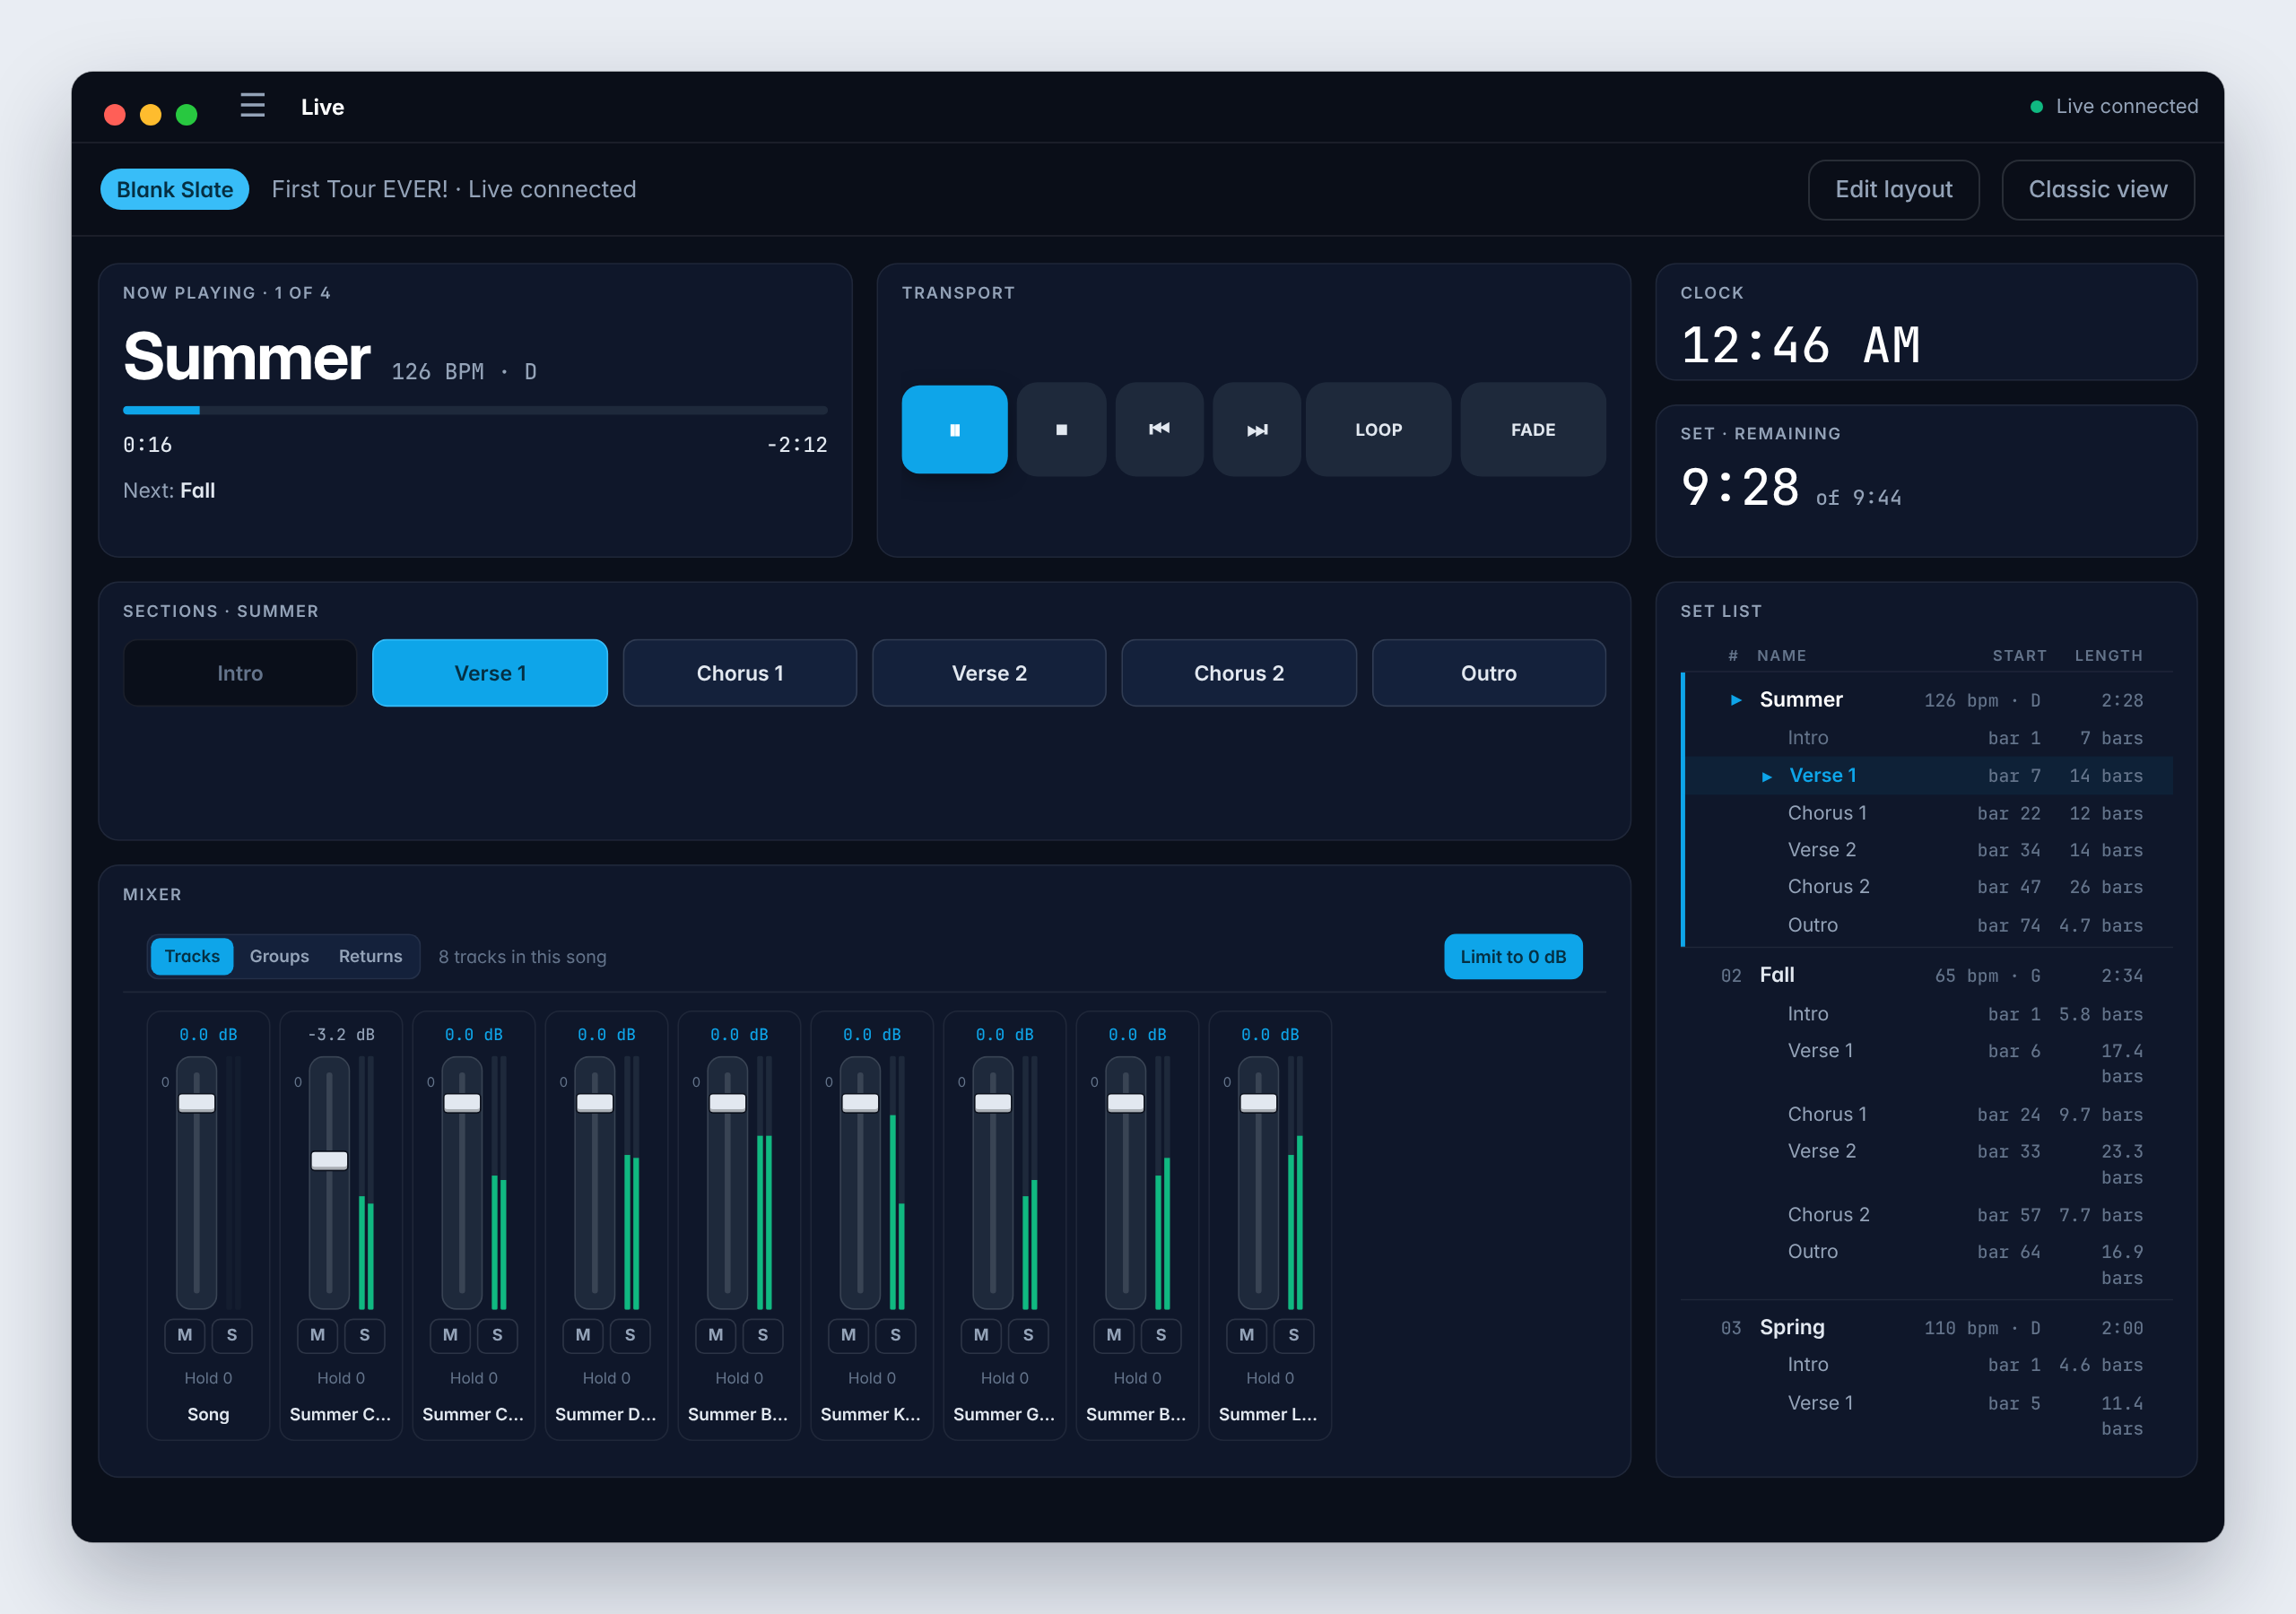
Blank Slate. Big tiles you choose and arrange: now and next, the transport, a clock, time left in the set, the song's sections, the set list and the mixer. Click Edit layout to change the tiles, and Classic view to go back to Default.
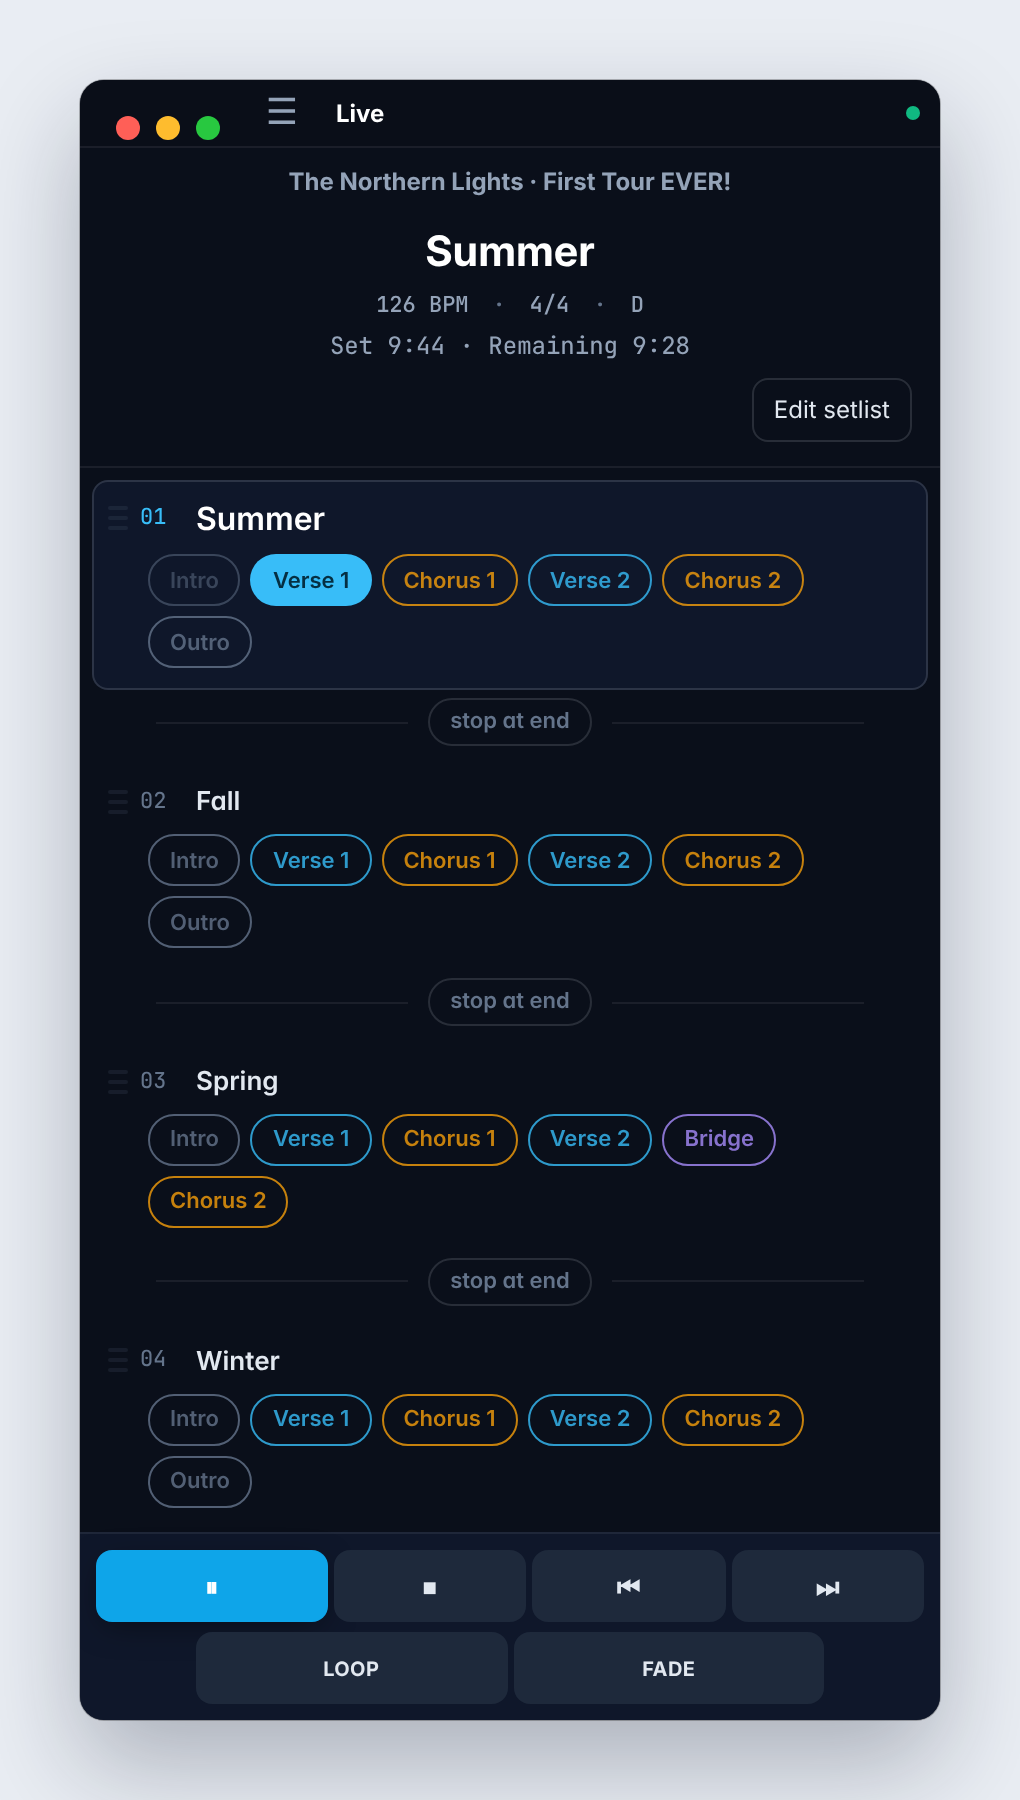
List. A tall, narrow setlist that sits beside Ableton, with the transport below.
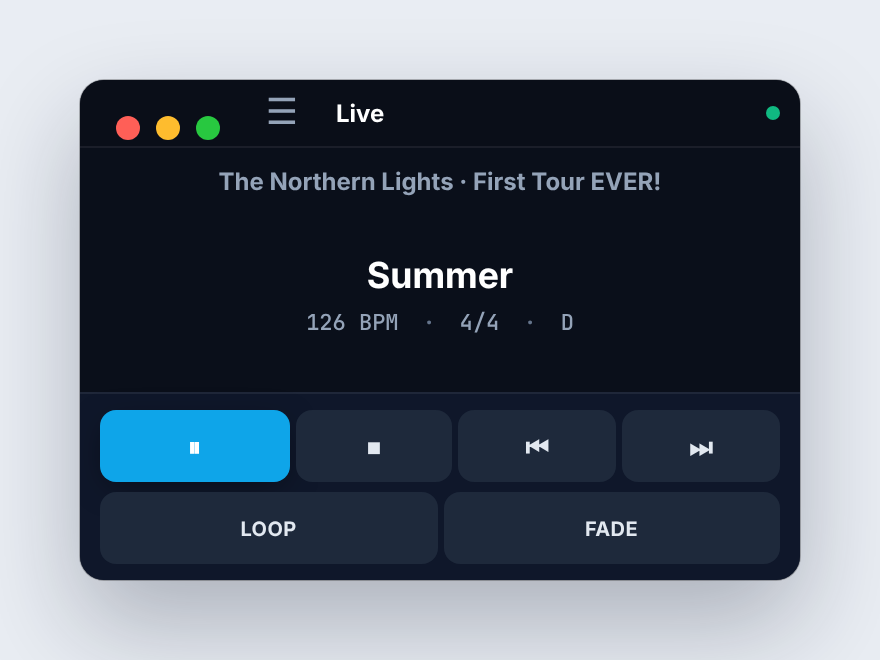
Mini. Just the current song and a compact transport, in a small window you can tuck in a corner.
Transport strip. A wide bar with the current and next song and the controls. Drag it above or below Ableton.

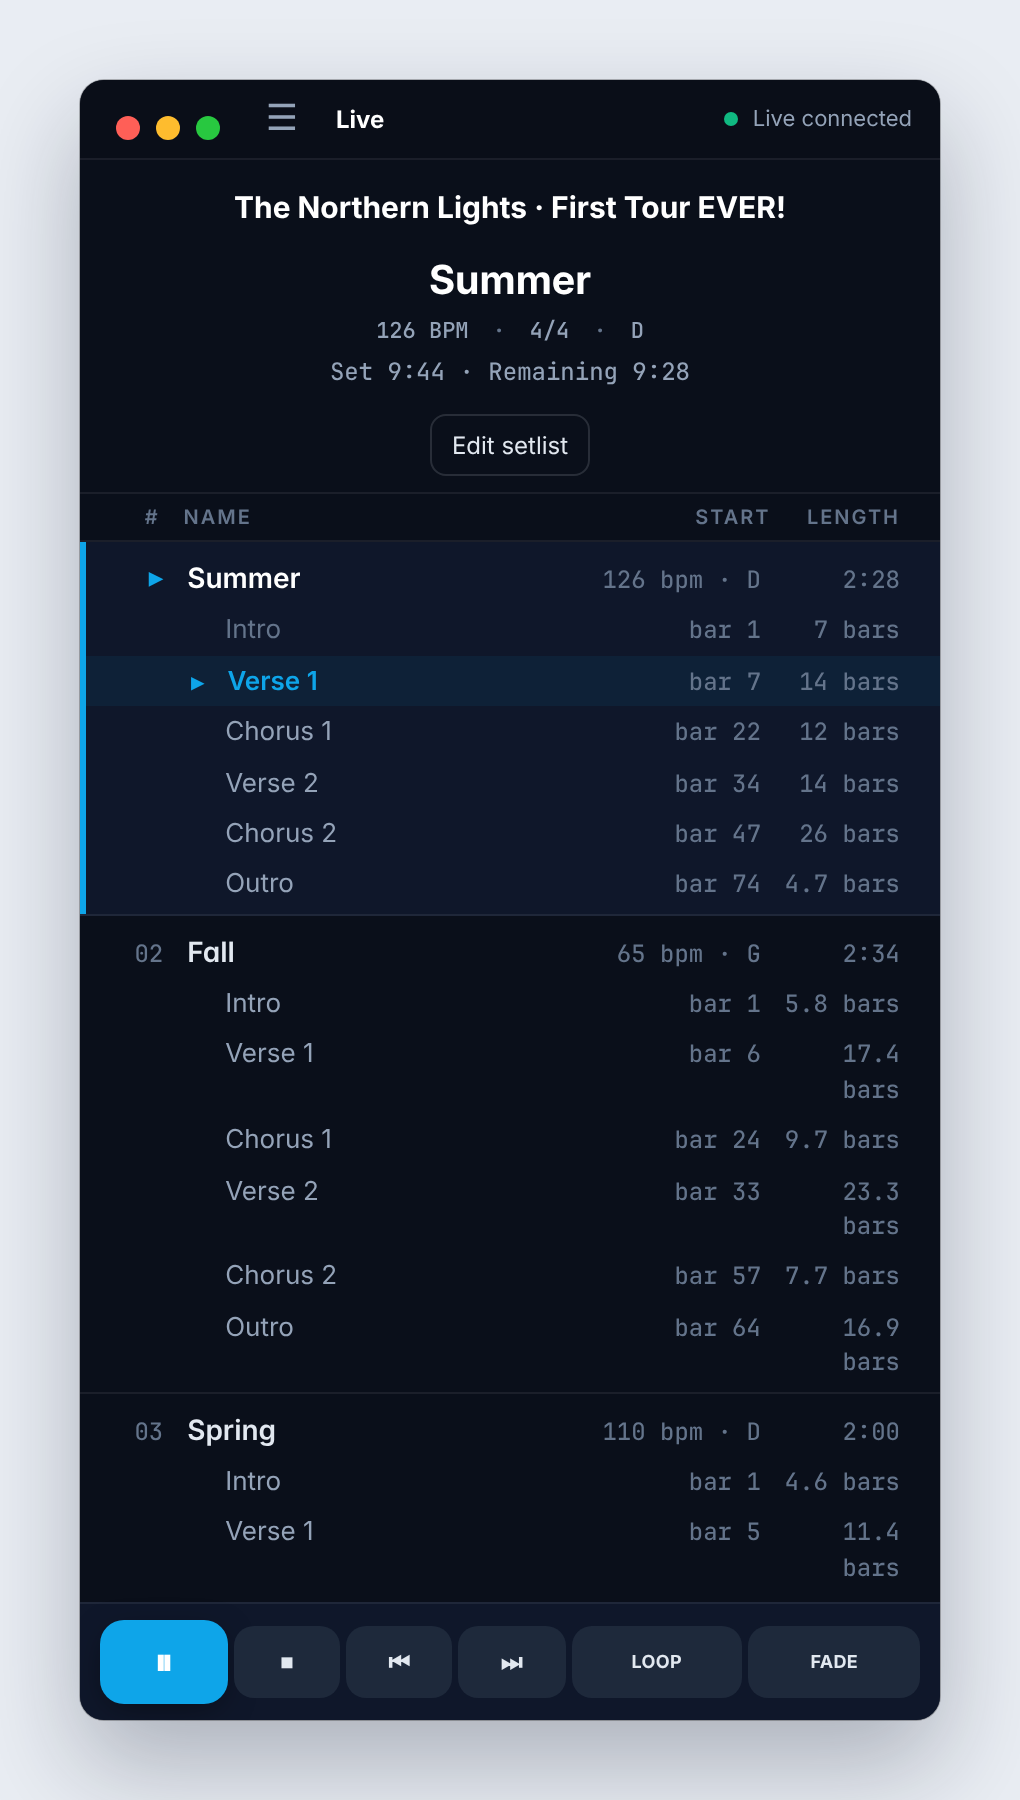
Song list. Every song and its sections with where each starts and how long it is, in a tall window beside Ableton. Click a line to jump there.
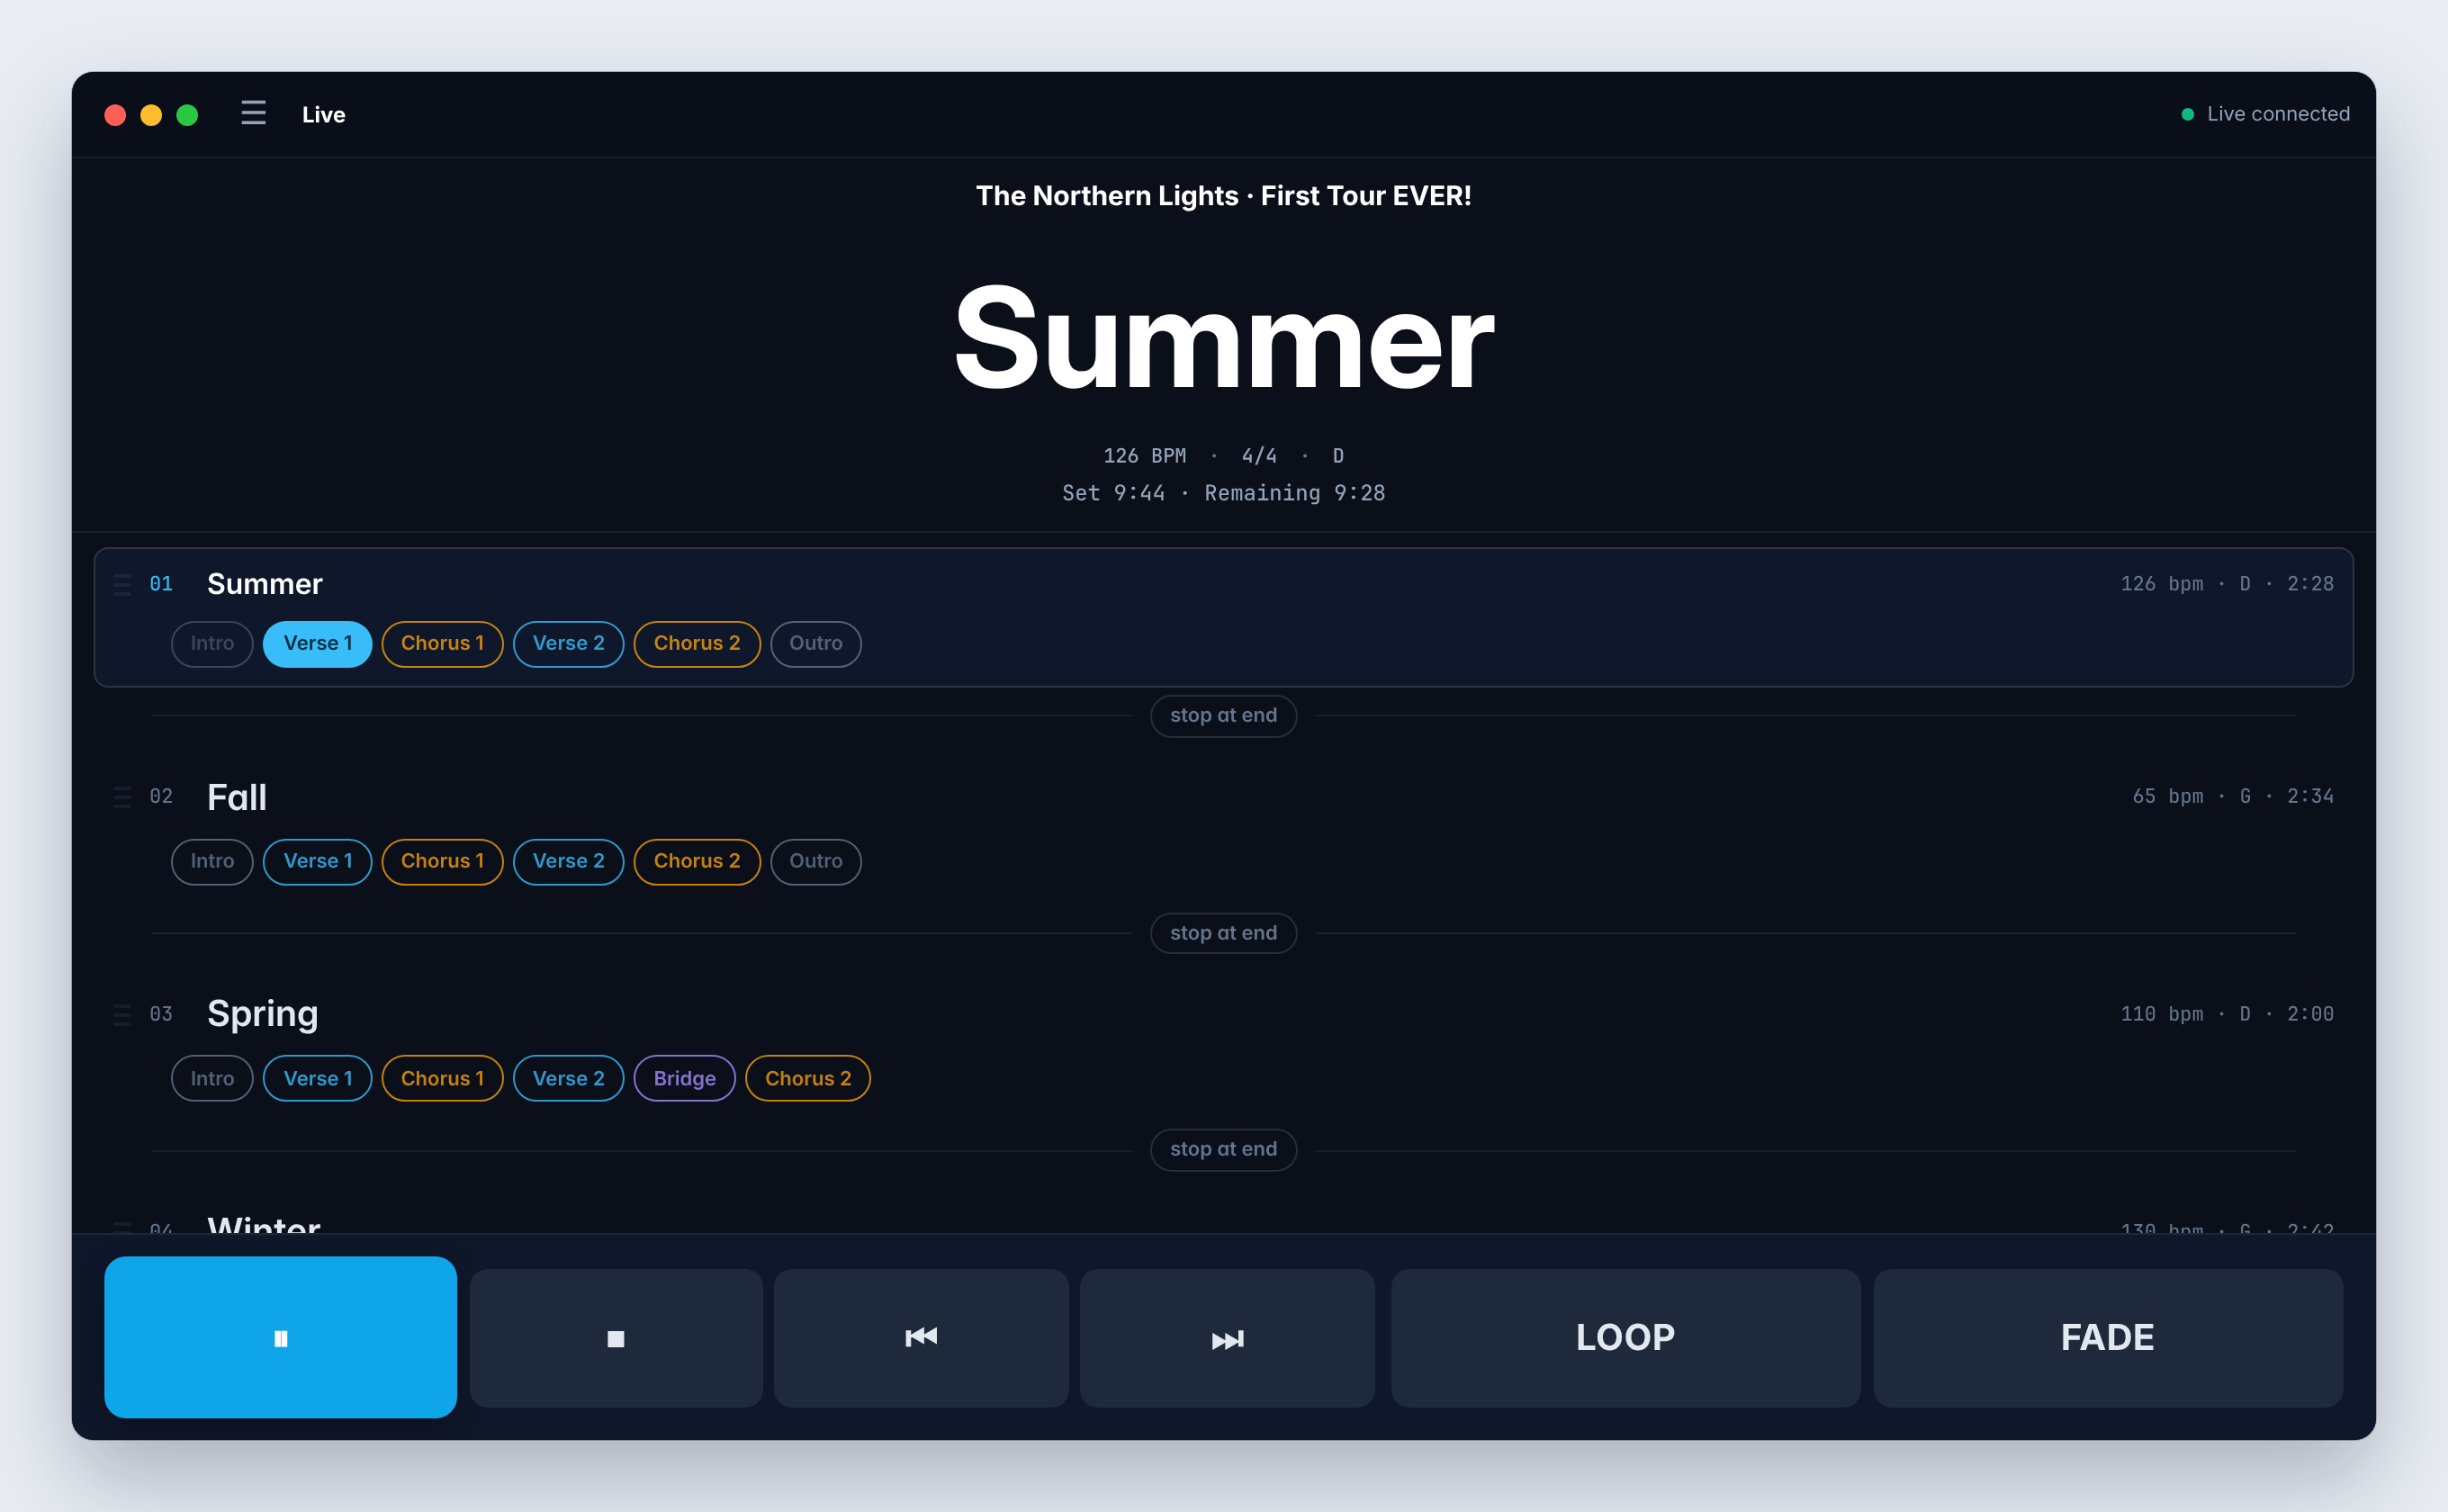
Stage / full screen. A large song name and section, easy to read from across the stage. Press Esc to go back to Default.
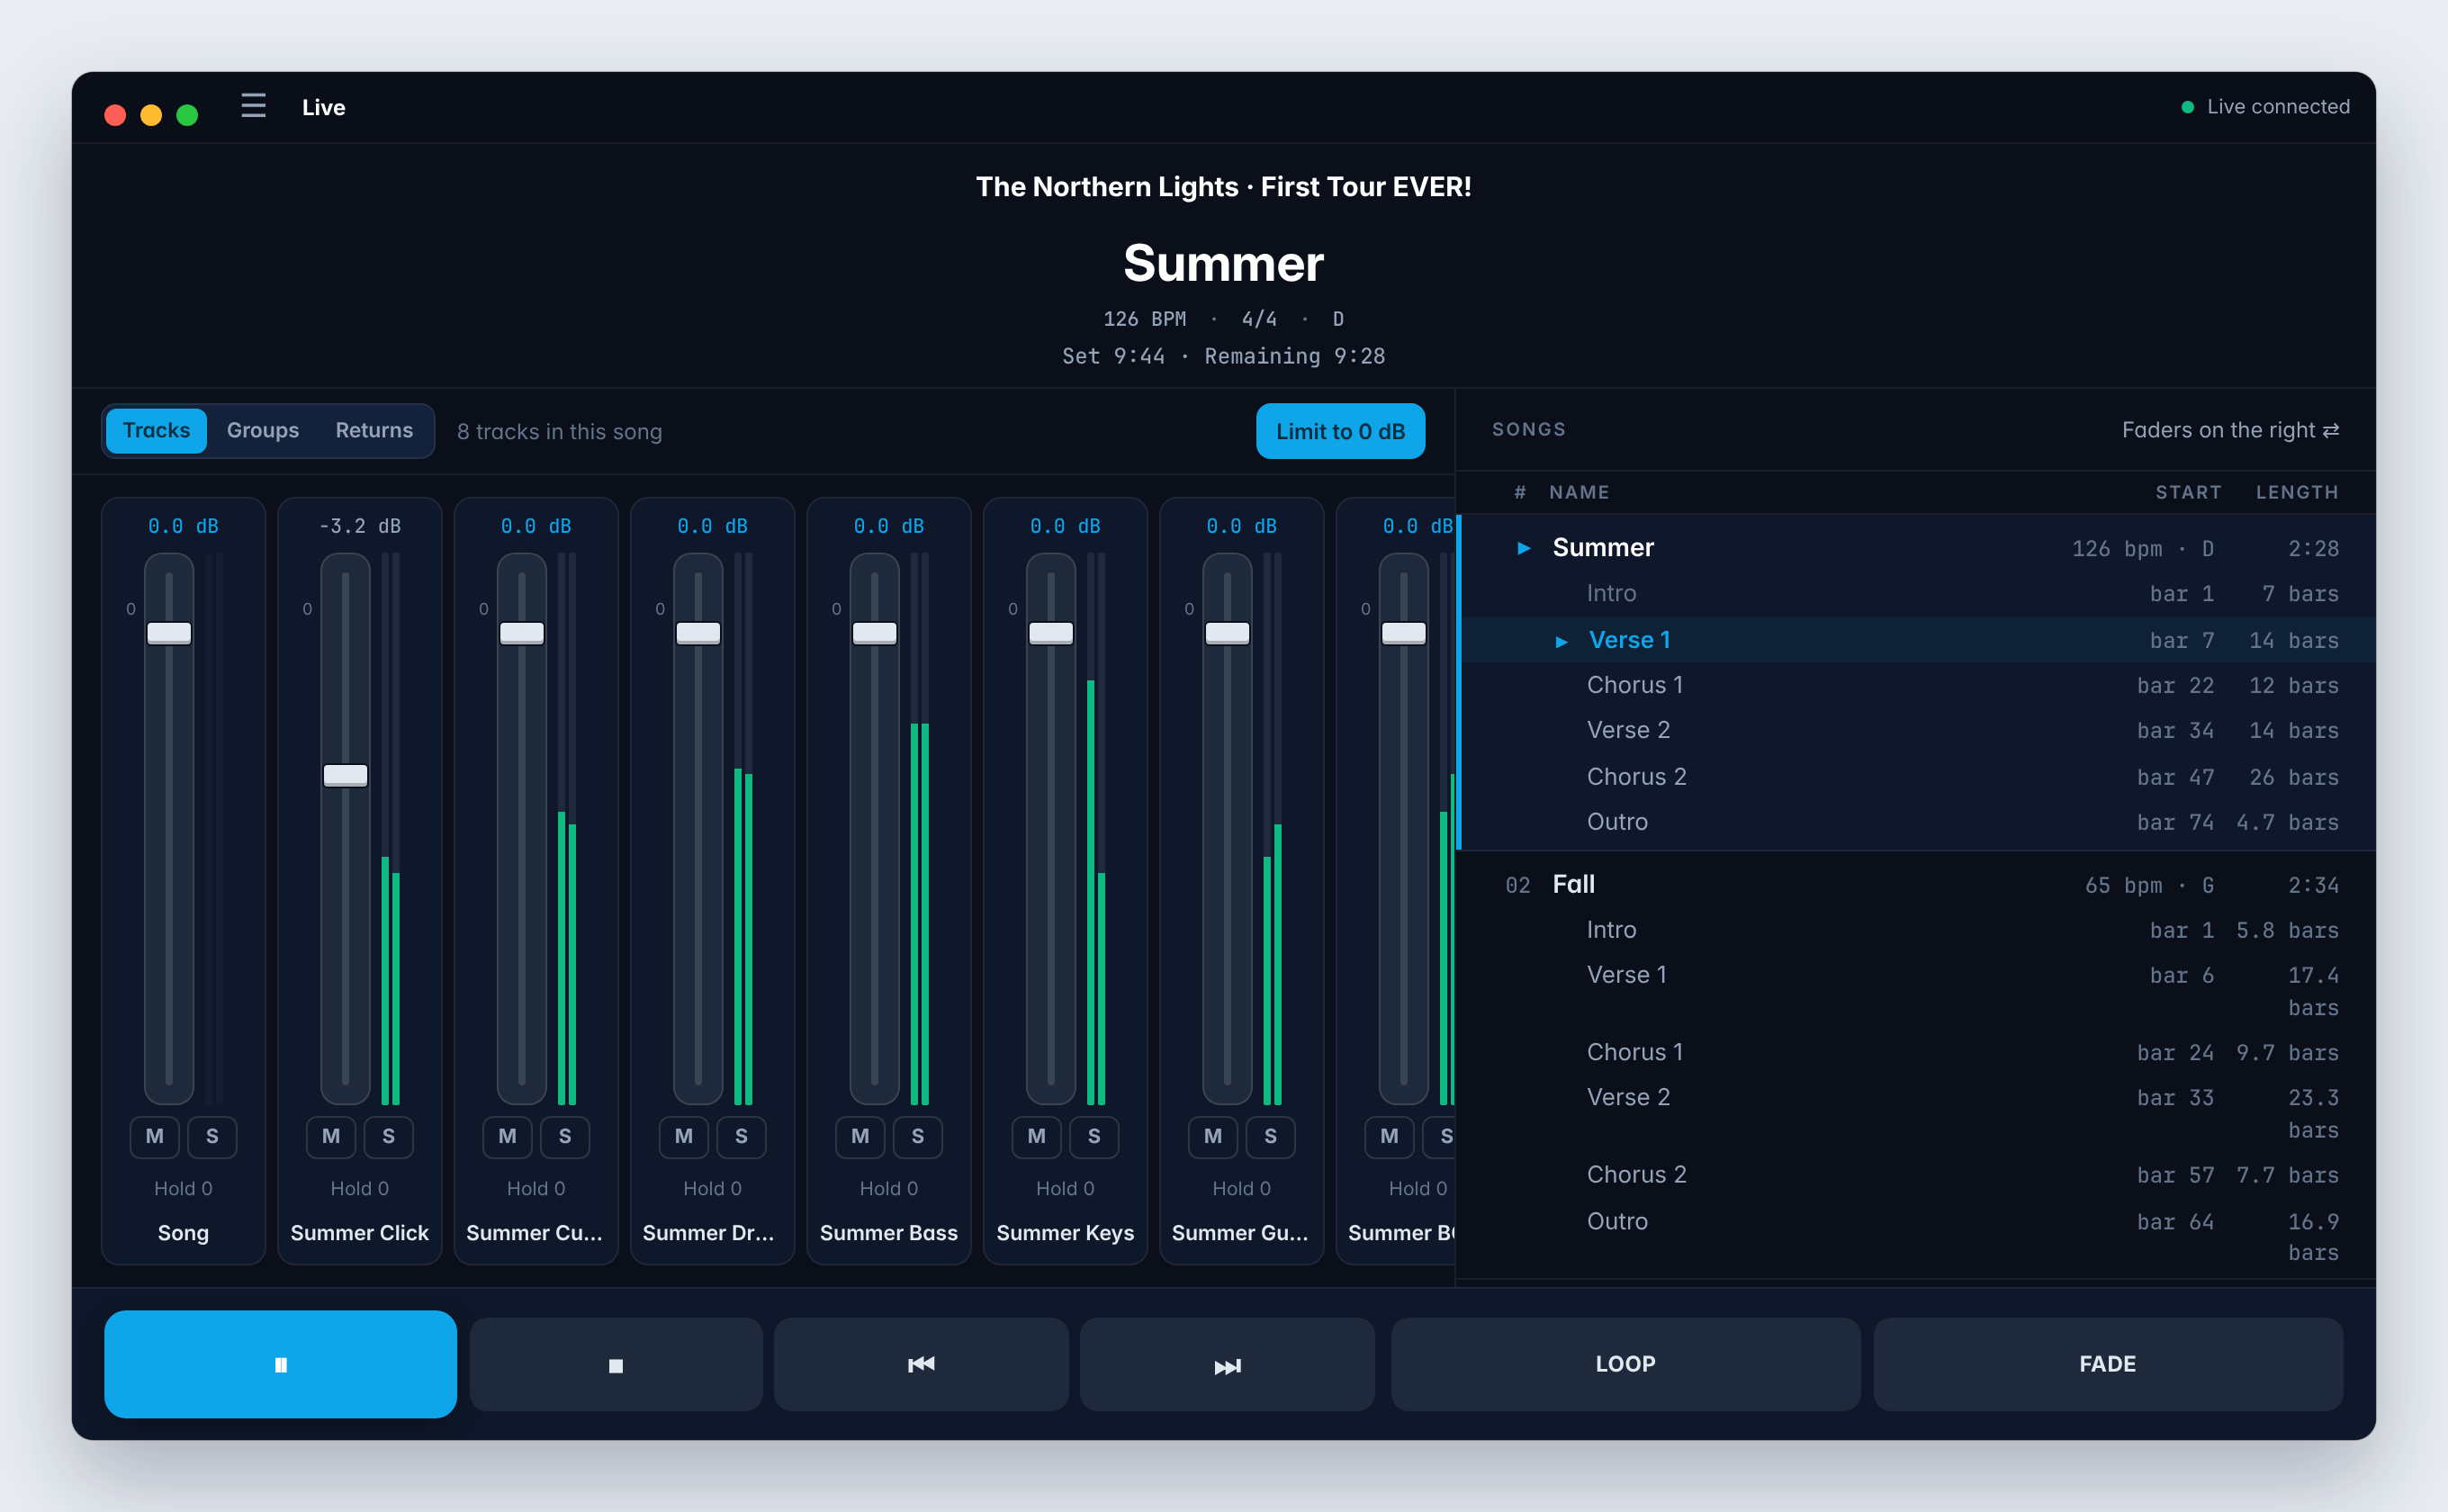
Mixer + songs. Full screen, with faders for the playing song's tracks beside the song list. Press Esc to go back to Default.
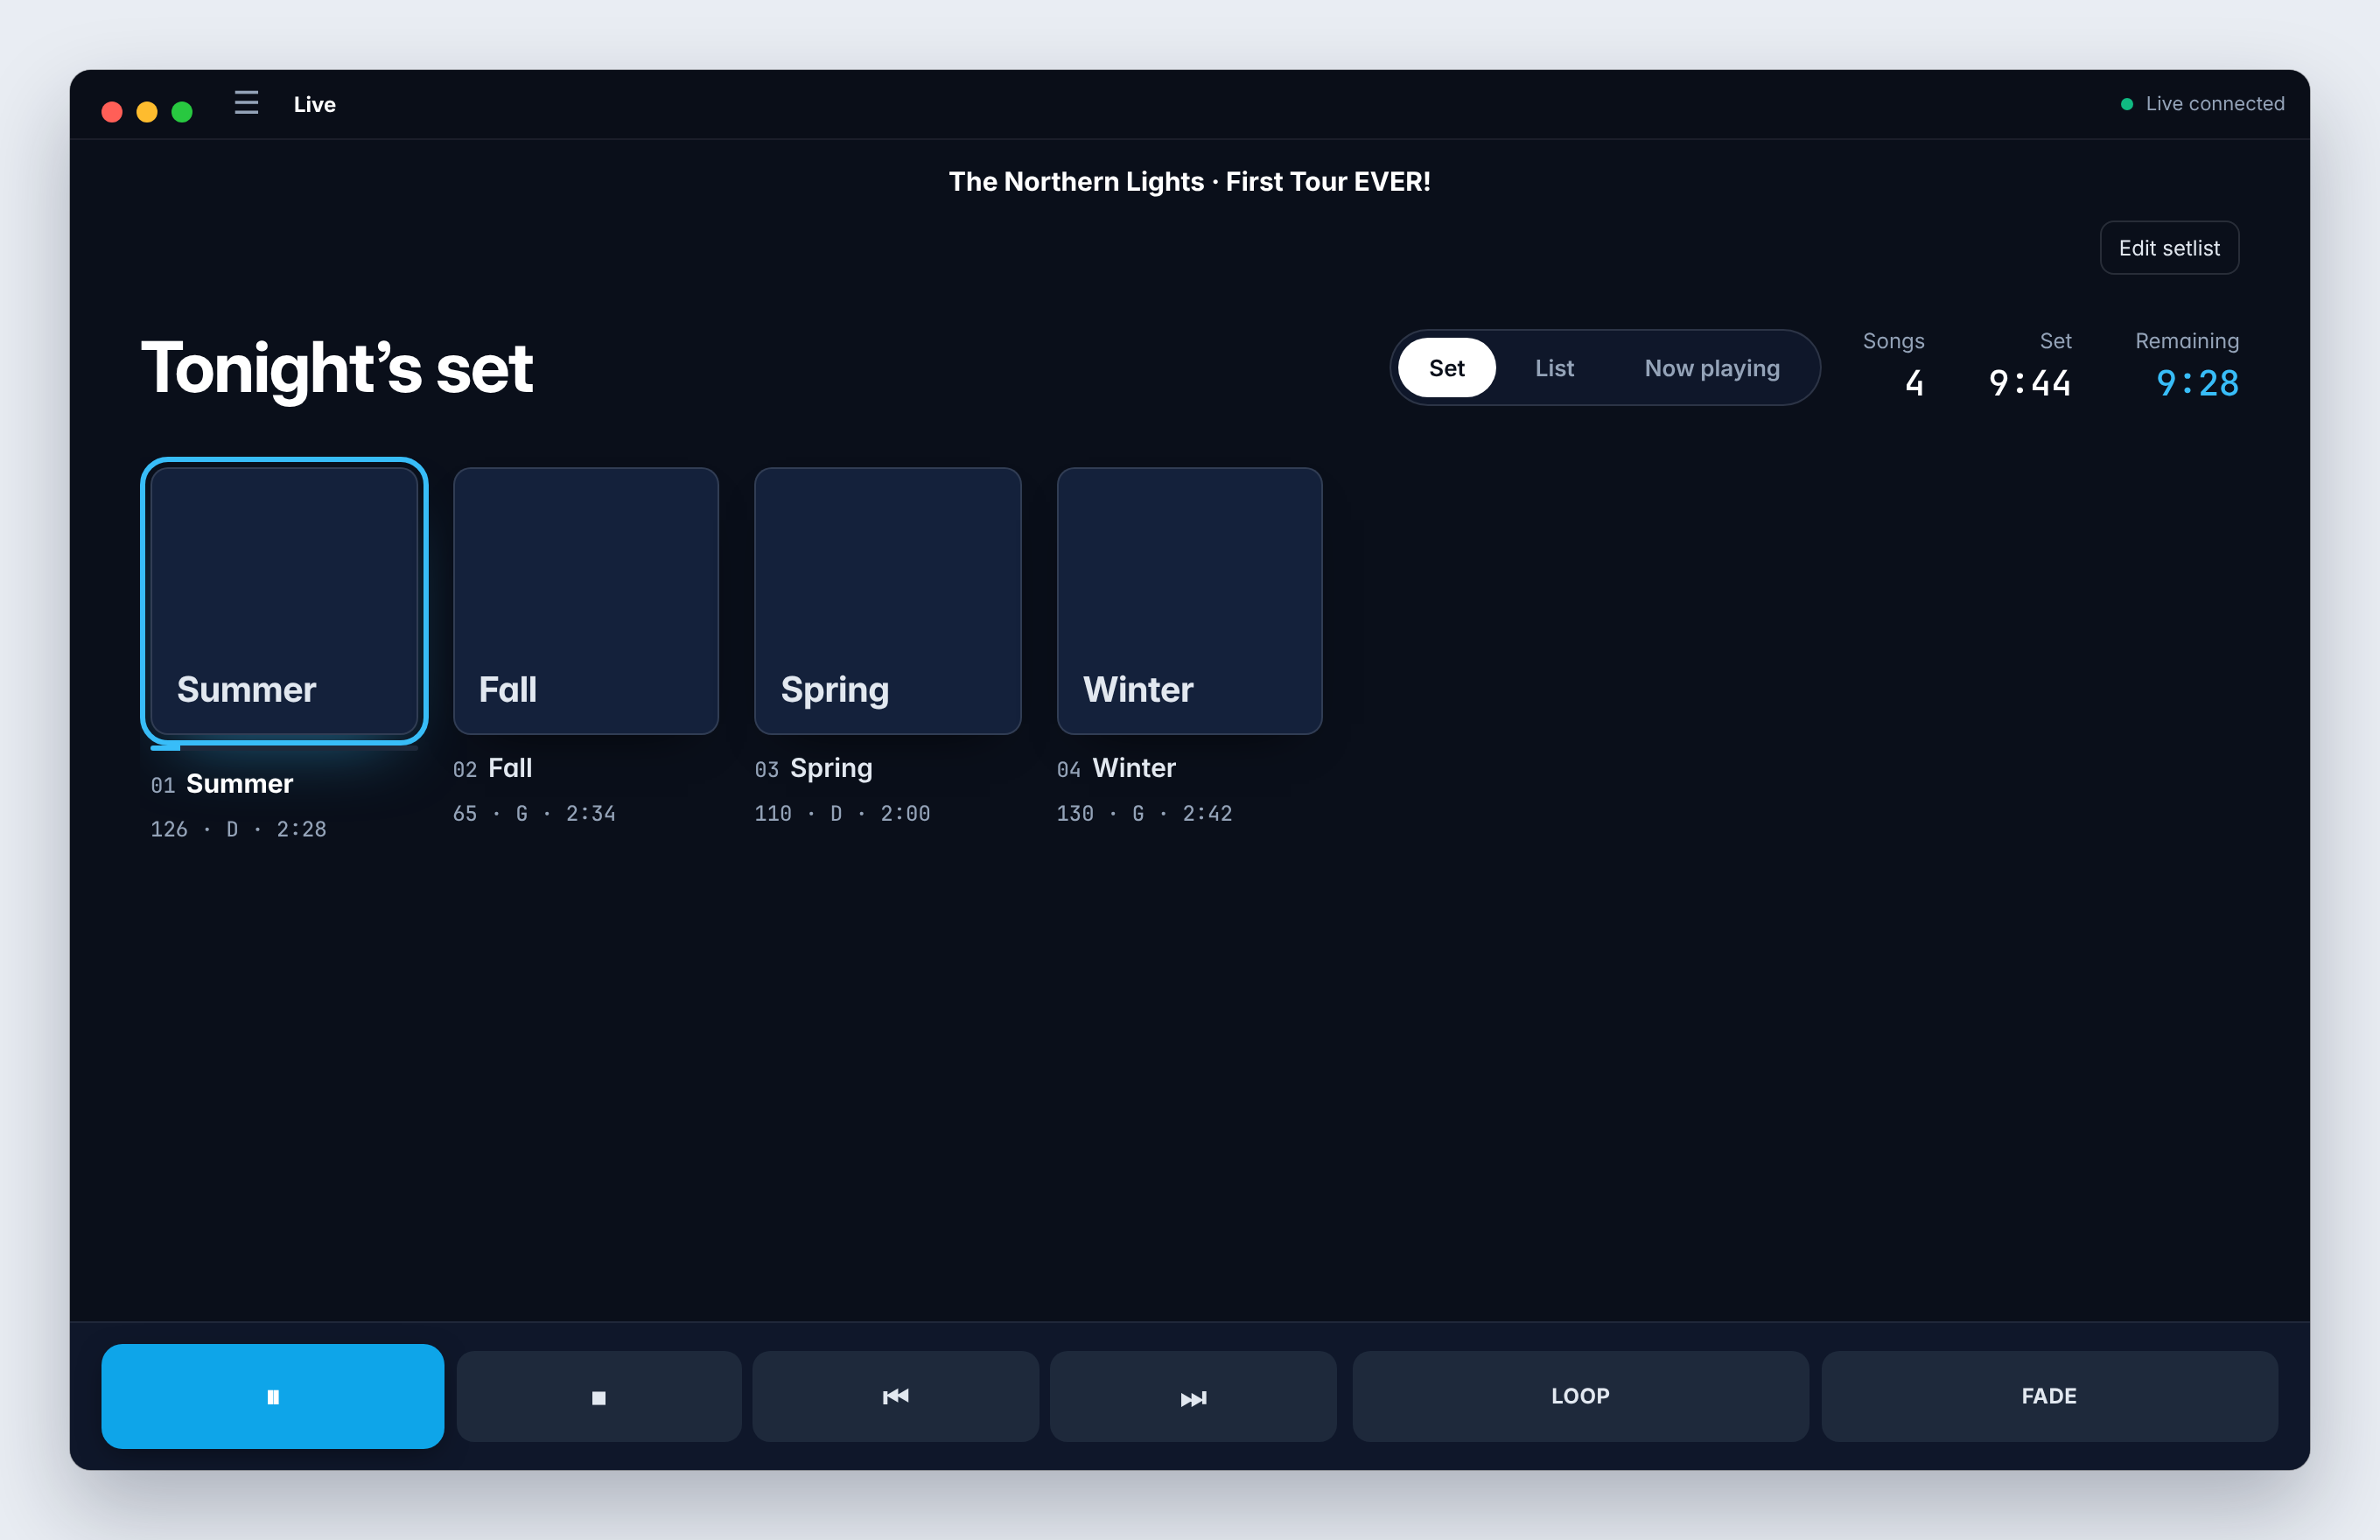
Cover Art. Tonight's set as album covers, with the moments between songs. Click a cover to cue that song.
Settings → Look changes the color theme, including a high-contrast Stage theme and a light Daylight theme for outdoor gigs.
Frequently asked questions
Why does Maestro say "Waiting for Live"?
Live hasn't loaded the Pliris Maestro script. In Live, open Settings → Link, Tempo & MIDI and choose Pliris Maestro in a Control Surface slot, then restart Live. If it's still waiting, open Settings → Script in Maestro and click Reinstall and restart Live.
Does Maestro need Accessibility permission?
For some things, yes. Playing, jumping, looping and fading go through Maestro's control script and work without it. Cutting, pasting, duplicating or deleting song sections, Save in Live, answering Live's "Save changes?" prompts, and telling which set you opened yourself in Live all need Accessibility. Turn it on in System Settings → Privacy & Security → Accessibility. Updating Maestro can switch it off again, so check there first if one of these is refused.
Why do some songs show a cloud icon?
They aren't downloaded to this Mac yet. Tick them in the Files desktop app and they'll download.
Can I use a MIDI controller and a phone at the same time?
Yes. The keyboard, a MIDI controller and Pliris Remote all control the same show, and you can use any of them at any moment.
Lyrics and Charts aren't following Maestro. What should I check?
Make sure every device is on the same network and has Local Network access turned on. Then check Settings → Network in Maestro: every app that's listening appears under Other devices. See What is Pliris Network? for the full checklist.
Do I need locators in my Live set to jump between sections?
No. Maestro knows where every section starts and jumps there in time, with or without locators.
What are Live cues?
An option under Settings → Show that makes your Cues track speak where the show is really going, including loops and jumps. See Cues that follow the show.
Where to go next
- What is Pliris Network?: how the other apps follow Maestro.
- The Files desktop app: download songs and build the sets Maestro opens.
- Building and sharing a setlist: build setlists on the website.
- Pliris Remote and Pliris Charts: the iPhone and iPad apps that work with Maestro.
Stuck at any point, click the support bubble in the bottom-right corner of any page, or email support@fromstudiotostage.com. You'll hear back within 24 hours.