The Files App
Files is cloud storage built into Pliris at files.fromstudiotostage.com. Upload stems, bulk import songs or a Live Set, request files with an invite link, and share songs for timecoded comments. Everything lands in your Inbox until you send it to a song with Add to arrangement.
Files is cloud storage built into Pliris. It's where everything comes in: loose stems, folders of songs, an Ableton Live Set, a cloud storage link, or files someone else sends you. Everything lands in your Inbox first, and nothing appears in your bands until you send it to a song.
Watch the lesson: this article goes with The Files app: a walkthrough, part of the Using Pliris to Program, Practice, and Perform course.
Go to files.fromstudiotostage.com. If you're signed in to any Pliris app, you're already signed in to Files.
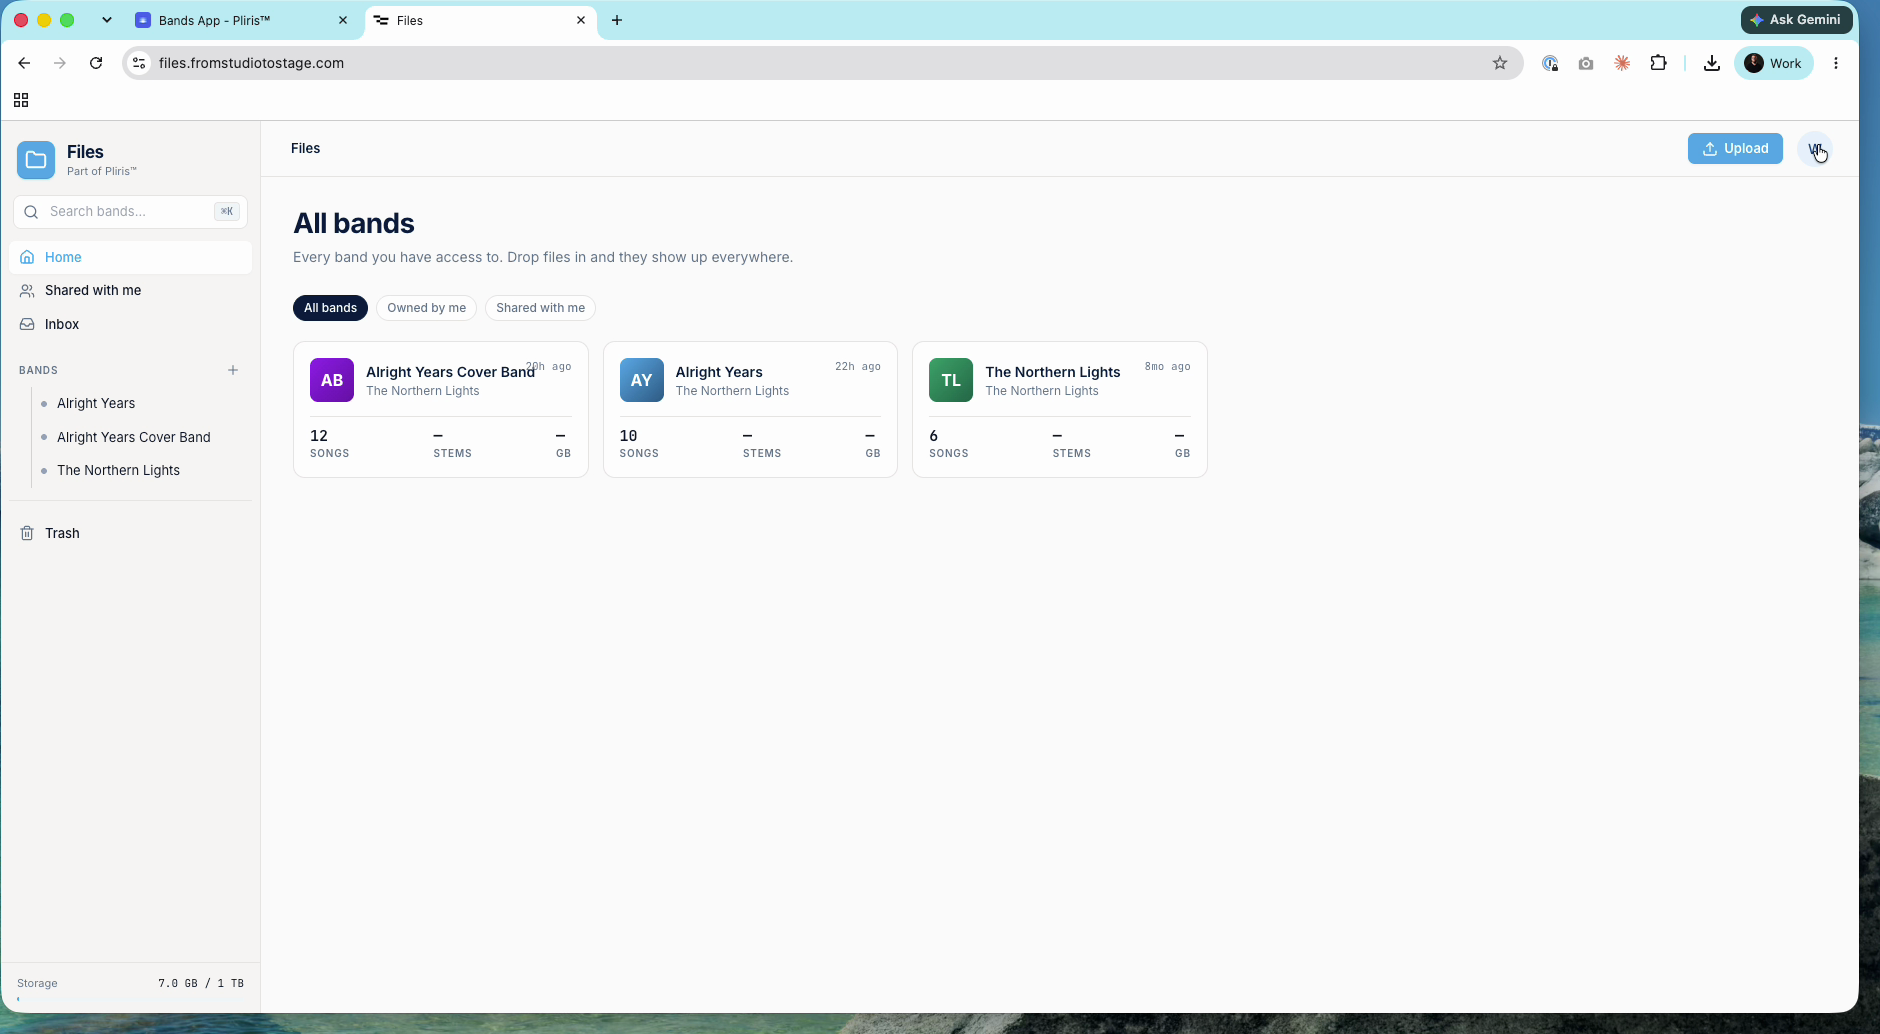
Storage
- Free: one band, up to 15 songs and about 10 GB of storage.
- All-Access: 1 TB of storage, unlimited bands and members, and 1,000 credits a month.
Your storage used shows at the bottom of the sidebar.
Upload files
Click Upload (top right). You get two choices:
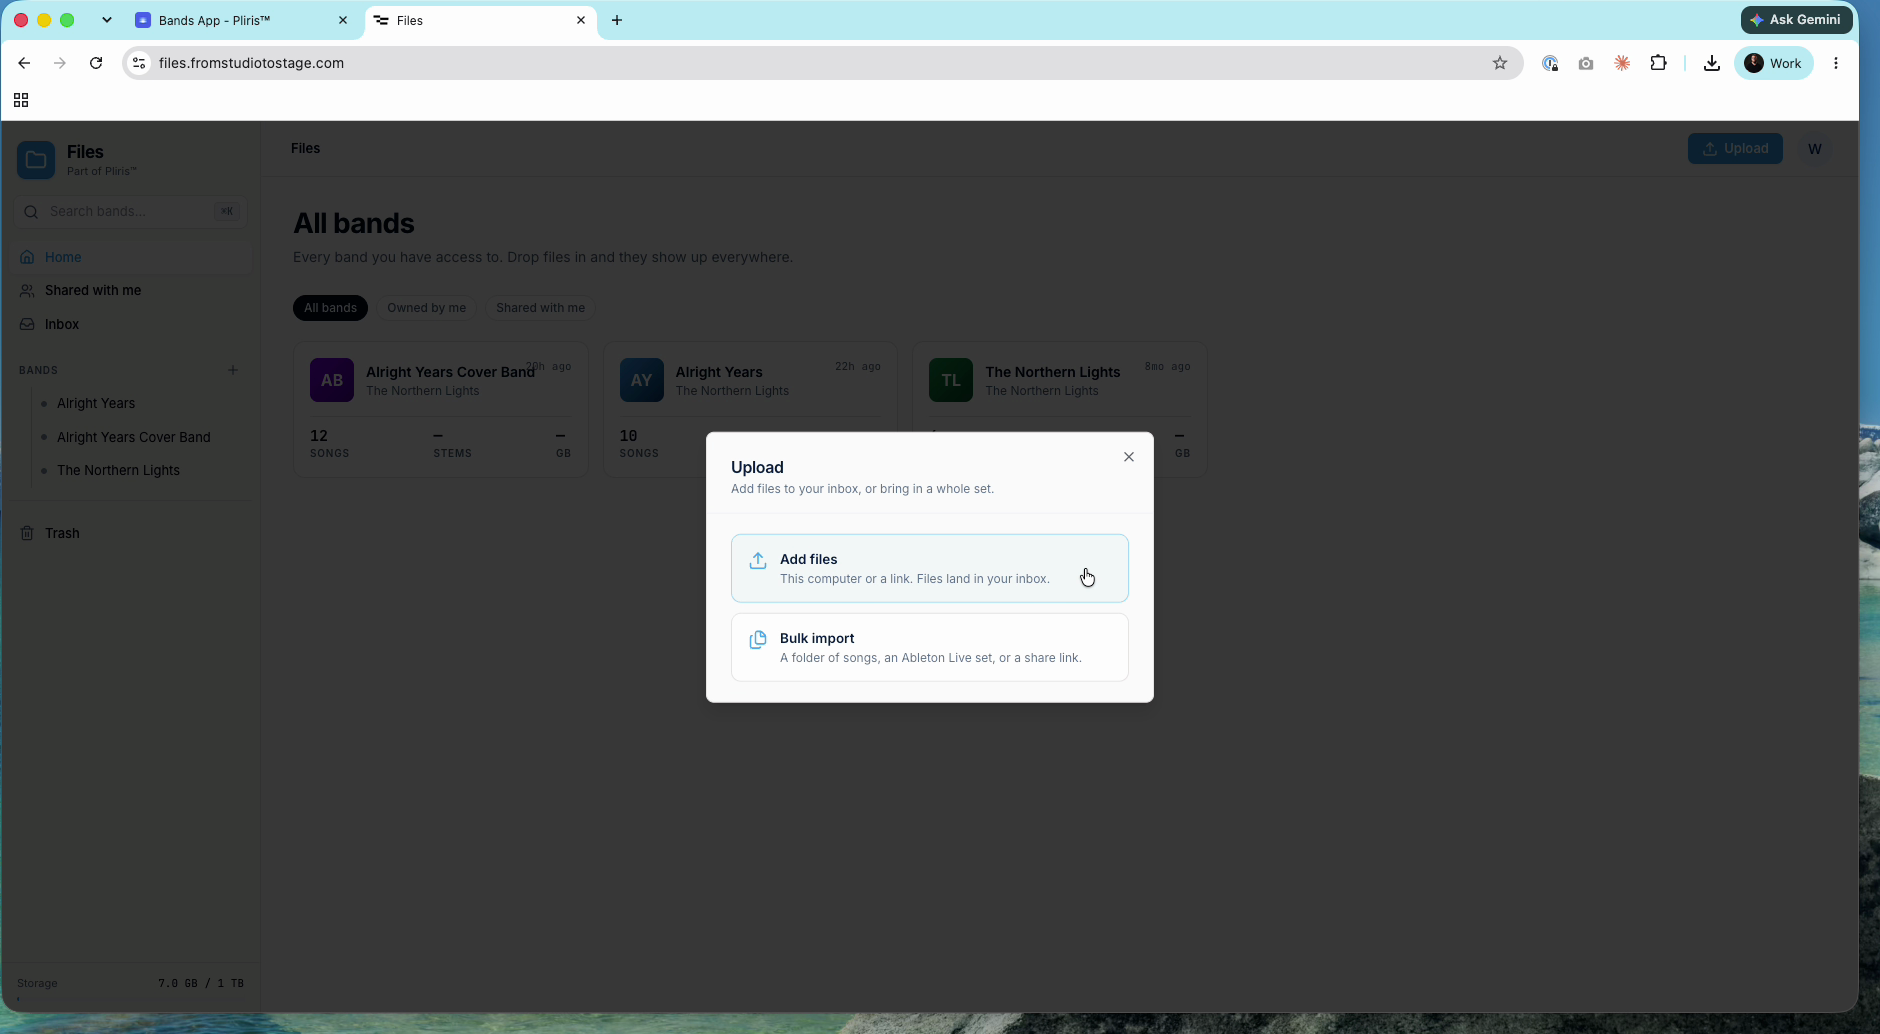
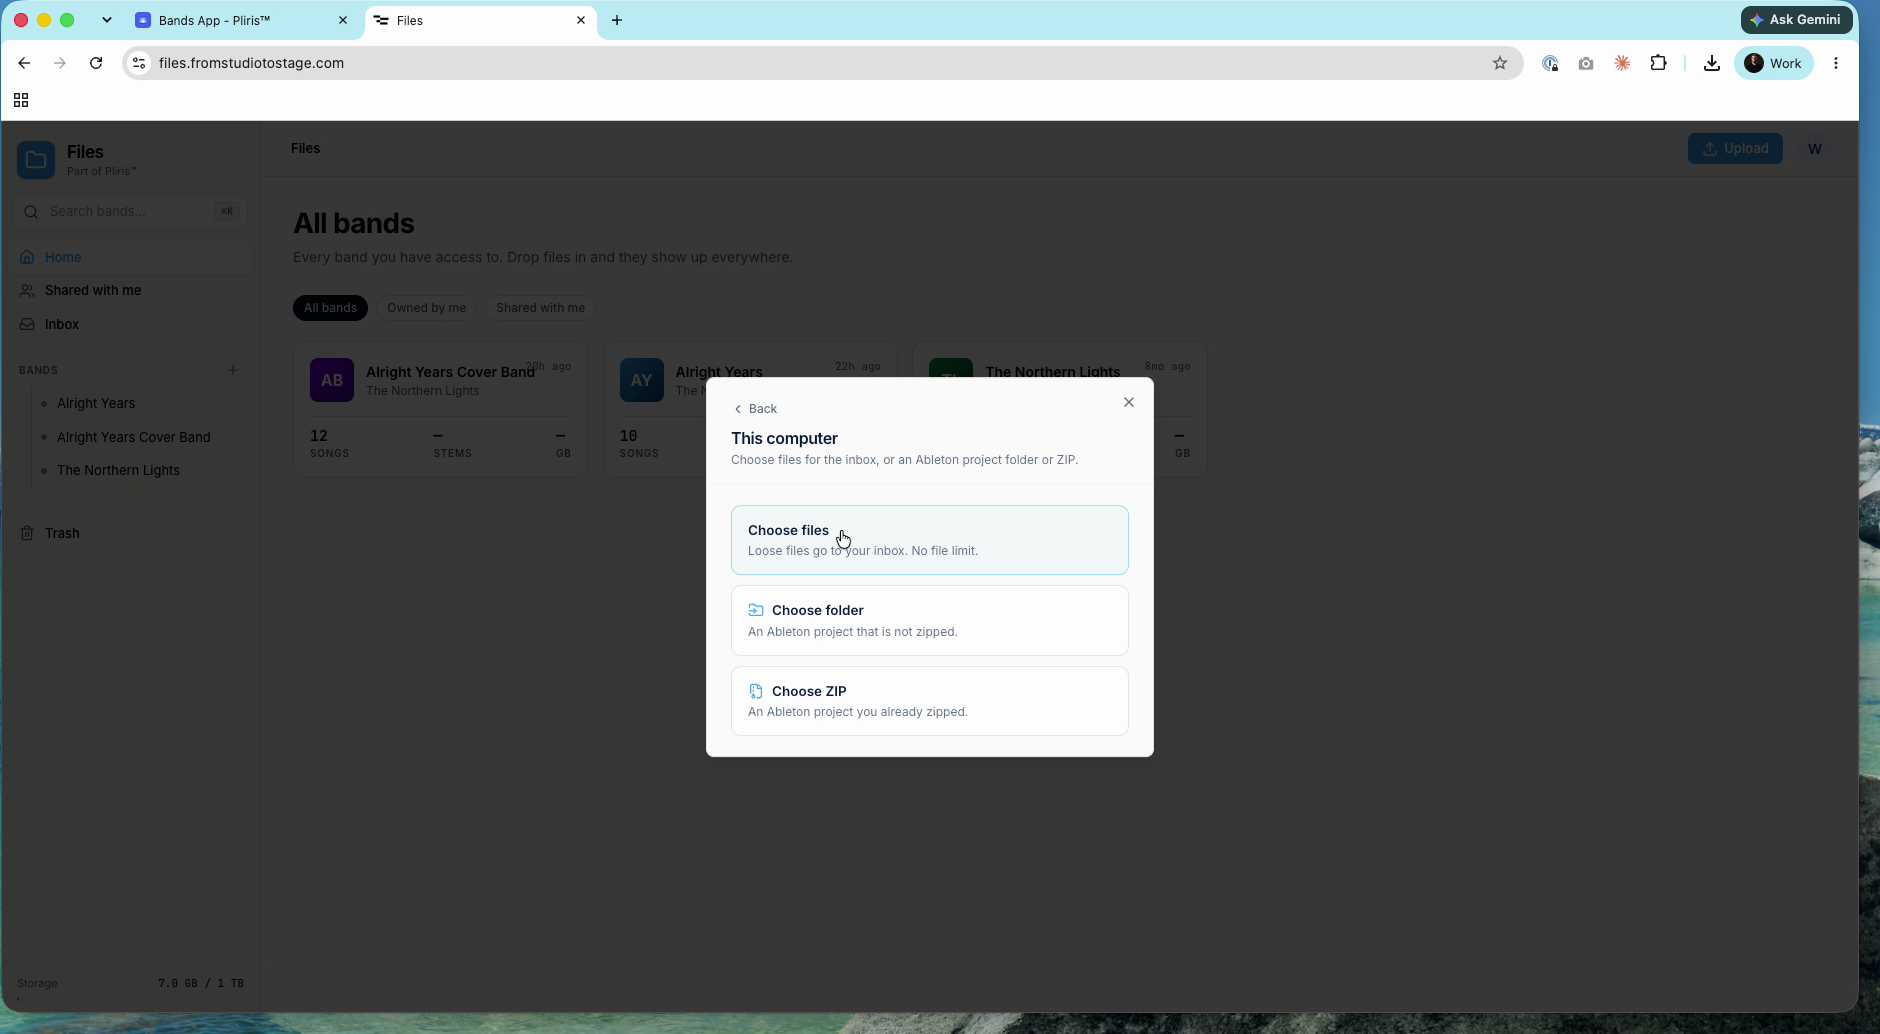
- Add files: from This computer or Paste a link. From your computer you can Choose files (loose files, no file limit), Choose folder (an Ableton project that isn't zipped) or Choose ZIP (a zipped Ableton project).
- Bulk import: a Folder of songs (each folder becomes a song), an Ableton Live set (each locator becomes a song) or Paste a link (up to 4 GB; the files land in your inbox, and a link doesn't create songs).
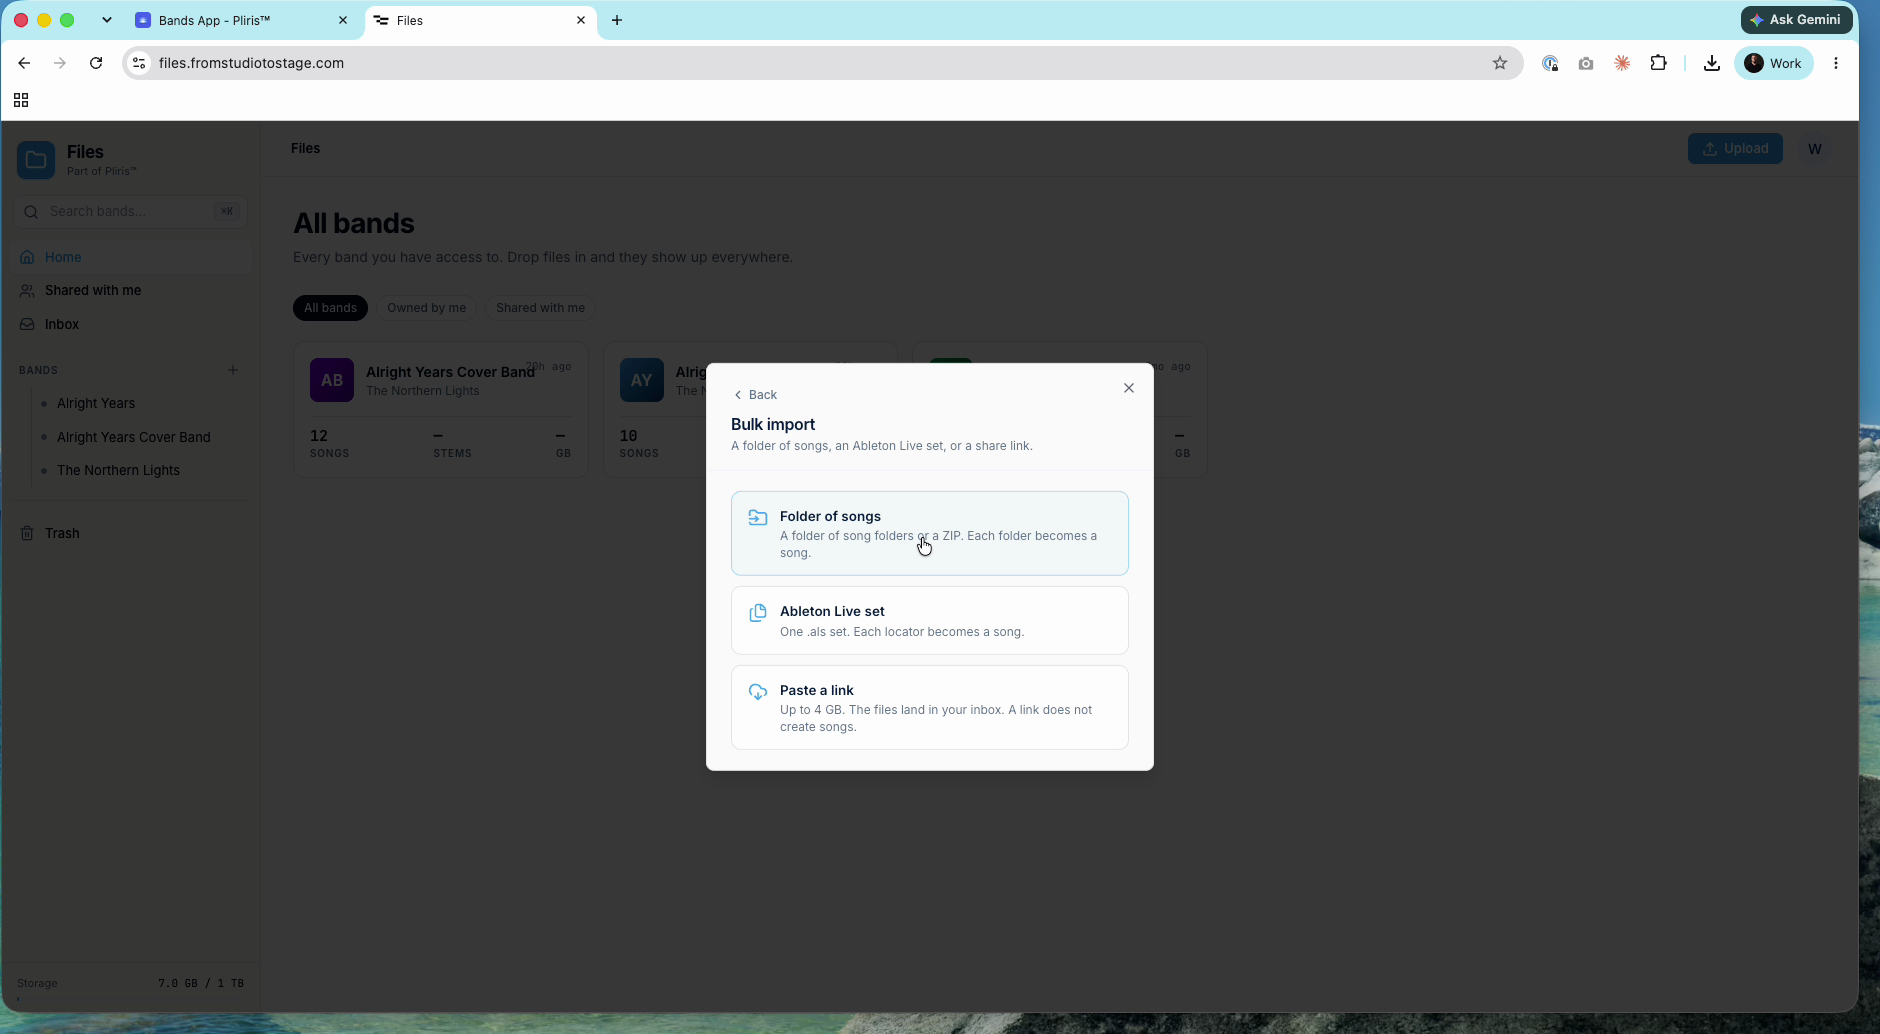
For link imports, see Importing Stems from Cloud Storage. For whole catalogs, see Bulk Uploading a Folder of Songs and Importing a Whole Ableton Live Set.
Your Inbox and drops
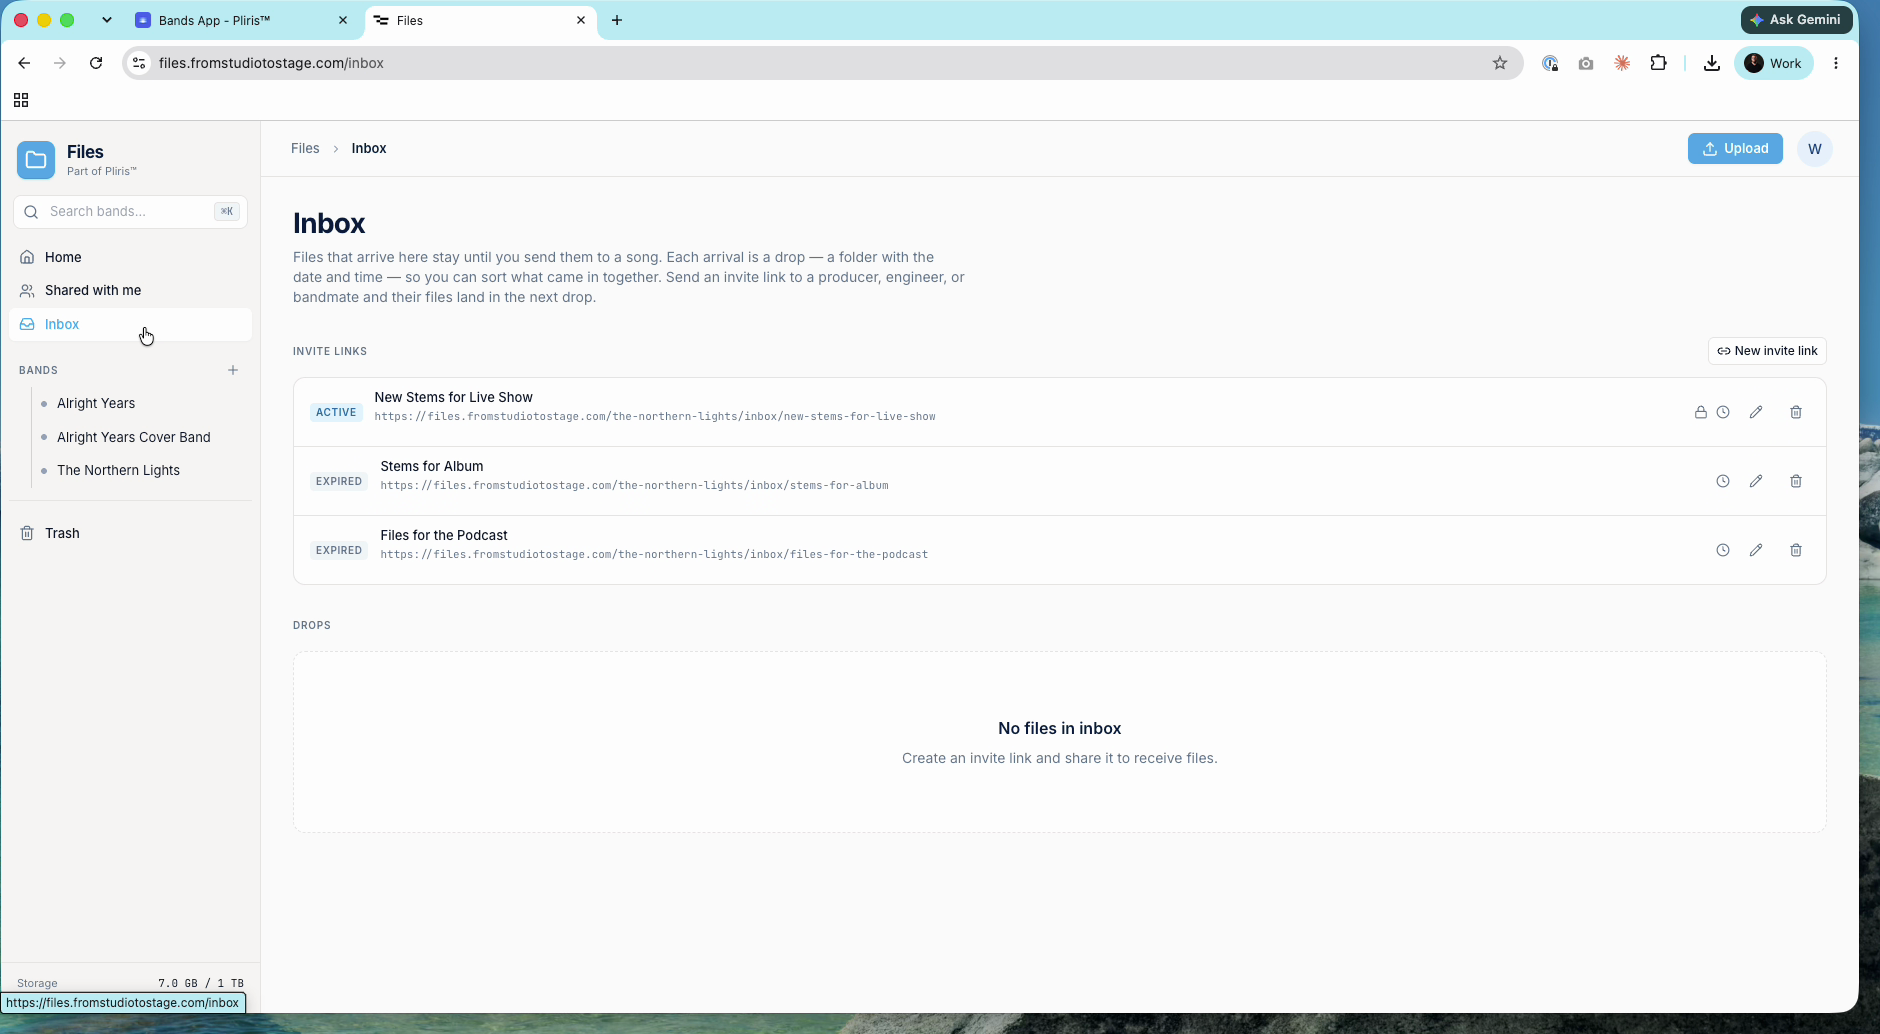
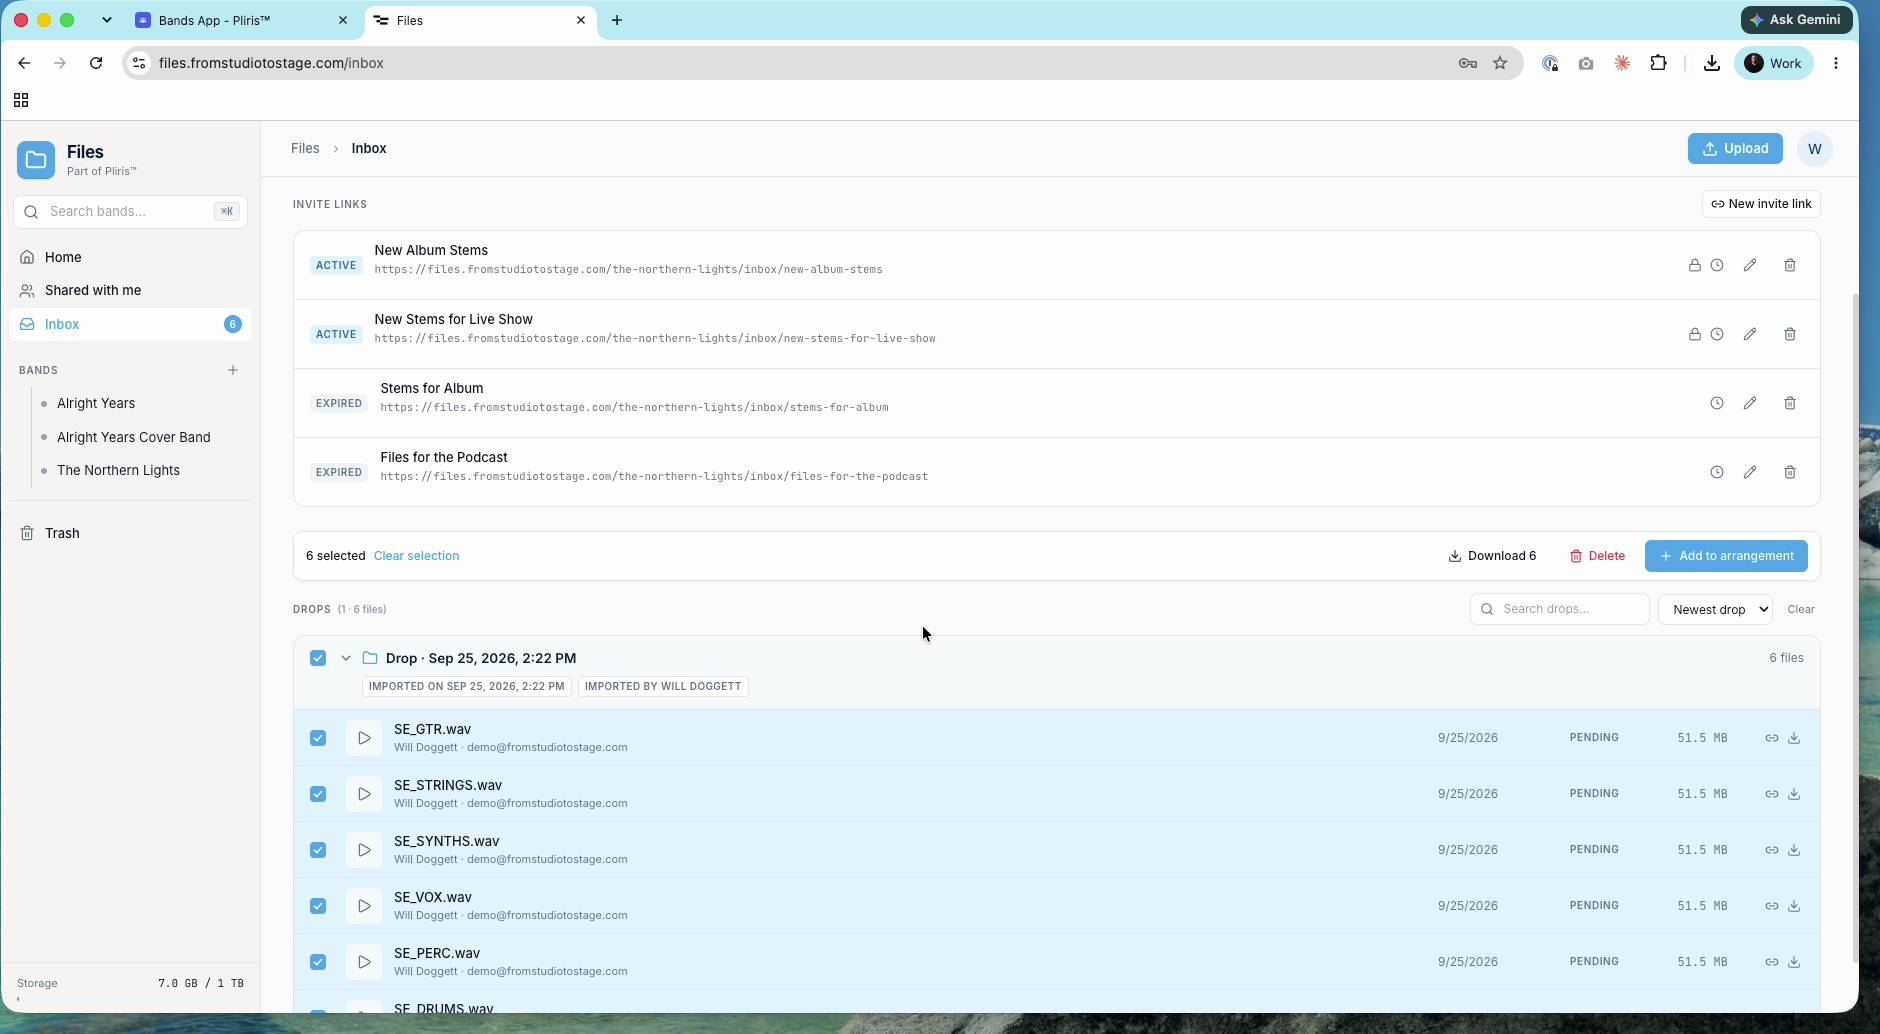
Every upload, import and request lands in Inbox as a drop: a group of files labelled with the date and time and who imported it. Files in the Inbox don't appear in Bands or the other Pliris apps until you send them to a song.
Request files from someone
- In Inbox, click New invite link.
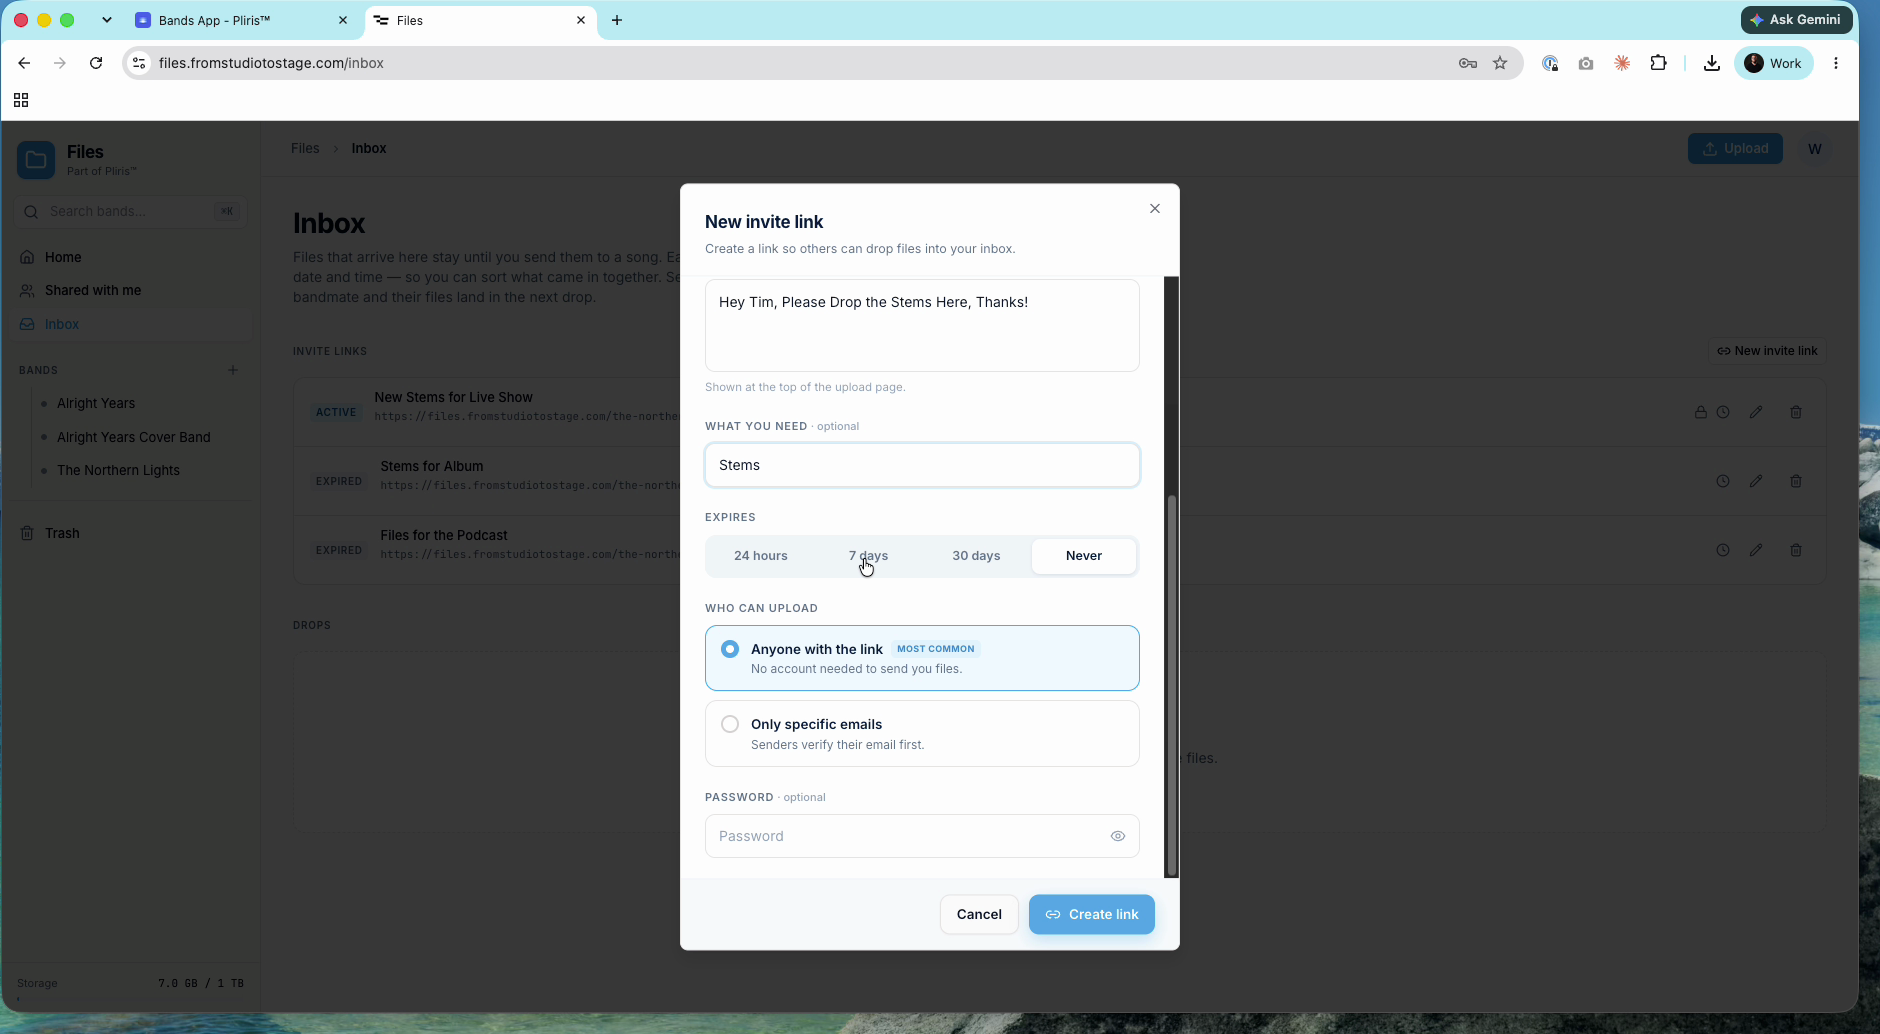
- Add a name and a message (it's shown at the top of the upload page), and say what you need, for example Stems.
- Choose when it expires: 24 hours, 7 days, 30 days or Never.
- Choose who can upload: Anyone with the link (no account needed) or Only specific emails (senders verify their email first).
- Add a password if you want one, click Create link, and send it.
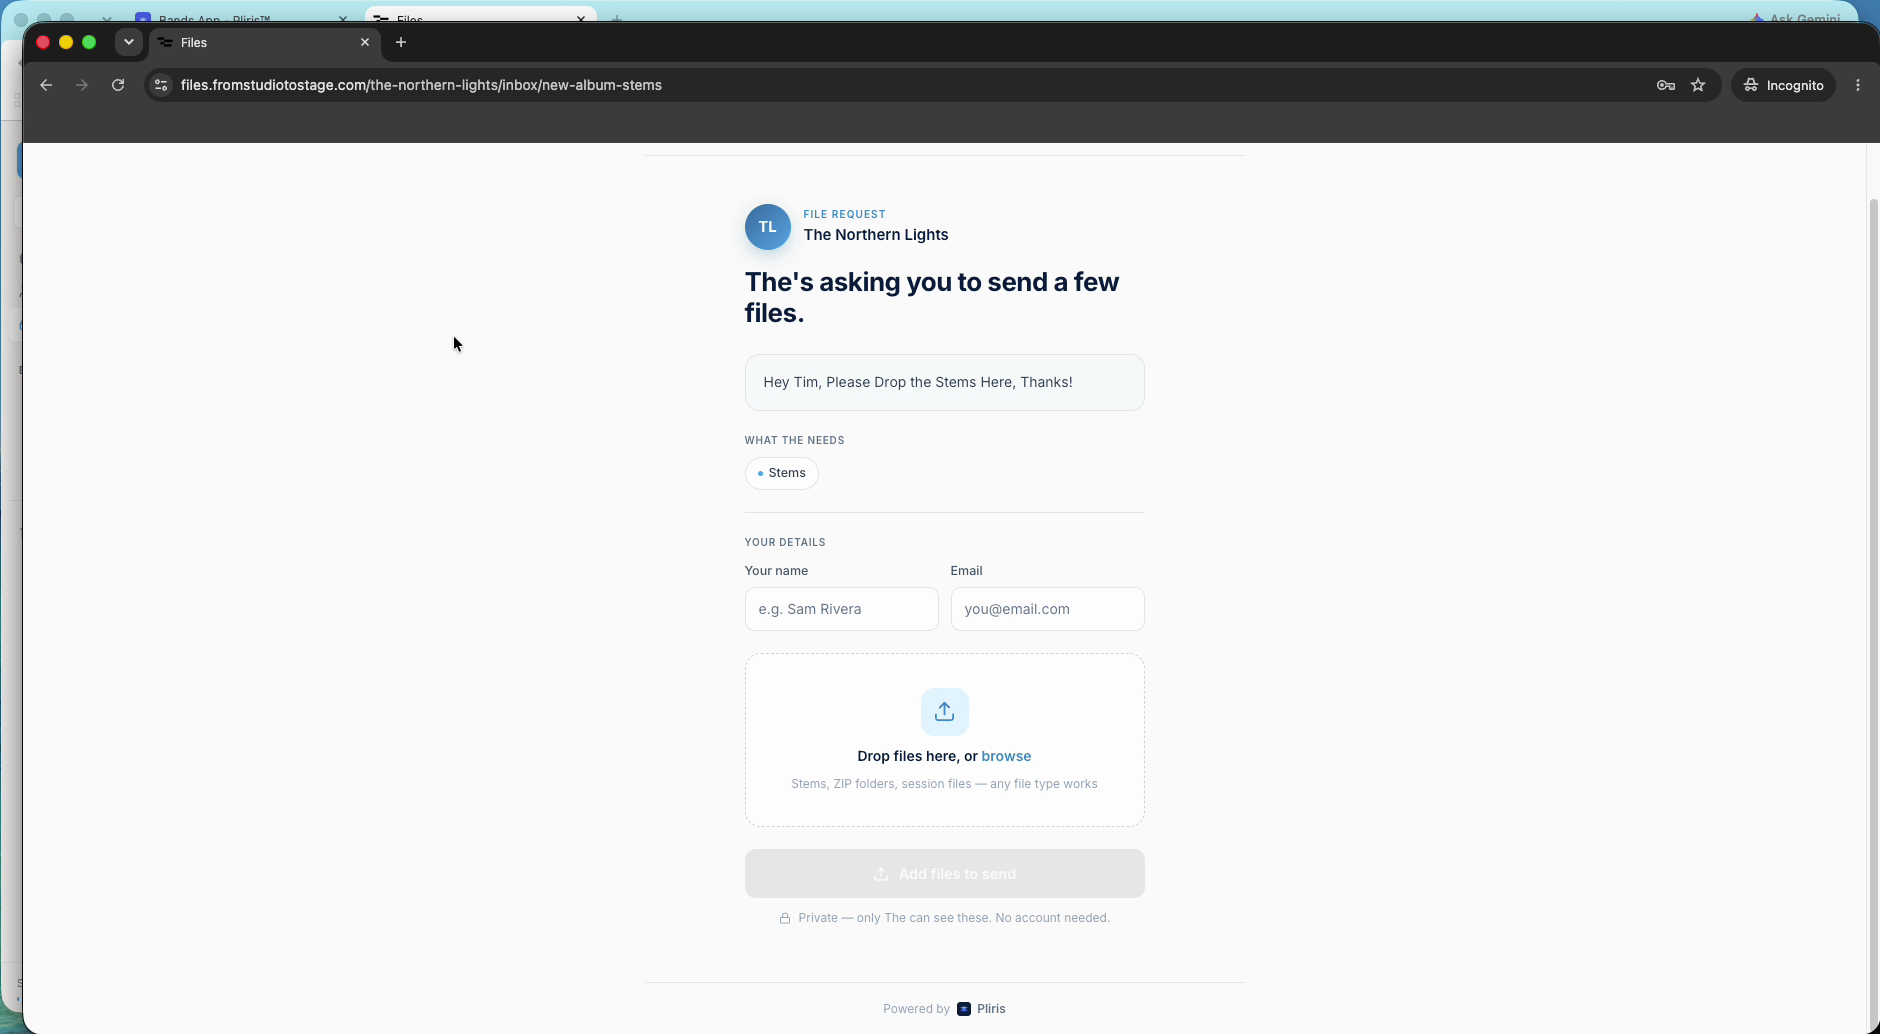
The other person opens the link, enters the password if there is one, adds their name and email, and drops their files. The upload uses their internet connection, and the files land in your Inbox.
Browse and share your songs
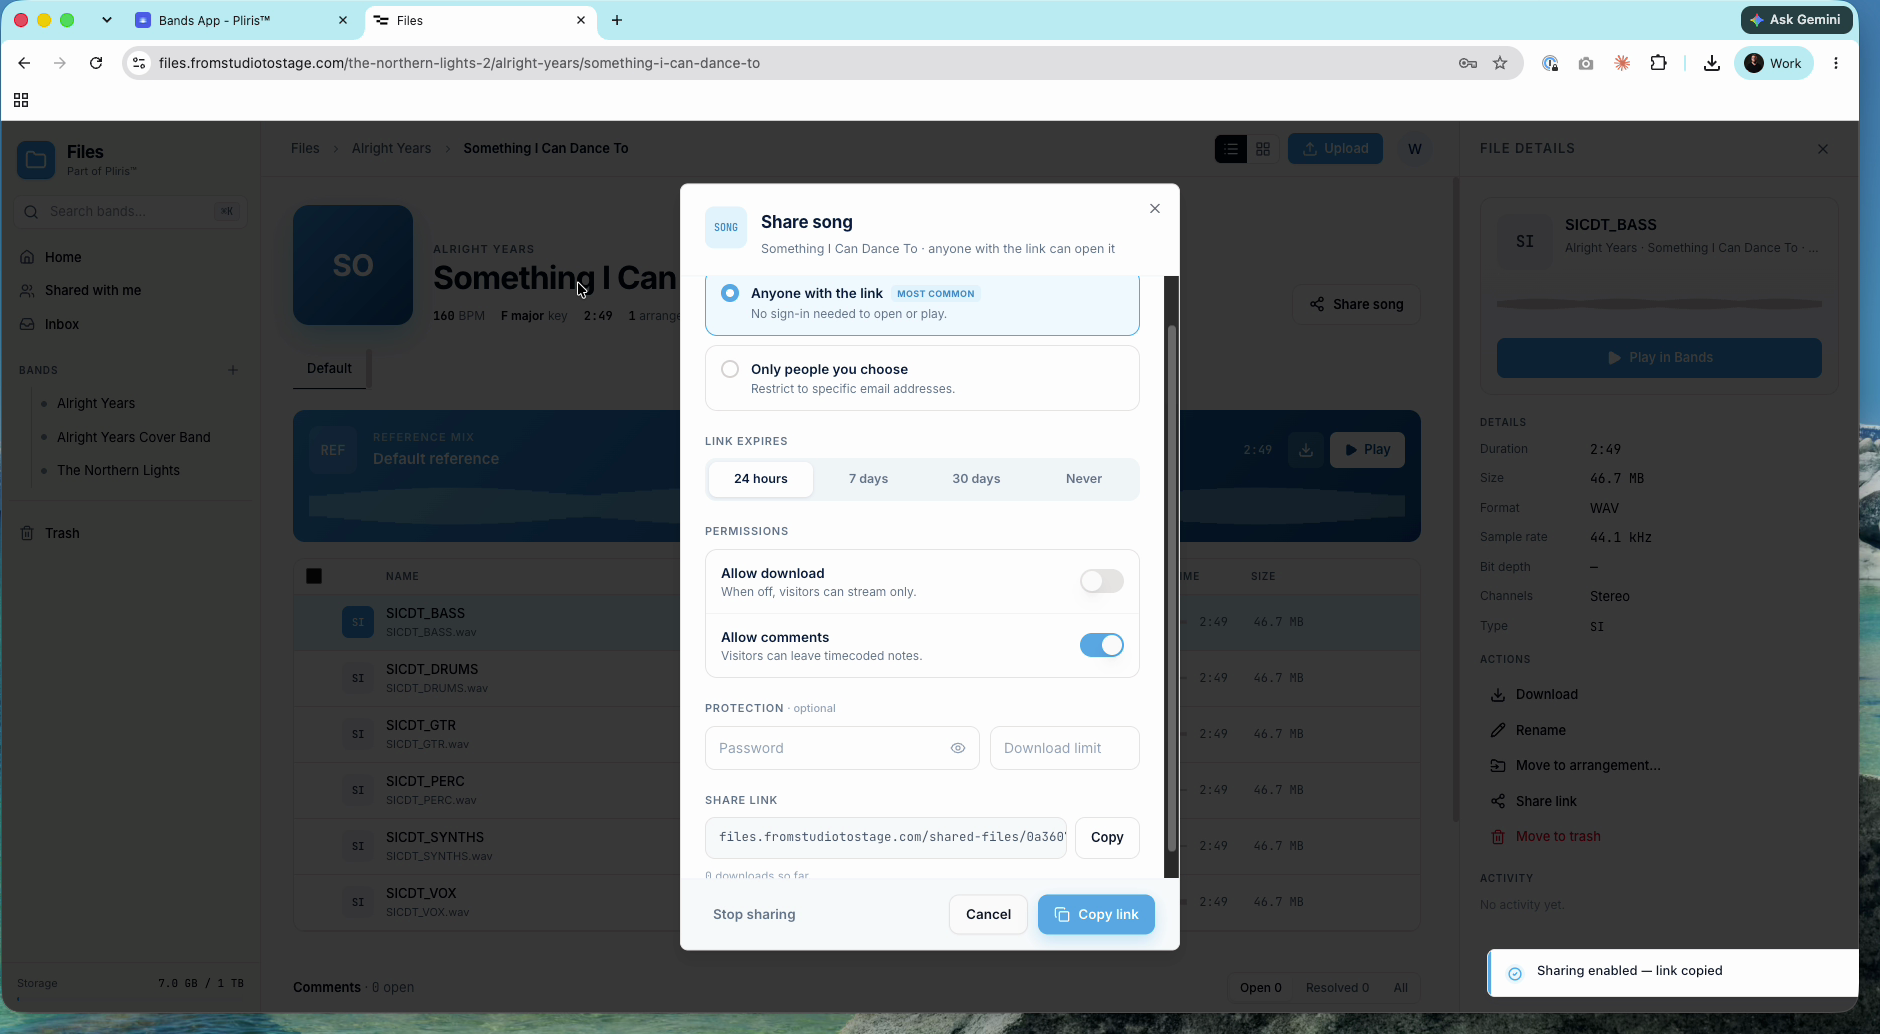
Click a band in the sidebar, then a song, to see its reference mix and stems. Click a file to share only that file, or click Share song to share the whole song.
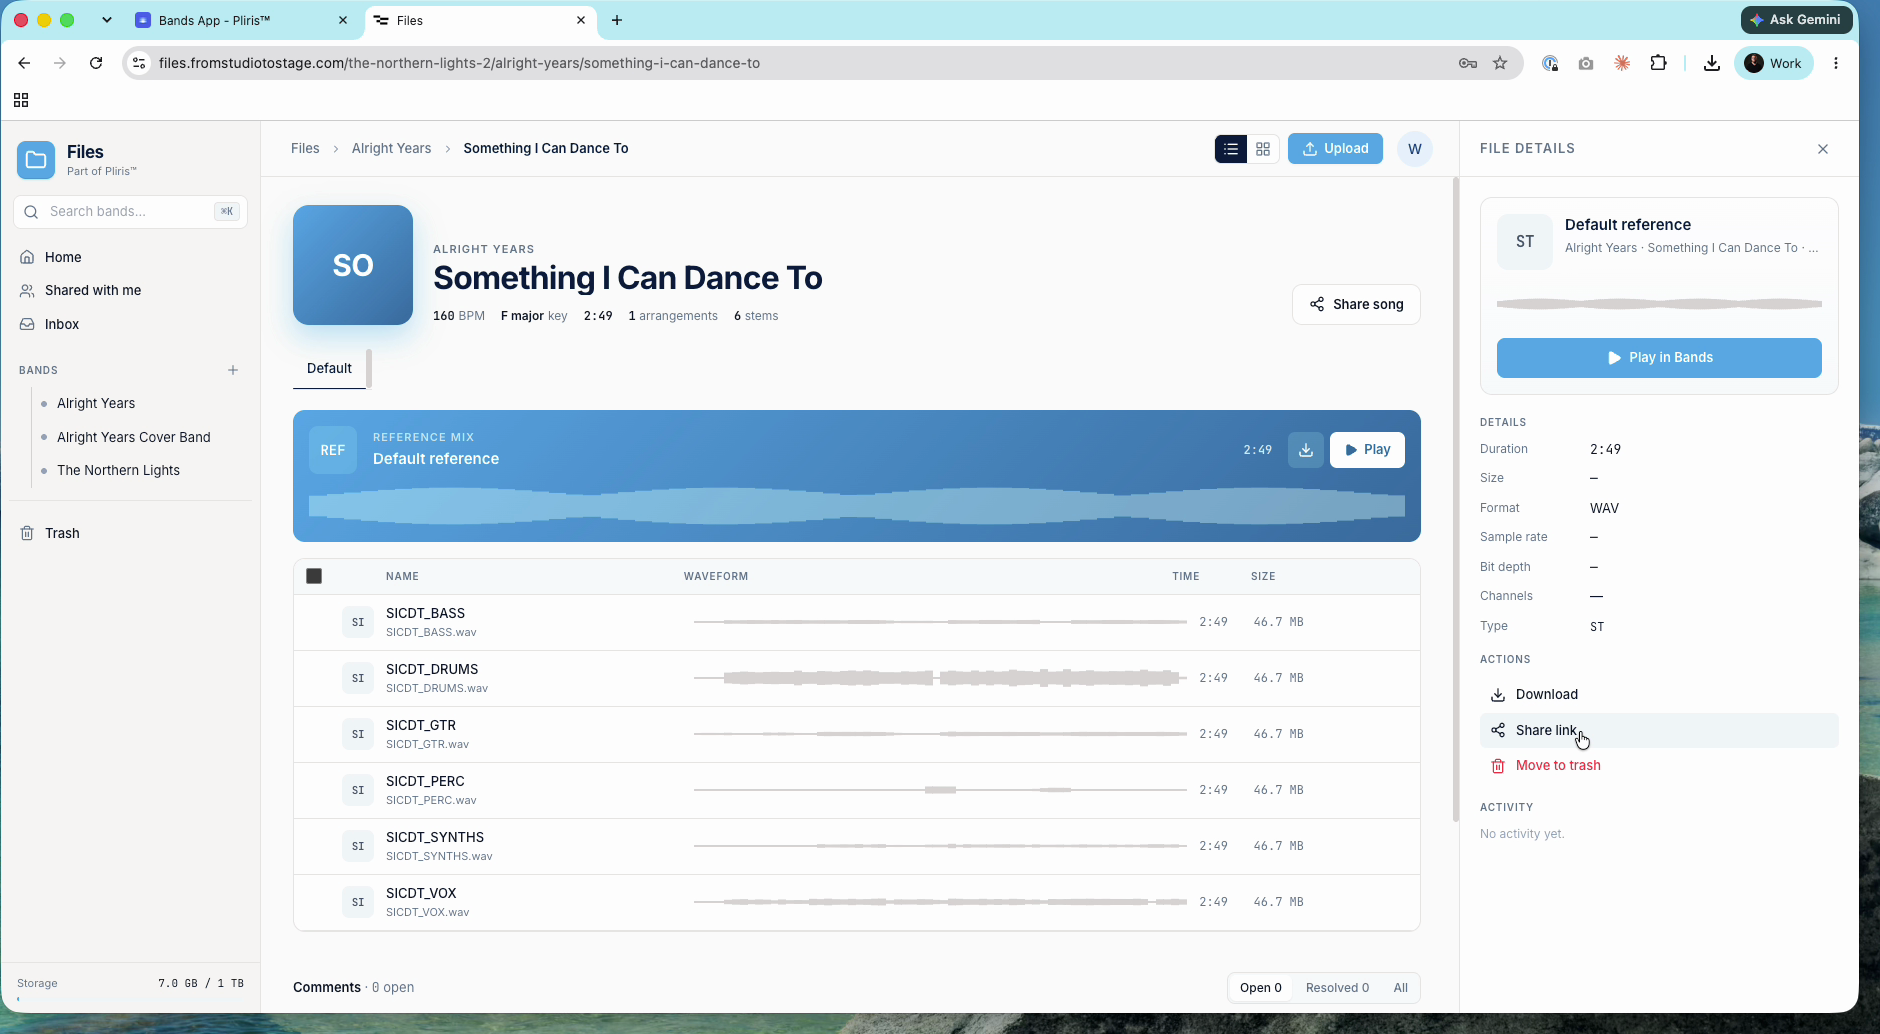
In Share song, choose:
- Anyone with the link or Only people you choose
- When the link expires
- Allow download (when it's off, visitors can stream only) and Allow comments (visitors can leave timecoded notes)
- An optional password and download limit
Then click Copy link.
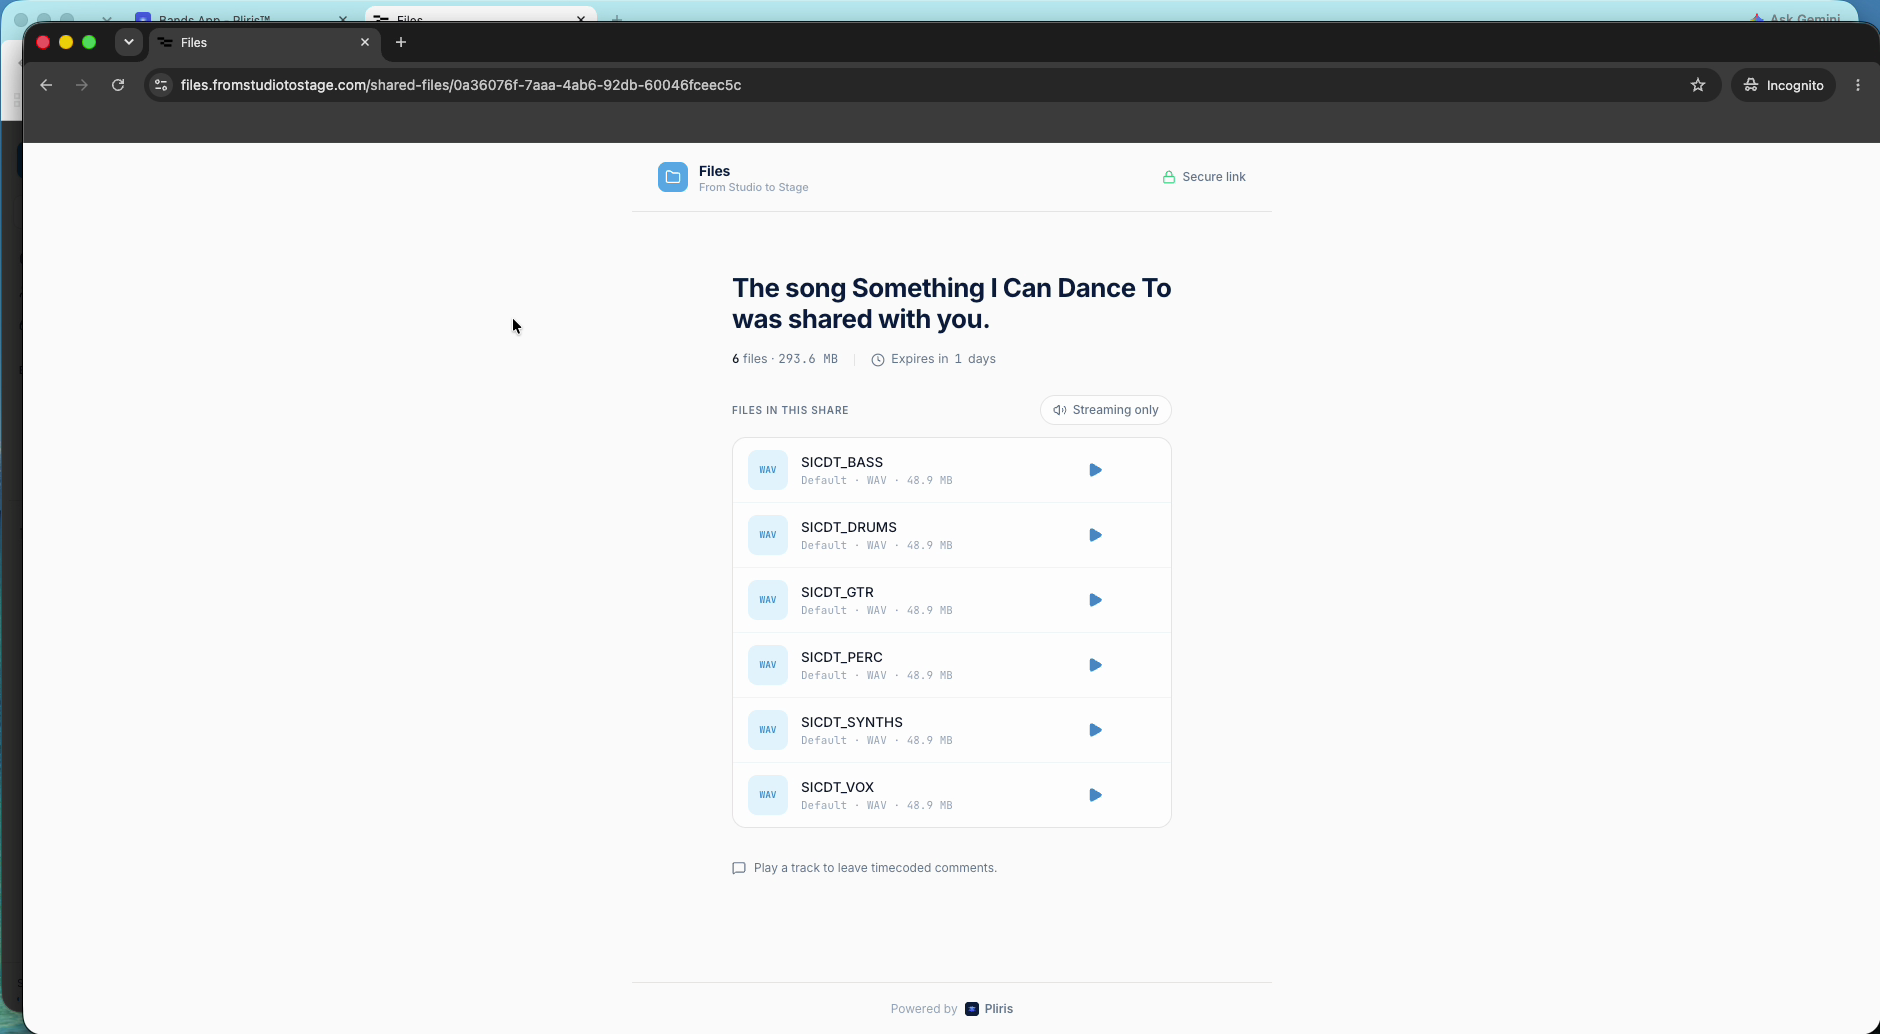
People who open the link can play each file and leave comments tied to a timestamp. Comments land on the song in Files, where you can mark them resolved.
Send a drop to a song
- In Inbox, tick the drop to select all of its files, then click Add to arrangement.
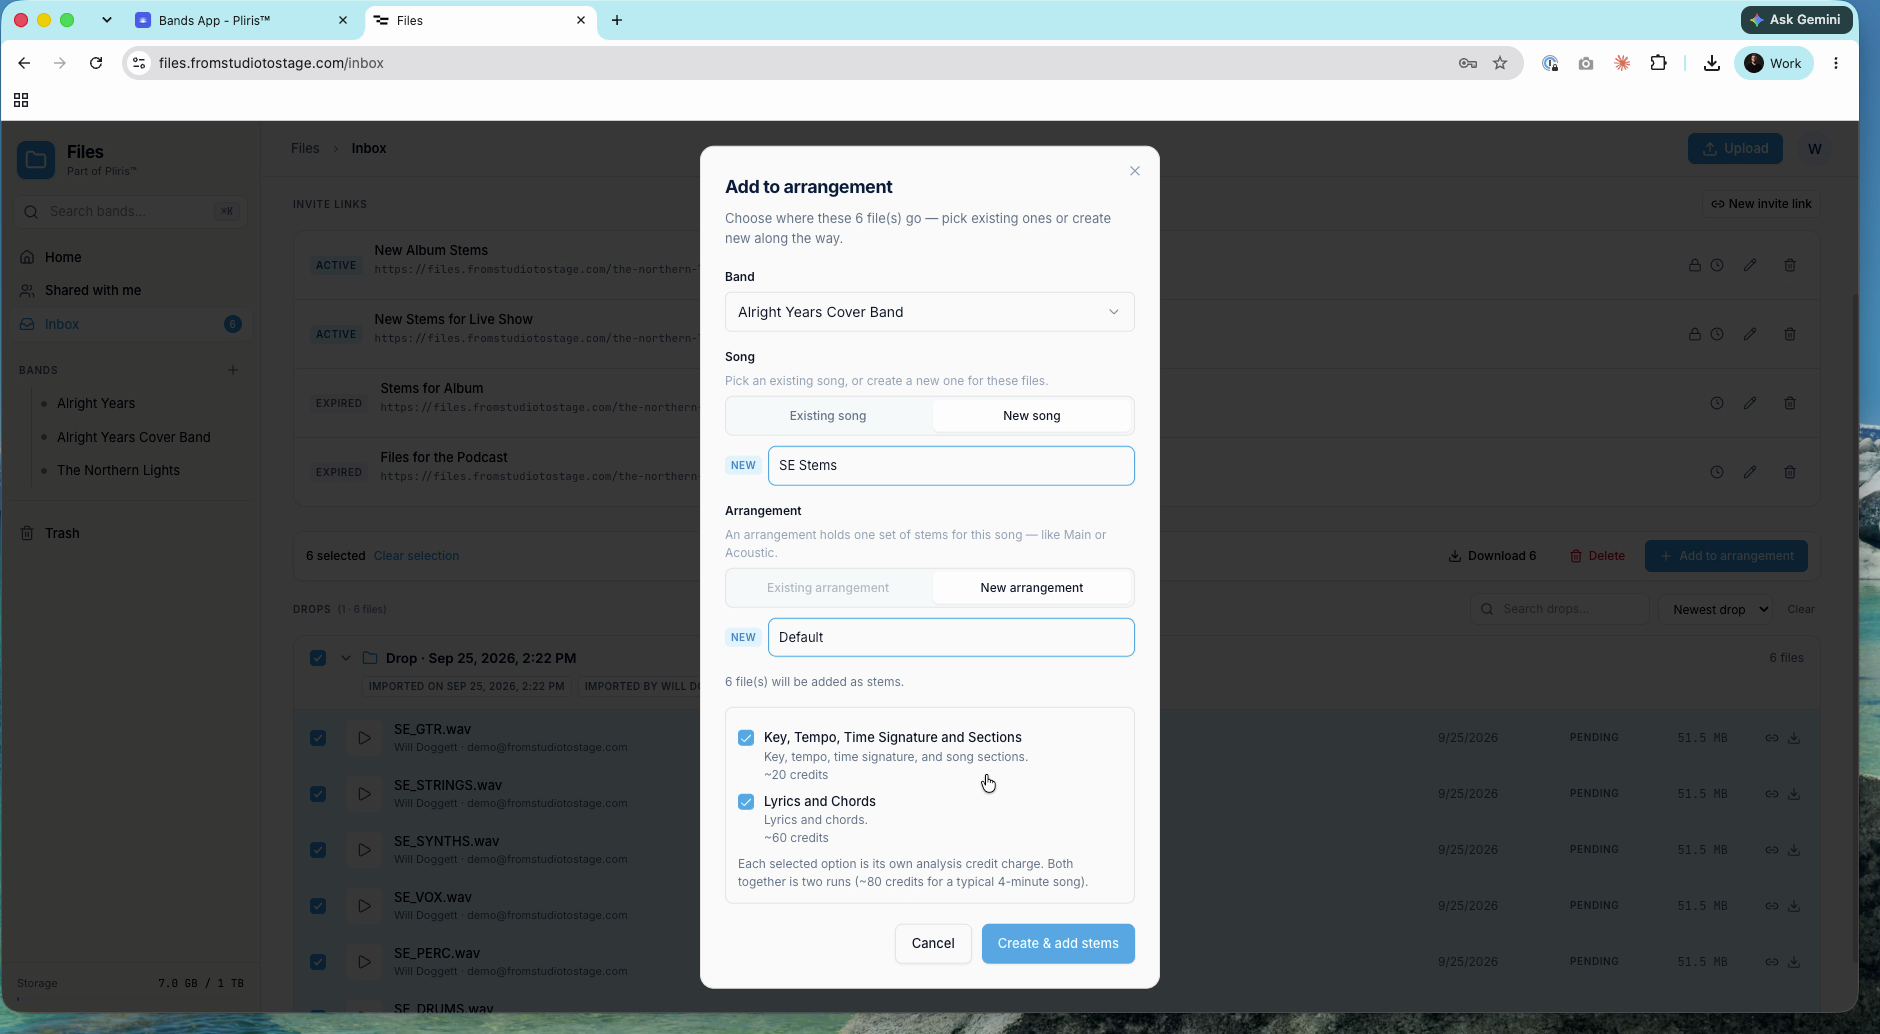
- Choose the Band, then Existing song or New song, then Existing arrangement or New arrangement (for example Default).
- Tick the analysis you want. Each option is its own credit charge: Key, Tempo, Time Signature and Sections (about 20 credits) and Lyrics and Chords (about 60 credits) for a typical 4-minute song. See Credits Explained.
- Click Create & add stems.
The stems move on the server. Nothing is downloaded to your computer or uploaded again. The song appears in that band in the Bands app, and analysis runs.
Frequently asked questions
Where do I find the Pliris Files app?
Go to files.fromstudiotostage.com. If you're signed in to any Pliris app, you're already signed in.
Why aren't my uploaded files showing up in my band?
Everything you upload lands in your Inbox first. Select the drop and click Add to arrangement to send it to a song.
How do I get stems from a bandmate or producer?
Create an invite link in your Inbox and send it. They upload with their own internet connection, and the files land in your Inbox. No account is needed if you choose Anyone with the link.
Can people comment on my songs without a Pliris account?
Yes. Share the song with Allow comments on. Anyone with the link can play the files and leave timecoded comments.
How much storage do I get in Files?
Free accounts get about 10 GB with one band and up to 15 songs. All-Access includes 1 TB.